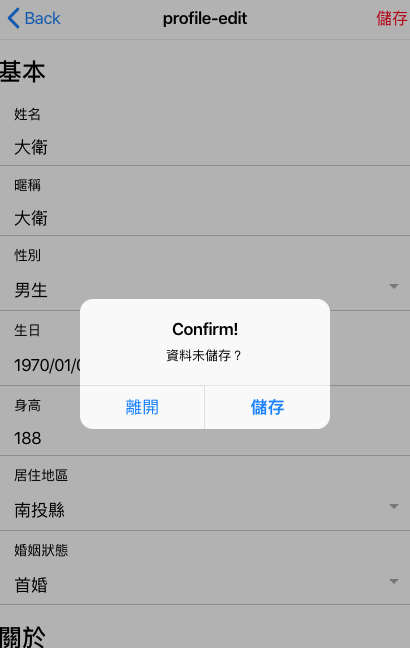
在 ionic 4 中只要加上 就可以很方便的讓我們加上返回鈕,但有的時候我們需要再返回前做一些檢查,例如說頁面上有一些資料變更了,但是使用者還沒有儲存,這時候如果提示一下,體驗一定比較好!
直接看看如何實作,假設我們的頁面叫做 profile,點擊 back 的時候會跳 alert 提示要不要儲存,profile.page.ts 如下
import {Component, OnInit, ViewChild} from '@angular/core';
import {Router, NavigationExtras} from '@angular/router';
import {AlertController, IonBackButtonDelegate, NavController} from '@ionic/angular';

@Component({
    selector: 'app-profile',
    templateUrl: './profile.page.html',
    styleUrls: ['./profile.page.scss'],
})
export class Profile implements OnInit {
    saveButton: any;

    @ViewChild(IonBackButtonDelegate, {static: false}) backButtonDelegate: IonBackButtonDelegate;

    constructor(
        private router: Router,
        private navCtrl: NavController,
        private alertController: AlertController,
    ) {
        // 紀錄資料是否有變更
        this.saveButton = false;
    }

    ngOnInit() {
    }

    ionViewDidEnter() {
        // 取得 back button 的 click event
        this.backButtonDelegate.onClick = () => {
            console.log('leave');
            if (this.saveButton === true) {
                this.presentDeleteConfirm();
            } else {
                this.navCtrl.pop();
            }
        };
    }

    async presentDeleteConfirm() {
        const alert = await this.alertController.create({
            header: 'Confirm!',
            message: '資料未儲存?',
            buttons: [
                {
                    text: '離開',
                    role: 'cancel',
                    cssClass: 'secondary',
                    handler: (blah) => {
                        console.log('Confirm Cancel: blah');
                        this.navCtrl.pop();
                    }
                }, {
                    text: '儲存',
                    handler: () => {

                    }
                }
            ]
        });

        await alert.present();
    }
}
html 記得加上按鈕
<ion-header>
    <ion-toolbar>
        <ion-title>quiz-edit</ion-title>
        <ion-buttons slot="start">
            <ion-back-button></ion-back-button>
        </ion-buttons>
        <ion-buttons [ngStyle]="{'color': saveButtonStyle == true ? 'red' : ''}" (click)="submitProfile()" slot="end">
            儲存
        </ion-buttons>
    </ion-toolbar>
</ion-header></ion-header>
這樣就可以囉,看看效果,特別注意這個方法對 Android 手機上的返回按鈕無效喔!
