
Prop 是拿來做什麼呢 ? 是我們註冊完一個組件並定義好內容後,可以從父層 ( HTML標籤使用處 ) 透過 Tag Attribute 的方式傳遞資訊給子層定義的 Prop,如果硬要講 Prop 是什麼的話,那大概就是HTML標籤的客製化屬性了吧,這裡我依照 "想讓使用者傳入的屬性來定義子層 Prop " 這個概念來製作我們的組件。
<div>
  <b-button>Button</b-button>
  <b-button variant="danger">Button</b-button>
  <b-button variant="success">Button</b-button>
  <b-button variant="outline-primary">Button</b-button>
</div>

<b-button> ,這就是 BV 自己做的組件啦。// 1. 全域註冊
Vue.component('name-generator', {})
// 2. 局部註冊
let nameGeneratorHeHe = {...}
new Vue({
...
components: {
nameGeneratorHeHe
}
})
<name-generator></name-generator>
<name-generator-he-he></name-generator-he-he>
b-button ,在這之前我們要先來學習 Prop 的部份,首先註冊一個組件,我這邊選擇用全域註冊,並為組件添加一個 template 以及 props。// 避免混淆, 我取名叫 m-button 表示 my-button
Vue.component('m-button', {
template: `
<div class="button">
<button type="button"></button>
</div>
`,
// 第一種,單純一個陣列表示所有可傳給子組件的prop
props: ['variant', 'text', 'other']
// 第二種,以物件形式定義傳入 prop 的型別
props: {
variant: String,
text: String,
other: ['String', 'Array', 'Boolean'] // 表示多種可傳入的型別
}
// 第三種, 針對每個 prop 做更詳細的,物件形式的定義
props: {
variant: {
type: String,
required: true // 表示一定要提供
},
text: {
type: String,
default: 'button' // 預設值
},
other: ['String', 'Array', 'Boolean'], // 表示多種可傳入的型別
// 官網提供的 自定義驗證方式,個人目前還沒有用過這樣的模式在專案中
propF: {
validator: function (value) {
// 这个值必须匹配下列字符串中的一个
return ['success', 'warning', 'danger'].indexOf(value) !== -1
}
}
}
})
// 若是傳入了不符合類型的資訊,使用開發版 Vue 將會看到警告
BV 的按鈕,看起來,屬性 variant 以及 Button 文本是完成此組件的必要資訊
<b-button variant="danger">Button</b-button>
Vue.component('m-button', {
    template: `
      <div class="button">
        <button type="button"></button>
      </div>
    `,
    props: {
      variant: {
        type: String,
        default: 'normal'
      }
    }
})
<m-button variant="danger">Button</m-button>

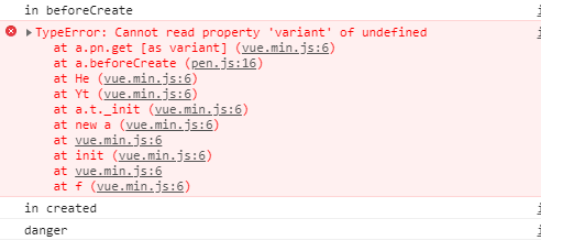
注意那些 prop 会在一个组件实例创建之前进行验证,所以实例的 property (如 data、computed 等) 在 default 或 validator 函数中是不可用的。
Vue.component('m-button', {
  template: `
    <div class="mbutton">
        <button type="button"></button>
    </div>
  `,
  props: {
    variant: {
        type: String,
        default: 'normal'
    }
  },
  beforeCreate () {
    console.log('in beforeCreate')
    console.log(this.variant)
  },
  created () {
    console.log('in created')
    console.log(this.variant)
  }
})
<m-button variant="danger">Button</m-button>
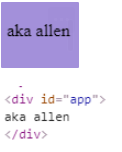
<div id="app">
  aka allen
</div>

... in script tag

let vm = new Vue({
  template: `
    <div class="NewTemplate">
      Elvis
    </div>
  `
})

// 先不要掛載,註解起來
// vm.$mount("#app")

圖片來源: https://ofeyhong.pixnet.net/blog/post/68205660
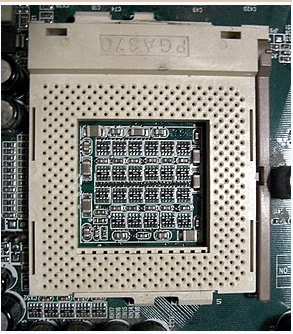
圖片來源: https://zh.wikipedia.org/zh-mo/Socket_370
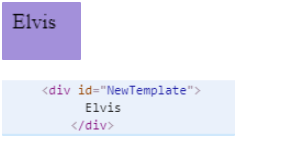
<div id="app">
  aka allen
</div>

... in script tag

// 加入slot
let vm = new Vue({
  template: `
    <div class="NewTemplate">
	  <slot></slot>
      Elvis
    </div>
  `
})

vm.$mount("#app")
<m-button variant="danger">Button</m-button>

// ...

Vue.component('m-button', {
  template: `
    <div class="mbutton">
      <button type="button">
		<slot></slot>
	  </button>
    </div>
  `,
  props: {
	variant: {
	  type: String,
		default: 'normal'
	}
  }
})
template: `
  <div class="mbutton">
	<slot></slot>
    <button type="button"></button>
  </div>
`
template: `
  <div class="mbutton">
    <button type="button"></button>
	<slot></slot>
  </div>
`
太調皮了ㄅㄏㄏ,針對 slot ,還可以做更進一步的使用,不過目前為止的需求使用到這邊就足夠了,我們先這樣就好,現在先把 slot 安裝回正確的位置,這樣我們主機板上的記憶體才不會插在莫名其妙的版面配置中 ...。
接下來為我們的按鈕準備 style ,經過去 BV 官網偷看,以下是狀態按鈕的色票們:
預設 = #6c757d,danger = #dc3545 , success = #28a745,primary = #007bff,依照這些色票,開始包裝我們的組件,我們將使用 computed 屬性來替換 class 的方法來達成目標。
1. 刪掉 div.mbutton 那層,以button作為根元素就好
2. class="btn" 與 :class=" 'btn-' + dynamicClass" 是可以共存的,最終兩個會一起渲染,利用這個特性,準備一個共用的.btn
3. 而 dynamicClass 將會被 computed 的 dynamicClass getter 返回一個新值
   隨使用者傳入的不同字串,動態的被改變。
4. v-bind 除了可以綁定 data member, 也可綁定 props member ,相對的 computed 也可以監測 props 變化,可以把 props 當成另一種形式的 data。

Vue.component('m-button', {
  template: `
    <button type="button" class="btn" :class=" 'btn-' + dynamicClass" >
      <slot></slot>
    </button>
  `,
  props: {
    variant: {
      type: String,
      default: 'normal'
    }
  },
  computed: {
    dynamicClass () {
      return this.variant
    }
  }
})
<m-button>Button</m-button>
<m-button variant="success">Button</m-button>
<m-button variant="primary">Button</m-button>
<m-button variant="danger">Button</m-button>
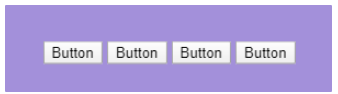
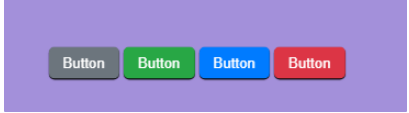
隨著傳入字串的不同,HTML確實被動態的改變了,並且預設沒傳入 variant 也確實地藉由設定 default 來進行預設的渲染。

// 先準備 .btn 作為按鈕基本型
.btn {
  border-radius: 5px;
  color: white;
  padding: .375rem .75rem;
  border: 1px solid transparent;
  box-shadow: 0 1px 1px 0px black
}

// 定義各色塊
// 預設 = #6c757d , success = #28a745 , primary = #007bff , danger = #dc3545

.btn-normal {
  background-color: #6c757d;
}

.btn-success {
  background-color: #28a745;
}

.btn-primary {
  background-color: #007bff;
}

.btn-danger {
  background-color: #dc3545;
}
最後這樣:
做到這邊,我們模仿 BV 的 算是成功了,你可以自己擴充關鍵字色票建立自己的基本按鈕,hover 效果也可以自己處理,不過目前按鈕還沒有實質效果,下一篇將解說 Slot 更進一步的應用以及組件 Event 的建立及監聽。
https://codepen.io/fiftybillionHuang/pen/BaKwvjN
沒事也可以逛逛我們其他團隊成員的文章啦 ~~
eien_zheng: 前端小嘍嘍的Golang學習旅程_The journey of learning Golang 系列
PollyPO技術: 前端設計轉前端工程師-JS踩坑雜記 30 天 系列

 iThome鐵人賽