
這次來一點點 Vuex,專案都還沒用到來玩玩ㄅ,sidebar 個人訊息就是這樣的內容,大家一定都有看過類似的。
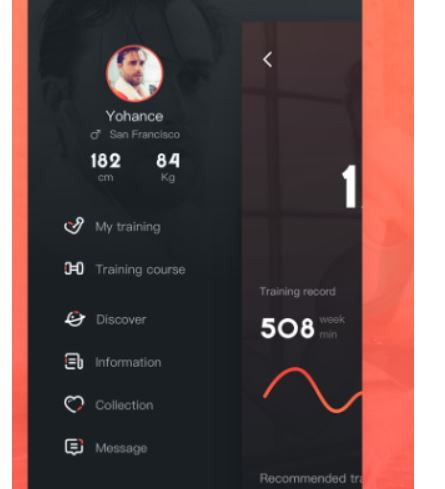
對於 Vuex 的概念,我自己理解後,其實是不太想用官網提供的那張狀態圖來分享。我們都知道 Vue 由資料驅動畫面,Vuex 也是一樣可以讓我們綁定資料,當我們的專案愈變愈大的時候可能會有許多的組件會需要共用到資料的部分,Vuex 就提供了我們這個部分,他從 Vue 中分出一塊公用的倉庫,讓我們可以儲存資料在裡面,而繼承 Vue 的所有組件,都可以藉由 store 這個屬性存取到裡面的資料,概念和全域混入 Mixin 一點點類似,不過運用的方向是完全不一樣的。
並且我們依然可以依靠 store 中的資料做畫面的綁定,他就是一塊可以供我們在任何地方使用的 "全域變數"。
main.js 中,可以看見 store 選項被注入,如此你可以在往後的所有子組件中使用
this.$store
這樣的方式來存取 store 中的資料。
store/index.js 中的設定非常簡略,在 store 中,最常被拿來使用的資料就是 state,我們這裡只是待會傳資料進來時進行更新而已:
import Vue from 'vue'
import Vuex from 'vuex'

Vue.use(Vuex)

export default new Vuex.Store({
  state: {
    displayName: '',
    name: '',
    emailVerified: '',
    email: '',
    photoURL: '',
    phoneNumber: ''
  },
  mutations: {
    setCurrentUser (state, currentUser) {
      state.displayName = currentUser.displayName
      state.name = currentUser.name
      state.emailVerified = currentUser.emailVerified
      state.email = currentUser.email
      state.photoURL = currentUser.photoURL
      state.phoneNumber = currentUser.phoneNumber
    }
  },
  actions: {
  },
  modules: {
  }
})
要更新 state 的資料,要用 commit mutations 的方式,用以下的方式就會將 currentUser 指定為我們丟 commit 進去的第二個引數物件內容:
this.$store.commit('setCurrentUser', {物件內容})

... 這樣傳進去的物件內容就會跑到我們提交請求方法的 currentUser

setCurrentUser (state, currentUser) {
	currentUser 等於 {物件內容}
	...
}
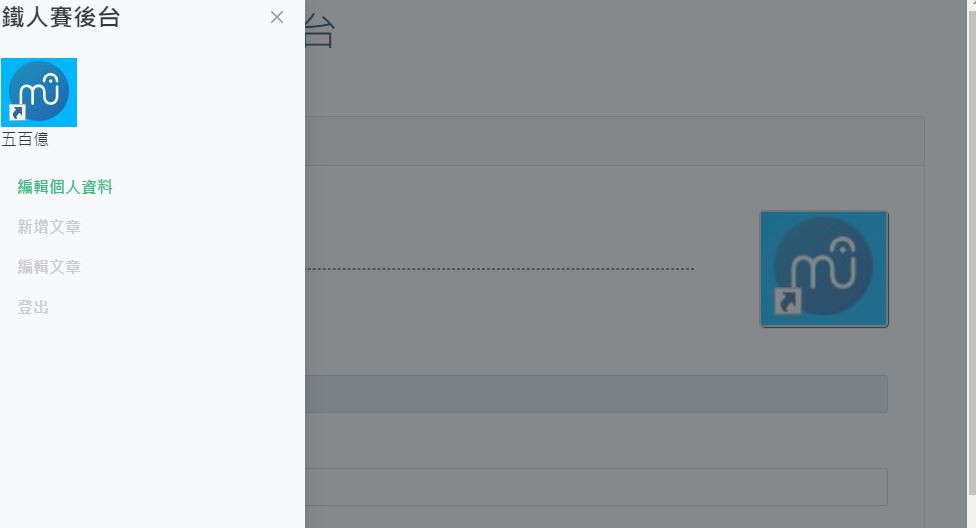
上面就是基本的使用方法,我們今天將應用改為 sidebar ( backend.vue中 ) 顯示 currentUser 資訊,其中會包含 photoURL 儲存抓下來的大頭貼 URL,並讓 img tag src 綁定他,並且讓編輯個人資料的頁面也加入上傳大頭貼的功能,上傳完會接著更新 proifle 和 資料庫的資料。
另個問題是,網頁重新整理後,state 中的資料是會被清空的,所以我們勢必要採用一些方法讓資料重新進來,比較多是會把資料放在 sessionstorage 或 localstorage 中,重新整理後讀取再放進 state,或者有套件是可以幫我們 keep state,不過這也是使用前面說的 storage 來實現,而我們今天採用的是 Firebase 抓資料庫資料下來放進去,雖然速度比較慢,但是可以做的事情會比較無所顧忌,因為我們的資料是有資料庫的規則幫我們保護起來的,比較不會直接被看光
所以監看者方法就變得重要,因為重整後他一定會觸發幫我們檢查使用者,所以我們會把重要的 commit 動作放在裡面,這樣整體網頁就能依靠他每次觸發並且更新 state 的動作來做出需要的整體變化。
先到 FirebaseModel.vue 新增一些方法,並且監看者改成偵測到使用者變化時,就會將登入或登出的使用者資料提交到 store 中,我們今天將會把 userInfo.vue 和 Backend.vue 會用到照片和 displayName 的部分綁定 state 中的值,這樣每次監看者方法觸發時,就能夠馬上幫我們更新資訊並透過綁定的部分重新渲染。
F_stateWatcher () {
  const self = this
  firebase.auth().onAuthStateChanged(function (user) {
    if (user) {
      let userInfo = {}
      self.F_getManagerInfo(self.$route.params.who).then(manager => {
        userInfo = {
          displayName: user.displayName,
          email: user.email,
          emailVerified: user.emailVerified,
          photoURL: user.photoURL,
          phoneNumber: user.phoneNumber,
          name: manager.name
        }
        // 將現在的使用者資料丟給 setCurrentUser 去更新
        self.$store.commit('setCurrentUser', userInfo)
      })
    } else {
      self.$store.commit('setCurrentUser', {})
    }
  })
}

...

// 取得檔案儲存參照的下載 URL
async F_getStorageURL (ref) {
  // Create a storage reference from our storage service
  var storageRef = storage.ref()
  var pathReference = storageRef.child(ref)
  return pathReference.getDownloadURL().then(function (url) {
    return url
  }).catch(function (error) {
  // Handle any errors
    console.log(error)
  })
},

// 上傳大頭貼時先條列出裡面所有檔案,取得裡面的檔案名稱並一一刪除再上傳,確保我們的大頭貼只會有一張
F_uploadImg (file, ref) {
  const self = this
  if (ref.indexOf('managers/' + this.$store.state.name) !== -1) {
    const storageRef = storage.ref()
    const listToRemoveRef = storageRef.child('managers/' + this.$store.state.name)

    // 刪除所有檔案
    return listToRemoveRef.listAll().then(function (res) {
      res.items.forEach(function (itemRef) {
        console.log(itemRef)
        // Delete the file
        const deleteItem = storageRef.child('managers/' + self.$store.state.name + '/' + itemRef.name)
        deleteItem.delete().then(function () {
          console.log(itemRef.name + ' 刪除成功')
        }).catch(function (error) {
          console.log(error)
          // Uh-oh, an error occurred!
        })
      })

      // 上傳檔案
      const uploadRef = storageRef.child(ref)
      return uploadRef.put(file).then(function (snapshot) {
        console.log('Uploaded a blob or file!')
      })
    }).catch(function (error) {
      console.log(error)
      // Uh-oh, an error occurred!
    })
  }
},

// 列出目標參照下的所有檔案方法
async F_listStorageRef (ref) {
  const storageRef = storage.ref()
  const listToShow = storageRef.child(ref)
  return listToShow.listAll().then(function (res) {
    const item = []
    res.items.forEach(function (itemRef) {
      item.push(itemRef)
    })
    return item
  }).catch(function (error) {
    console.log(error)
    // Uh-oh, an error occurred!
  })
}
更新 backend.vue
<template>
  <b-container class="pageBackend">
    <b-sidebar id="sidebar-1" title="鐵人賽後台" shadow backdrop>
      <template v-slot:footer="{ hide }">
        <div class="d-flex flex-column bg-dark text-light px-3 py-2">
          <strong class="mr-auto">footer</strong>
          <b-button size="sm" @click="hide">Close</b-button>
        </div>
      </template>
      <template v-slot:default>
        <div class="p-3">
          <div>
            <b-img :src="photoURL"></b-img>
            <p>{{ displayName }}</p>
          </div>
          <nav class="mb-3">
            <b-nav vertical>
              <b-nav-item :to="'/backend/'+ who +'/user_info_editor'">編輯個人資料</b-nav-item>
              <b-nav-item :to="'/backend/'+ who +'/add_article'">新增文章</b-nav-item>
              <b-nav-item :to="'/backend/'+ who +'/article_editor'">編輯文章</b-nav-item>
              <b-nav-item @click="F_signOut" to="#">登出</b-nav-item>
            </b-nav>
          </nav>
        </div>
      </template>
    </b-sidebar>

    <b-row>
      <b-col cols="12">
        <h1 @click="F_showUser">30天鐵人賽,後台</h1>
        <b-button v-b-toggle.sidebar-1>Toggle Sidebar</b-button>
      </b-col>
    </b-row>
    <router-view></router-view>
  </b-container>
</template>

<script>
// import '../plugins/markdown.js'
import { mapState } from 'vuex'
export default {
  name: 'Backend',
  data () {
    return {
      who: this.$route.params.who,
      avatorShow: false
    }
  },
  computed: {
    ...mapState([
      // 映射 this.count 为 store.state.count
      'photoURL',
      'displayName'
    ])
  }
}
</script>

<style language="scss" scope>
.pageBackend {
  padding: 1rem;
}
</style>
其中有個重要的內容,這裡是引入 vuex 的 mapState 輔助函數,可以幫我們把 state 中想使用的值拉出來,文章下面有講到另外一種用法。
import { mapState } from 'vuex'
...
computed: {
    ...mapState([
      // 映射 this.count 为 store.state.count
      'photoURL',
      'displayName'
    ])
}
加入上面這兩個部分,將會映射 state 的 currentUser 到你所在的組件作用域中,如此將可以使用這樣的方式存取 store 中的資料:
this.photoURL
this.displayName

很方便吧,因此我們 sidebar 大頭貼的部分就可以像這樣綁定 store 資料,如此只要監看者函式觸發完成後
我們的大頭貼也會相應的更新。

<div>
  <b-img ref="managerImg" :src="photoURL"></b-img>
  <p>{{ displayName }}</p>
</div>
更新 userInfo.vue
<template>
  <div class="container">
    <b-card-group deck>
      <b-card header="帳號資訊" header-tag="header" class="m-3">
        <div role="group" class="m-3">
          <b-form-group>
            <b-form-row class="upload">
              <b-col cols="12" md="2 mt-2">
                <div class="upload-file">
                  <input @change="uploadChange" ref="inputFile" type="file" id="avatar" accept=".jpg,.jpeg,.png">
                  <b-button variant="info">
                    <label for="avatar" ref="fileText">選擇你的頭貼檔案</label>
                  </b-button>
                </div>
              </b-col>
              <b-col cols="12" md="8 mt-2">
                <div class="upload__connect-line"></div>
              </b-col>
              <b-col cols="12" md="2 mt-2">
                <div class="upload-picture">
                  <b-img ref="img" :src="url"></b-img>
                  <span v-if="!url">空空如也</span>
                </div>
              </b-col>
            </b-form-row>
          </b-form-group>

          <label for="account">信箱 (帳號):</label>
          <b-form-input
            id = "account"
            v-model="account"
            disabled
            trim
          ></b-form-input>
          <b-form-text id="input-live-help" v-if="!emailVerified">
            <span>您的帳號尚未認證,點擊</span>
            <span class="mail--verified"
              v-b-tooltip.hover title="發送認證信"
              @click="makeToast('success')"
            >
              連接
            </span>發送認證信
          </b-form-text>
          <b-form-text id="input-live-help" v-if="emailVerified">
            <span style="color: green;">已認證的帳號 !</span>
          </b-form-text>

          <label for="password">密碼:</label>
          <b-form-input
            id = "password"
            v-model="password"
            trim
          ></b-form-input>

          <label for="backupEmail">信箱 (備援):</label>
          <b-form-input
            id = "backupEmail"
            v-model="backupEmail"
            trim
          ></b-form-input>
        </div>
      </b-card>
    </b-card-group>

    <b-card-group deck>
      <b-card header="名稱相關" header-tag="header" class="m-3">
        <div role="group" class="m-3">
          <label for="">暱稱:</label>
          <b-form-input
            id="displayName"
            v-model="displayName"
            trim
          ></b-form-input>
        </div>
        <div role="group" class="m-3">
          <label for="name">英文暱稱:</label>
          <b-form-input
            id = "name"
            v-model="name"
            trim
          ></b-form-input>
        </div>
      </b-card>
    </b-card-group>

    <b-card-group deck>
      <b-card header="聯絡資訊" header-tag="header" class="m-3">
        <div role="group" class="m-3">
          <label for="phoneNumber">電話號碼:</label>
          <b-form-input
            id="phoneNumber"
            v-model="phoneNumber"
            trim
          ></b-form-input>
        </div>
        <div role="group" class="m-3">
          <label for="address">住址:</label>
          <b-form-input
            id = "address"
            v-model="address"
            trim
          ></b-form-input>
        </div>
      </b-card>
    </b-card-group>

    <b-card-group deck>
      <b-card header="簡介" header-tag="header" class="m-3">
        <div role="group" class="m-3">
          <label for="skills">專長:</label>
          <b-form-textarea
            id="skills"
            v-model="skills"
            placeholder="Enter something..."
            rows="3"
            max-rows="6"
          ></b-form-textarea>
        </div>
        <div role="group" class="m-3">
          <label for="intro">自我介紹:</label>
          <b-form-textarea
            id="intro"
            v-model="intro"
            placeholder="Enter something..."
            rows="3"
            max-rows="6"
          ></b-form-textarea>
        </div>
      </b-card>
    </b-card-group>
    <b-button @click.native="updateUserInfo" href="#" variant="primary" class="m-3">更新資料</b-button>
  </div>
</template>

<script>
import { mapState } from 'vuex'
export default {
  name: 'UserInfoEditor',
  data () {
    return {
      account: '',
      password: '',
      backupEmail: '',

      displayName: '',
      name: '',

      phoneNumber: '',
      address: '',

      skills: '',
      intro: '',

      photoURL: '',
      uid: '',
      emailVerified: '',

      file: '',
      fileName: '',
      uploaded: false,
      targetRef: ''
    }
  },

  computed: mapState({
    url: state => state.photoURL,
    display: state => state.displayName
  }),

  created () {
    this.F_getManagerInfo(this.$route.params.who).then(manager => {
      if (manager.emailVerified === false) this.refreshVerified()
      else this.appendCurrentValue(manager)
    })
  },

  methods: {
    updateUserInfo () {
      const info = this.appendCurrentValue({}, 'skip get cloud')
      const self = this
      try {
        (async function () {
          await self.F_uploadImg(self.file, self.targetRef)
          await self.F_listStorageRef('managers/' + self.name).then(item => {
            self.F_getStorageURL('managers/' + self.name + '/' + item[0].name).then(url => {
              self.photoURL = url
              info.photoURL = url
              self.$store.commit('setCurrentUser', {
                photoURL: self.photoURL
              })
              self.F_updateProfile({ displayName: info.displayName, photoURL: self.photoURL })
              self.F_updateManagerInfo(self.$route.params.who, info)
            })
          })
        })()
      } catch (e) {
        console.log(e)
      }
    },

    makeToast (variant = null) {
      this.F_sendEmailVerified()
      this.$bvToast.toast('我們已發送認證郵件至 ' + this.account + ',請點選信箱連結認證後,再重新整理確認本頁狀態。', {
        title: '提示訊息',
        variant: variant,
        solid: true
      })
    },

    appendCurrentValue (manager, order) {
      if (order === 'skip get cloud') {
        // 返回更新值
        return {
          displayName: this.displayName,
          name: this.name,
          backupEmail: this.backupEmail,
          phoneNumber: this.phoneNumber,
          address: this.address,
          // uid: this.uid,
          skills: this.skills,
          intro: this.intro,
          photoURL: this.photoURL
        }
      }

      // 取得雲端值
      this.account = manager.account
      this.password = manager.password
      this.backupEmail = manager.backupEmail

      this.displayName = manager.displayName
      this.name = manager.name

      this.phoneNumber = manager.phoneNumber
      this.address = manager.address

      this.skills = manager.skills
      this.intro = manager.intro
      this.emailVerified = manager.emailVerified
      // this.uid = manager.uid
      this.photoURL = manager.photoURL
    },

    refreshVerified () {
      (async () => {
        let currentUser = null
        await this.F_showUser().then(user => {
          console.log(user)
          currentUser = user
        })
        await this.F_updateManagerInfo(this.$route.params.who, { emailVerified: currentUser.emailVerified })
        this.F_getManagerInfo(this.$route.params.who).then(manager => {
          console.log(manager)
          this.appendCurrentValue(manager)
        })
      })()
    },

    uploadChange () {
      this.uploaded = false
      this.$refs.fileText.innerText = '請選擇你的頭貼檔案'
      try {
        this.file = this.$refs.inputFile.files[0]
        this.fileName = this.$refs.inputFile.files[0].name
        this.targetRef = 'managers/' + this.name + '/' + this.$refs.inputFile.files[0].name
        this.$refs.img.src = URL.createObjectURL(this.file)
        if (this.$refs.inputFile.files.length !== 0) {
          this.uploaded = !this.uploaded
          this.$refs.fileText.innerText = this.file.name
        }
      } catch (e) {
        console.log(e)
      }
    }
  }
}
</script>

<style lang="scss" scoped>
%vertical-center {
  position: relative;
  top: 50%;
  transform: translateY(-50%);
}

.mail--verified {
  color: #33f;
  cursor: pointer;
}

.upload {
  .upload-file {
    @extend %vertical-center;
    width: 100%;
    & > button {
      border-radius: 5px;
      width: 100%;
      & > label {
        width: 100%;
        height: 100%;
        margin: 0;
      }
    }
    input {
      display: none;
    }
  }
  .upload__connect-line{
    width: 80%;
    height: 0px;
    border-top: 1px dashed black;
    margin: 0 auto;
    @extend %vertical-center;
  }
  .upload-picture {
    width: 100%;
    height: 100%;
    border: solid 2px #ccc;
    border-radius: 5px;
    box-shadow: 1px 1px 1px 0;
    position: relative;

    & > span {
      position: absolute;
      white-space: nowrap;
      top: 50%;
      left: 50%;
      transform: translate(-50%, -50%);
    }

    img {
      width: 100%;
      height: 100%;
    }
  }
}
</style>
updateUserInfo () {
	// 先更新所有 info 值
  const info = this.appendCurrentValue({}, 'skip get cloud')
  const self = this
  try {
    (async function () {
      // 先上傳大頭貼
      await self.F_uploadImg(self.file, self.targetRef)

      // 再取得大頭貼 URL
      await self.F_listStorageRef('managers/' + self.name).then(item => {
        self.F_getStorageURL('managers/' + self.name + '/' + item[0].name).then(url => {
          self.photoURL = url
          info.photoURL = url

          // 更新 store URL
          self.$store.commit('setCurrentUser', {
            photoURL: self.photoURL
          })

          // 更新 profile
          self.F_updateProfile({ displayName: info.displayName, photoURL: self.photoURL })

          // 更新個人資訊
          self.F_updateManagerInfo(self.$route.params.who, info)
        })
      })
    })()
  } catch (e) {
    console.log(e)
  }
}
另一處重點,上面講到 mapState 輔助函數,可以幫我們把多個需要的 state 值拉過來現在的組件區域使用並改名,如果不需要改名的話就能夠使用陣列的方式一個一個映射出來使用,但是 backend.vue 這裡因為會有名稱相衝突的問題,所以可以使用另一種寫法,改名並回傳指定的 state 值
import { mapState } from 'vuex'
...
computed: mapState({
  url: state => state.photoURL,
  display: state => state.displayName
}),
如此可使用這樣的方式來去得到 state 中的值
this.url
this.display
並且我們的綁定處就能隨著資料變動更新圖片
<div class="upload-picture">
  <img ref="img" :src="url">
  <span v-if="!url">空空如也</span>
</div>
現在你可以去上傳頭貼,並且重新整理看看,資料都會被監看者方法觸發後提交到 state 中,並透過綁定的部分重新渲染。
沒事也可以逛逛我們其他團隊成員的文章啦 ~~
eien_zheng: 前端小嘍嘍的Golang學習旅程_The journey of learning Golang 系列
PollyPO技術: 前端設計轉前端工程師-JS踩坑雜記 30 天 系列
阿電: 忍住不打牌位,只要30天VueJS帶你上A牌 系列
喬依司: 實作經典 JavaScript 30 系列

 iThome鐵人賽