vuevue-route是用來跳轉頁面切換和傳值的東西
一開始我們先找到專案裡的,src/router裡的index.js,
這檔案是用來負責元件切換、設定路由的地方。
下圖是index.js

import lifecircle from '../views/lifecircle.vue'
是指引入該元件,之後在下方打
    {
        path: '/lifecircle',
        component: lifecircle
    },
path輸入自己定義的路徑名稱。
component是輸入上方宣告的元件名稱。
接著我們到App.vue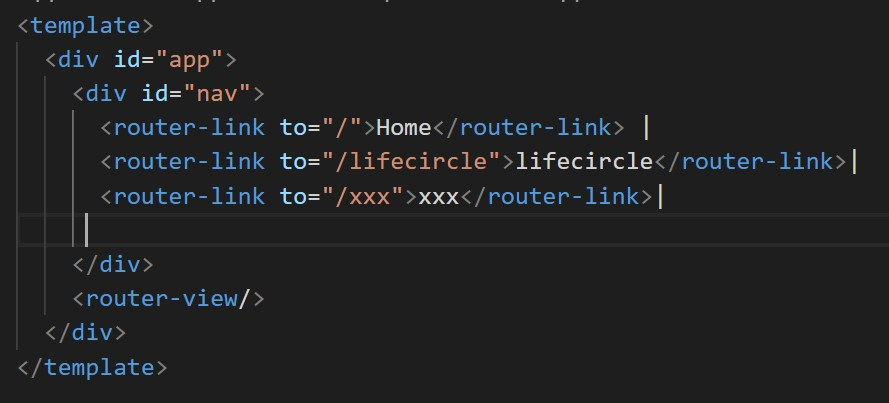
<router-link to="/lifecircle">lifecircle</router-link>|
router-link標籤有點類似跳頁的按鈕,to裡面放剛才在index.js設定的path名稱
表示按下router-link標籤切換到的頁面,會顯示在此,如果沒有則跳頁會沒效果
還有一種用法叫巢狀路由,一個路由下還有其他路由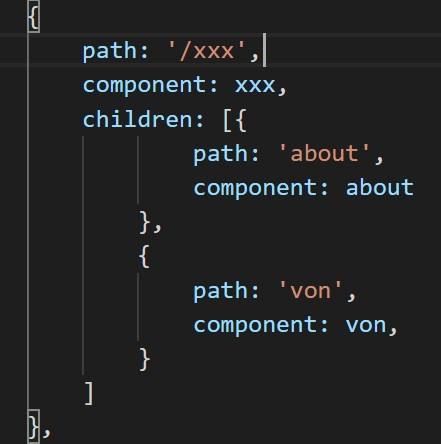
我們在一個路由(/xxx)下加一個children包住其他路由(about和von)
接著切換到元件(xxx.vue)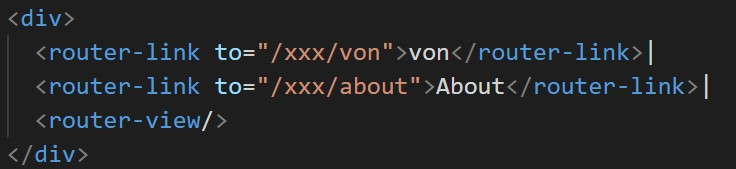
就能達到巢狀路由的效果
除了router-link可以跳轉頁面外,還可以用router.push來達到此效果,但不管是用哪一種方法,都一定要在src/router/index.js做設定才能有效果
在元件內新增一個button
<button class="btn btn-danger" @click="$router.push({path:'/xxx/about'})">toto</button>
用 @click來觸發$router.push({path:'/xxx/about'})的動作
route傳值有分,params和query兩種方式,跳轉頁面要用name來定義,因為params會把path忽略。
現在我們要用路由傳值的方式,由App.vue傳到routedata.vue
我們先在App.vue新增一個data,
    data:()=>({
      usep:"userparams"
    }),
然後新增route-link標籤<router-link :to="{name:'route',params:{p:this.usep}}">route</router-link>
params就是傳值的動作,裡面包p(自訂義的名稱),內容是剛才新增的data
我們切換到src/router/index.js修改要傳到的路由設定
    {
        path: '/route/:p',
        name: 'route',
        component: route
    }
就是在path後面加你從App.vue要傳過去的值
其實方式大同小異
只是不用在index.js修改路由設定
並把this.$route.params.p改成
this.$route.query.p
<router-link :to="{name:'route',params:{p:this.usep}}">route</router-link>
裡的params 改成 query
若要以router.push方式傳query,則改成
this.$router.push({
    path:'/slide',
    query: {p:this.msg},
})
並在接收元件端用一個data去接
  mounted(){
    this.ff = this.$route.query.p
  }
以下是程式碼
App.vue
<template>
  <div id="app">
    <div id="nav">
      <router-link to="/">Home</router-link> |
      <router-link to="/lifecircle">lifecircle</router-link>|
      <router-link to="/xxx">xxx</router-link>|
      <router-link :to="{name:'route',query:{p:this.usep}}">route</router-link>
    </div>
    <router-view/>
  </div>
</template>

<script>
// @ is an alias to /src
/*eslint-disable*/
import { mapState } from "vuex";
export default {
  name: 'home',
  components: {
  },
    data:()=>({
      usep:"userparams"
    }),
}
</script>
<style>
#app {
  font-family: Avenir, Helvetica, Arial, sans-serif;
  -webkit-font-smoothing: antialiased;
  -moz-osx-font-smoothing: grayscale;
  text-align: center;
  color: #2c3e50;
}

#nav {
  padding: 30px;
}

#nav a {
  font-weight: bold;
  color: #2c3e50;
}

#nav a.router-link-exact-active {
  color: #42b983;
}
</style>
routedata.vue
<template>
  <div class="home">
    <h1>{{onview}}</h1>
  </div>
</template>

<script>
// @ is an alias to /src
/*eslint-disable*/
import { mapState } from "vuex";
export default {
  name: 'route',
  components: {
  },
    data:()=>({
     onview:""
    }),
    mounted(){
        this.onview = this.$route.query.p
    },
}
</script>


 iThome鐵人賽