目前如果想要縮址的服務在網上還滿多這樣子的服務,但是如果想要永久性或者想要看一些數據的話,那目前有這樣子的開源的服務可以這樣子的服務,在尋找的時候剛好有一個套件 YOURLS 服務有開源功能還滿其全的可以剛好又可以自行架設,記錄一下如何安裝及基本使用
Nginx 先決條件yum install yum-utils -y
yum 存儲庫,在此目錄下新增一個 vim /etc/yum.repos.d/nginx.repo 屬於 官方提供載點
[nginx-stable]
name=nginx stable repo
baseurl=http://nginx.org/packages/centos/$releasever/$basearch/
gpgcheck=1
enabled=1
gpgkey=https://nginx.org/keys/nginx_signing.key
module_hotfixes=true

[nginx-mainline]
name=nginx mainline repo
baseurl=http://nginx.org/packages/mainline/centos/$releasever/$basearch/
gpgcheck=1
enabled=0
gpgkey=https://nginx.org/keys/nginx_signing.key
module_hotfixes=true
stable 穩定版本,如果想使用比較最新的版本請使用 nginx-mailine 會以當時官方釋出的版本為主,目前 BUBU 是使用官方比較新版為主yum-config-manager --enable nginx-mainline
nginx 服務yum install nginx -y
systemctl start nginx ; systemctl enable nginx
新增加MariaDB安裝檔
vim /etc/yum.repos.d/MariaDB.repo

再填入內容為以下

# MariaDB 10.4 CentOS repository list - created 2019-08-21 13:29 UTC
# http://downloads.mariadb.org/mariadb/repositories/
[mariadb]
name = MariaDB
baseurl = http://yum.mariadb.org/10.4/centos7-amd64
gpgkey=https://yum.mariadb.org/RPM-GPG-KEY-MariaDB
gpgcheck=1

增加完畢後在下命令安裝

yum install MariaDB-server MariaDB-client -y
systemctl enable mariadb ; systemctl start mariadb   # 啟動資料庫服
mysql_secure_installation   # 設定資料庫的root密碼

NOTE: RUNNING ALL PARTS OF THIS SCRIPT IS RECOMMENDED FOR ALL MariaDB
      SERVERS IN PRODUCTION USE!  PLEASE READ EACH STEP CAREFULLY!

In order to log into MariaDB to secure it, we'll need the current
password for the root user. If you've just installed MariaDB, and
haven't set the root password yet, you should just press enter here.

Enter current password for root (enter for none):
OK, successfully used password, moving on...

Setting the root password or using the unix_socket ensures that nobody
can log into the MariaDB root user without the proper authorisation.

You already have your root account protected, so you can safely answer 'n'.

Switch to unix_socket authentication [Y/n]
Enabled successfully!
Reloading privilege tables..
 ... Success!


You already have your root account protected, so you can safely answer 'n'.

Change the root password? [Y/n]
New password:
Re-enter new password:
Password updated successfully!
Reloading privilege tables..
 ... Success!


By default, a MariaDB installation has an anonymous user, allowing anyone
to log into MariaDB without having to have a user account created for
them.  This is intended only for testing, and to make the installation
go a bit smoother.  You should remove them before moving into a
production environment.

Remove anonymous users? [Y/n]
 ... Success!

Normally, root should only be allowed to connect from 'localhost'.  This
ensures that someone cannot guess at the root password from the network.

Disallow root login remotely? [Y/n]
 ... Success!

By default, MariaDB comes with a database named 'test' that anyone can
access.  This is also intended only for testing, and should be removed
before moving into a production environment.

Remove test database and access to it? [Y/n]
 - Dropping test database...
 ... Success!
 - Removing privileges on test database...
 ... Success!

Reloading the privilege tables will ensure that all changes made so far
will take effect immediately.

Reload privilege tables now? [Y/n]
 ... Success!

Cleaning up...

All done!  If you've completed all of the above steps, your MariaDB
installation should now be secure.

Thanks for using MariaDB!

mysql -u root -p   # 登入資料庫裡設定資表及權限

CREATE DATABASE IF NOT EXISTS yourls DEFAULT CHARACTER SET utf8 COLLATE utf8_general_ci; #在資料庫裡新增yourls表單
GRANT ALL PRIVILEGES ON yourls.* TO 'yourls_user'@'localhost' IDENTIFIED BY 'password' WITH GRANT OPTION; #密碼請自己輸入好記錄的密碼
FLUSH PRIVILEGES;
quit
yum install -y epel-release yum-utils
rpm -Uvh http://rpms.famillecollet.com/enterprise/remi-release-7.rpm
yum-config-manager --disable remi-php54
yum-config-manager --enable remi-php73
yum install -y php php-mysqlnd php-pdo php-xml php-pear php-devel php-mbstring re2c gcc-c++ gcc \
php-fpm php-mysql php-gd php-cli php-json php-opcache php-curl php-ldap php-odbc php-xmlrpc php-soap \
curl curl-devel php-intl  php-zip
vim /etc/php.ini 設定檔修改時區
[Date]
修改前
;date.timezone =
修改後
date.timezone = Asia/Taipei
vim /etc/php-fpm.d/www.conf
由誰使用此服務
; RPM: apache user chosen to provide access to the same directories as httpd
;user = apache
user = nginx
; RPM: Keep a group allowed to write in log dir.
;group = apache
group =nginx
systemctl restart php-fpm ; systemctl enable php-fpm
cd /var/www/html/
用 git 方式下載
git clone https://github.com/YOURLS/YOURLS
修改名稱
mv YOURLS/ yourls/
cd /var/www/html/yourls/user/
修改設定檔
cp config-sample.php config.php

vim config.php
資料庫連接

/*
 ** MySQL settings - You can get this info from your web host
 */

/** MySQL database username */
define( 'YOURLS_DB_USER', 'your db user name' );

/** MySQL database password */
define( 'YOURLS_DB_PASS', 'your db password' );

/** The name of the database for YOURLS */
define( 'YOURLS_DB_NAME', 'yourls' );

/** MySQL hostname.
 ** If using a non standard port, specify it like 'hostname:port', eg. 'localhost:9999' or '127.0.0.1:666' */
define( 'YOURLS_DB_HOST', 'localhost' );

/** MySQL tables prefix */
define( 'YOURLS_DB_PREFIX', 'yourls_' );


/** YOURLS installation URL -- all lowercase, no trailing slash at the end.
 ** If you define it to "http://sho.rt", don't use "http://www.sho.rt" in your browser (and vice-versa) */
define( 'YOURLS_SITE', 'http://your-own-domain-here.com' );

時區
/** Server timezone GMT offset */
define( 'YOURLS_HOURS_OFFSET', '+8' );


/** Allow multiple short URLs for a same long URL
 ** Set to true to have only one pair of shortURL/longURL (default YOURLS behavior)
 ** Set to false to allow multiple short URLs pointing to the same long URL (bit.ly behavior) */
define( 'YOURLS_UNIQUE_URLS', true );


/** Private means the Admin area will be protected with login/pass as defined below.
 ** Set to false for public usage (eg on a restricted intranet or for test setups)
 ** Read http://yourls.org/privatepublic for more details if you're unsure */
define( 'YOURLS_PRIVATE', true );


/** A random secret hash used to encrypt cookies. You don't have to remember it, make it long and complicated. Hint: copy from http://yourls.org/cookie **/
define( 'YOURLS_COOKIEKEY', 'modify this text with something random' );

管理者的帳號及密碼
/** Username(s) and password(s) allowed to access the site. Passwords either in plain text or as encrypted hashes
 ** YOURLS will auto encrypt plain text passwords in this file
 ** Read http://yourls.org/userpassword for more information */
$yourls_user_passwords = array(
	'username' => 'password',  <<< username 修改成管理者帳號、password 修改成管理者密碼
	// 'username2' => 'password2',
	// You can have one or more 'login'=>'password' lines
	);
chown -R nginx:nginx /var/www/html/yourls/
vim /etc/nginx/conf.d/xxx.conf
server {
# 這個主機的 Port
    listen 80;
# 這個主機的名稱
    server_name 網域網名;
    rewrite ^(.*)$ https://${server_name}$1 permanent;
}
#
server {
# 使用 https 和 http/2 協定
    listen 443 ssl http2;
# 上述的 IPv6 方式
    listen [::]:443 ssl http2;
    server_name 網域網名;
    root /var/www/html/yourls;
#
# certs sent to the client in SERVER HELLO are concatenated in ssl_certificate
#
# SSL 憑證證書路徑
    ssl_certificate /etc/nginx/ssl/fullchain.pem;
# 私鑰路徑
    ssl_certificate_key /etc/nginx/ssl/privkey.pem;
# 緩存有效期
    ssl_session_timeout 1d;
# 緩存憑證類型和大小
    ssl_session_cache shared:SSL:50m;
#
# intermediate configuration. tweak to your needs.
#
# 使用的加密協定
    ssl_protocols TLSv1.1 TLSv1.2 TLSv1.3;
# 加密演算法,越前面的優先級越高
    ssl_ciphers 'TLS13-AES-256-GCM-SHA384:TLS13-CHACHA20-POLY1305-SHA256:TLS13-AES-128-GCM-SHA256:TLS13-AES-128-CCM-8-SHA256:TLS13-AES-128-CCM-SHA256:EECDH+CHACHA20:EECDH+CHACHA20-draft:EECDH+ECDSA+AES128:EECDH+aRSA+AES128:RSA+AES128:EECDH+ECDSA+AES256:EECDH+aRSA+AES256:RSA+AES256:EECDH+ECDSA+3DES:EECDH+aRSA+3DES:RSA+3DES:!MD5';
# 交握過程使用 Server 的首選加演算法,這裡使用 Client 為首選
    ssl_prefer_server_ciphers on;
#
# HSTS (ngx_http_headers_module is required) (15768000 seconds = 6 months)
#
# 增加 http header
    add_header Strict-Transport-Security max-age=63072000;
#
    access_log /var/log/nginx/ys_access.log;
    error_log /var/log/nginx/ys_error.log;
#
    client_max_body_size 1G;
    fastcgi_buffers 64 4K;
#
# html 檔
    location / {
# 使用「瀏覽器」瀏覽根目錄時,未指定檔名時預設使用的檔案
        index index.php index.html index.htm;
        autoindex on;
        try_files $uri $uri/ /yourls-loader.php;
    }
    location = /50x.html {
        root /usr/share/nginx/html;
    }
# pass the PHP scripts to FastCGI server listening on 127.0.0.1:9000
#
# php 檔
    location ~ \.php$ {
        fastcgi_pass 127.0.0.1:9000;
        fastcgi_index index.php;
        try_files $uri =404;
        fastcgi_param SCRIPT_FILENAME  $document_root$fastcgi_script_name;
        include fastcgi_params;
        fastcgi_intercept_errors on;
        fastcgi_buffers 16 16k;
        fastcgi_buffer_size 32k;
    }
#
    location ~* \.(?:ogg|ogv|svg|svgz|eot|otf|woff|mp4|ttf|css|rss|atom|js|jpg|jpeg|gif|png|ico|zip|tgz|gz|rar|bz2|doc|xls|exe|ppt|tar|mid|midi|wav|bmp|rtf)$ {
        expires 30d;
        log_not_found off;
    }
# deny access to .htaccess files, if Apache's document root
# concurs with nginx's one
#
    location ~ /\.ht {
        deny all;
    }
# 發生 404 指定導向哪個網頁
#error_page  404              /404.html;
# redirect server error pages to the static page /50x.html
#
    error_page 500 502 503 504  /50x.html;
# proxy the PHP scripts to Apache listening on 127.0.0.1:80
#
# location ~ \.php$ {
#    proxy_pass   http://127.0.0.1;
#}
#
}
server {
    listen 80;
    server_name 網域名稱;
    rewrite ^(.*)$ https://${server_name}$1 permanent;
}
#
server {
# 使用 https 和 http/2 協定
    listen 443 ssl http2;
# 上述的 IPv6 方式
    listen [::]:443 ssl http2;
    server_name 網域名稱;
#
# certs sent to the client in SERVER HELLO are concatenated in ssl_certificate
#
# SSL 憑證證書路徑
    ssl_certificate /etc/nginx/ssl/fullchain.pem;
# 私鑰路徑
    ssl_certificate_key /etc/nginx/ssl/privkey.pem;
# 緩存有效期
    ssl_session_timeout 1d;
# 緩存憑證類型和大小
    ssl_session_cache shared:SSL:50m;
#
# intermediate configuration. tweak to your needs.
#
# 使用的加密協定
    ssl_protocols TLSv1.1 TLSv1.2 TLSv1.3;
# 加密演算法,越前面的優先級越高
    ssl_ciphers 'TLS13-AES-256-GCM-SHA384:TLS13-CHACHA20-POLY1305-SHA256:TLS13-AES-128-GCM-SHA256:TLS13-AES-128-CCM-8-SHA256:TLS13-AES-128-CCM-SHA256:EECDH+CHACHA20:EECDH+CHACHA20-draft:EECDH+ECDSA+AES128:EECDH+aRSA+AES128:RSA+AES128:EECDH+ECDSA+AES256:EECDH+aRSA+AES256:RSA+AES256:EECDH+ECDSA+3DES:EECDH+aRSA+3DES:RSA+3DES:!MD5';
# 交握過程使用 Server 的首選加演算法,這裡使用 Client 為首選
    ssl_prefer_server_ciphers on;
#
    access_log /var/log/nginx/ys_access.log;
    error_log /var/log/nginx/ys_error.log;
#
    location / {
        proxy_pass https://服務主機;
        proxy_next_upstream error timeout invalid_header http_500 http_502 http_503;
        proxy_set_header Host $host;
        proxy_set_header X-Real_IP $remote_addr;
        proxy_set_header X-Forwarded-For $proxy_add_x_forwarded_for;
        proxy_set_header X-Forwarded-Proto https;
        proxy_redirect off;
        proxy_pass_header Authorization;
    }
#
    location ~* \.(?:ogg|ogv|svg|svgz|eot|otf|woff|mp4|ttf|css|rss|atom|js|jpg|jpeg|gif|png|ico|zip|tgz|gz|rar|bz2|doc|xls|exe|ppt|tar|mid|midi|wav|bmp|rtf)$ {
        proxy_pass https://服務主機;
    }
#
    location /nginx-status {
        stub_status on;
        access_log off;
# 允許看到的 IP
        allow 127.0.0.1;
        deny all;
    }
}
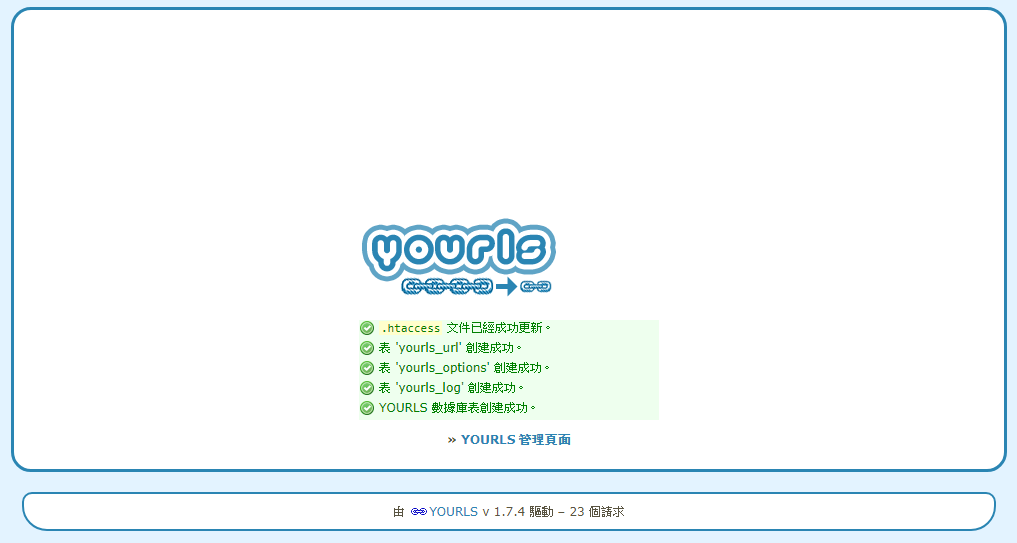
http://主機名稱/admin,按下安裝 YOURLS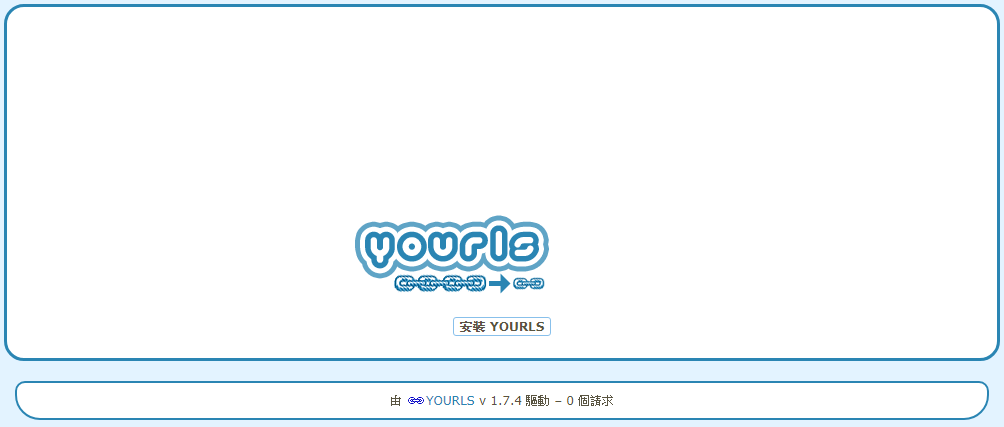
<php
header("HTTP/1.1 301 Moved Permanently");
header("Location: http://yourdomain.com/admin");
>
cd ~
下載
wget https://github.com/dr490n/YOURLS.pot_Chinese/archive/master.zip
解壓縮
unzip master.zip
將語言檔移動到 YOURLS 語言目錄下
cd YOURLS.pot_Chinese-master/
mv zh_Hant.mo /var/www/html/yourls/user/languages
mv zh_Hant.po /var/www/html/yourls/user/languages
vim cd /var/www/html/yourls/user/config.php

修改前
/** YOURLS language
 ** Change this setting to use a translation file for your language, instead of the default English.
 ** That translation file (a .mo file) must be installed in the user/language directory.
 ** See http://yourls.org/translations for more information */
define( 'YOURLS_LANG', ' ' );
修改後
/** YOURLS language
 ** Change this setting to use a translation file for your language, instead of the default English.
 ** That translation file (a .mo file) must be installed in the user/language directory.
 ** See http://yourls.org/translations for more information */
define( 'YOURLS_LANG', 'zh_Hant' );
到yourls 目錄
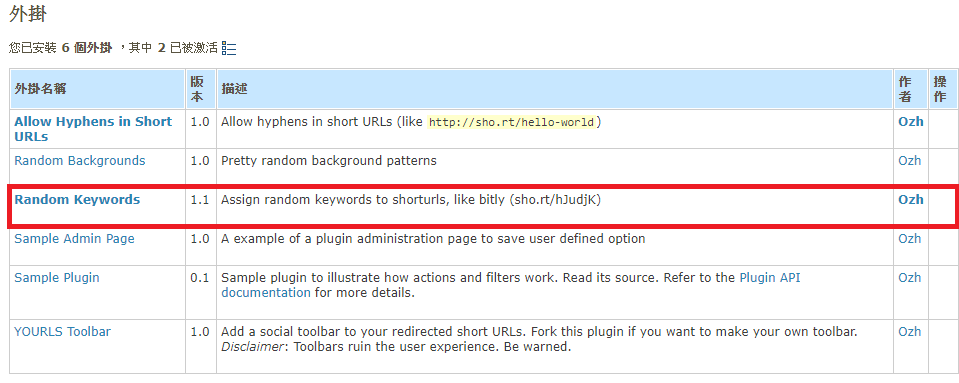
cd /var/www/html/yourls/user/plugins
下載
git clone https://github.com/YOURLS/random-keywords


 iThome鐵人賽