
Photo by Gunnar Ridderström on Unsplash
現階段先使用 Interface Builder (IB)來編輯畫面, 明天鐵人賽在用 SwiftUI , 哈哈 ◉‿◉
圖3-2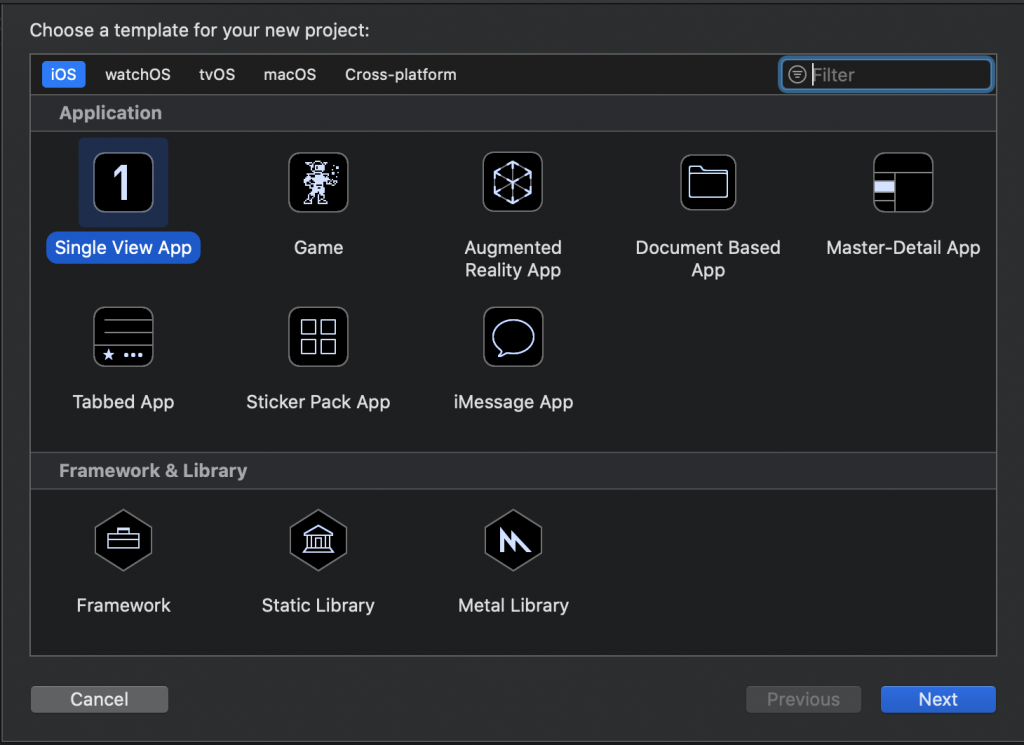
圖3-3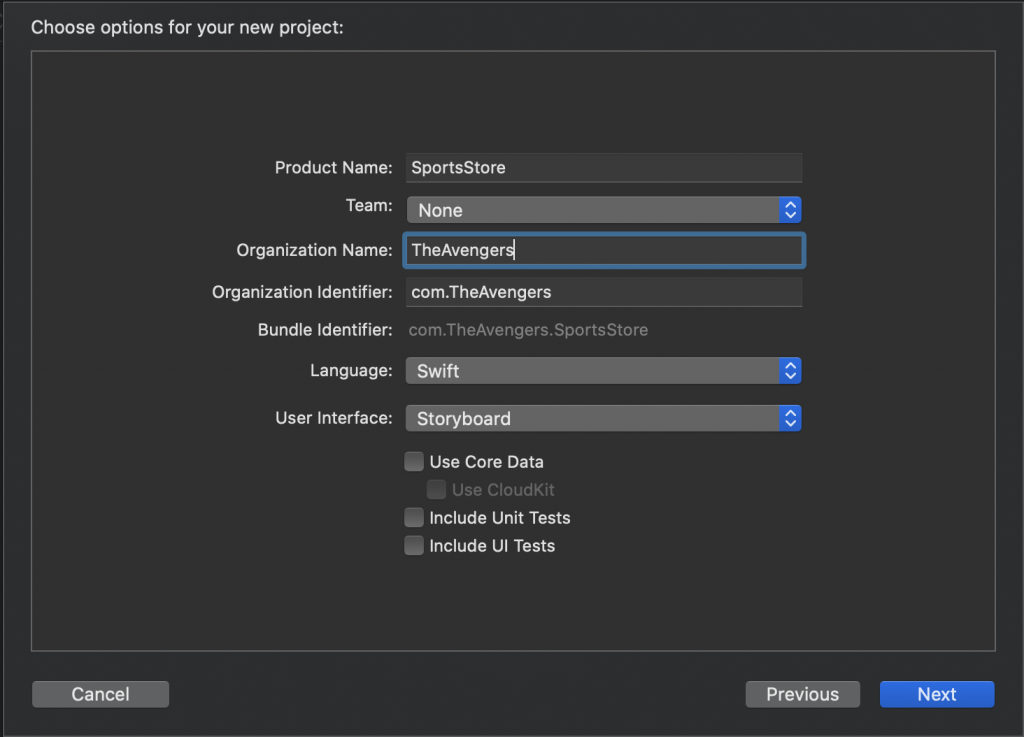
圖3-4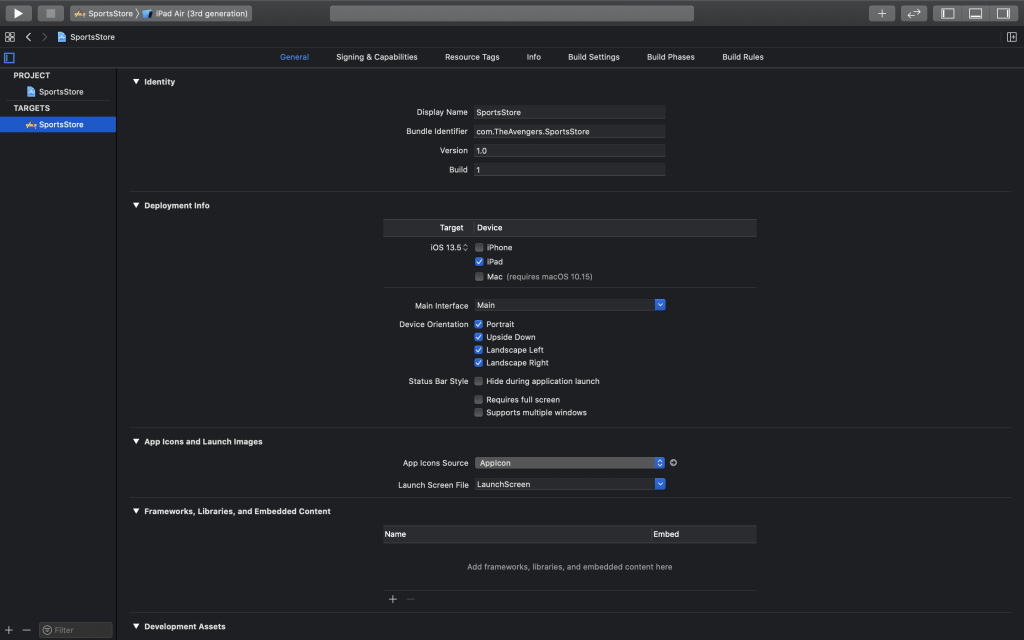
import Foundation;

var myProduct = ("Kayak", "A boat for one person", "Watersports", 275.0, 10);

func writeProductDetail(_ product: (String, String, String, Double, Int)) {
    print("Name: \(product.0)");
    print("Description: \(product.1)");
    print("Category: \(product.2)");
    let formattedPrice = NSString(format: "$%.2lf", product.3);
    print("Price: \(formattedPrice)");
}

writeProductDetail(myProduct);
這裡唯一差別, Swift函式外部參數名一定要寫, 但可用底線省略
圖3-5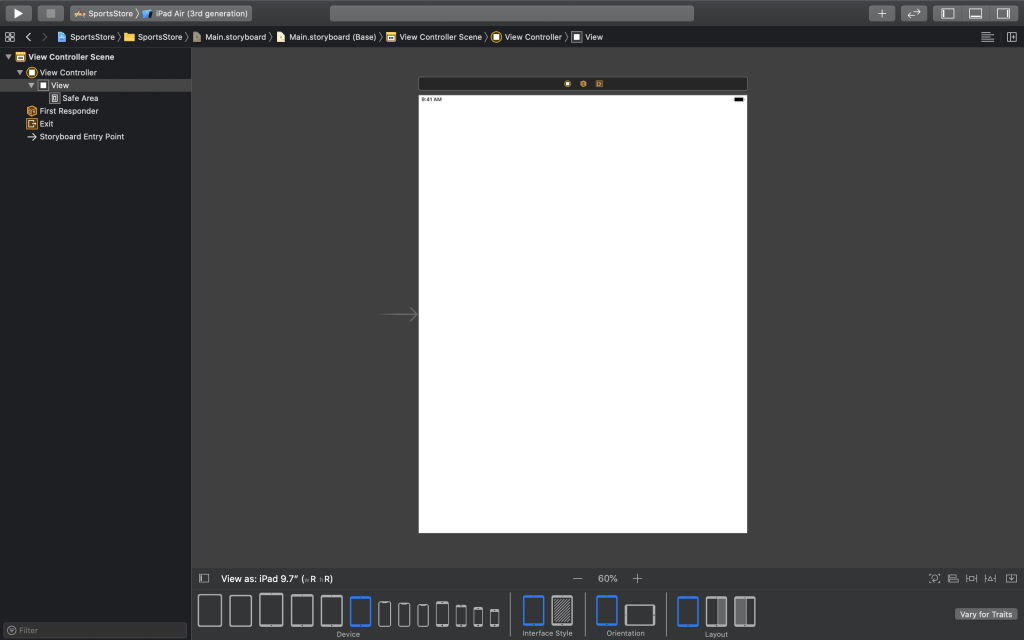
現在Interface Builder 好方便喔, 早期只有大正方形, 自己腦袋compiler各iphone尺寸機型, 含iPhone 4, 4.5尺寸.
圖3-6
圖3-8
按住 Control 鍵並拖動階層中的 TableView 到 Safe Area ( iOS 11 時期才出現 Safe Area )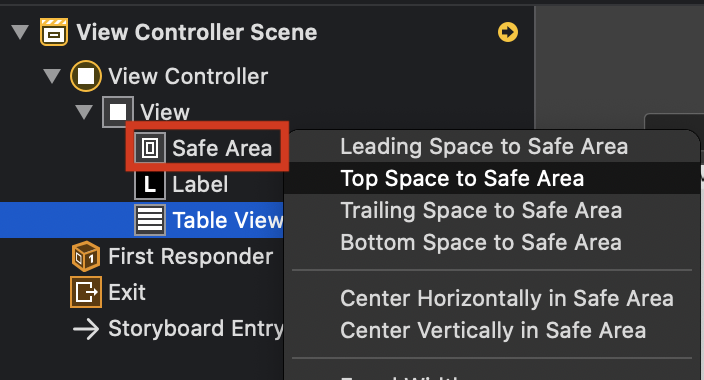
表 3-2
| 拖動 | 放置 | 拘束 |
|---|---|---|
| Label | Safe Area | ..... |
Assitant Editor here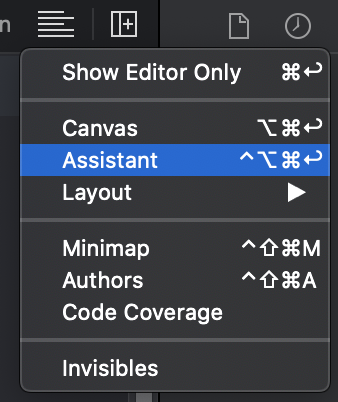
表 3-5 Fix書中排版
| 拖動來源 | 拖動目的地 | 拘束設置 |
|---|---|---|
| Description Label | Content View | ..... |
圖3-17
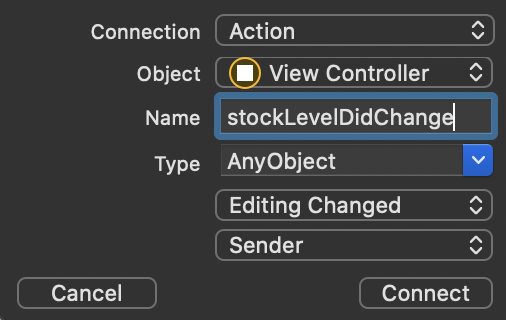
程式列 3-9
import UIKit

class ProductTableCell: UITableViewCell {
    @IBOutlet weak var nameLabel: UILabel!
    @IBOutlet weak var descriptionLabel: UILabel!
    @IBOutlet weak var stockStepper: UIStepper!
    @IBOutlet weak var stockField: UITextField!

    var productId: Int?
}

class ViewController: UIViewController, UITableViewDataSource {
    @IBOutlet weak var totalStockLabel: UILabel!
    @IBOutlet weak var tableView: UITableView!

    var products = [
        ("Kayak", "A boat for one person", "Watersports", 275.0, 10),
        ("Lifejacket", "Protective and fashionable", "Watersports", 48.95, 14),
        ("Soccer Ball", "FIFA-approved size and weight", "Soccer", 19.5, 32),
        ("Corner Flags", "Give your playing field a professional touch",
         "Soccer", 34.95, 1),
        ("Stadium", "Flat-packed 35,000-seat stadium", "Soccer", 79500.0, 4),
        ("Thinking Cap", "Improve your brain efficiency by 75%", "Chess", 16.0, 8),
        ("Unsteady Chair", "Secretly give your opponent a disadvantage",
         "Chess", 29.95, 3),
        ("Human Chess Board", "A fun game for the family", "Chess", 75.0, 2),
        ("Bling-Bling King", "Gold-plated, diamond-studded King",
         "Chess", 1200.0, 4)];

    override func viewDidLoad() {
        super.viewDidLoad()
        displayStockTotal();
    }

    override func didReceiveMemoryWarning() {
        super.didReceiveMemoryWarning()
    }

    func tableView(_ tableView: UITableView, numberOfRowsInSection section: Int) -> Int {
        return products.count;
    }

    func tableView(_ tableView: UITableView, cellForRowAt indexPath: IndexPath) -> UITableViewCell {
        let product = products[indexPath.row];
        let cell = tableView.dequeueReusableCell(withIdentifier: "ProductCell") as! ProductTableCell;
        cell.productId = indexPath.row;
        cell.nameLabel.text = product.0;
        cell.descriptionLabel.text = product.1;
        cell.stockStepper.value = Double(product.4);
        cell.stockField.text = String(product.4);
        return cell;
    }

    @IBAction func stockLevelDidChange(_ sender: AnyObject) {
        if var currentCell = sender as? UIView {
            while (true) {
                currentCell = currentCell.superview!;
                if let cell = currentCell as? ProductTableCell {
                    // MARK: Remove ?
                    if let id = cell.productId {

                        var newStockLevel: Int?;

                        if let stepper = sender as? UIStepper {
                            newStockLevel = Int(stepper.value);
                        } else if let textfield = sender as? UITextField {
                            // MARK: In Swift 2.x, the .toInt() function was removed from String.
                            if let newValue = Int(textfield.text!) {
                                newStockLevel = newValue;
                            }
                        }

                        if let level = newStockLevel {
                            products[id].4 = level;
                            cell.stockStepper.value = Double(level);
                            cell.stockField.text = String(level);
                        }
                    }
                    break;
                }
            }
            displayStockTotal();
        }
    }
    func displayStockTotal() {
        let stockTotal = products.reduce(0, {(total, product) -> Int in return total + product.4});
        totalStockLabel.text = "\(stockTotal) Products in Stock";
    }

}
目前這章節還沒遇到Swift語法變更太多, 需修正的issue, 後續 new issue就是 SwiftUI.
下一篇即將邁入Design patterns道路, ─=≡Σ((( つ•̀ω•́)つ
References:toint-removed-in-swift-2
