今日關鍵字:date
經過幾天的奮鬥
終於把通知的設定完成的差不多了
最後要來計算正確的播放時間
這裡選用的是moment.js
由於每個禮拜都要通知一次
可以預想設置通知時需要有個陣列來確定何時通知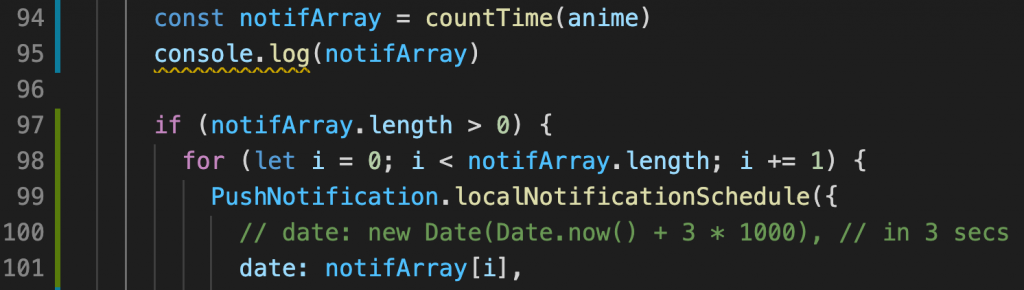
同時在interface中設定計算時需要的屬性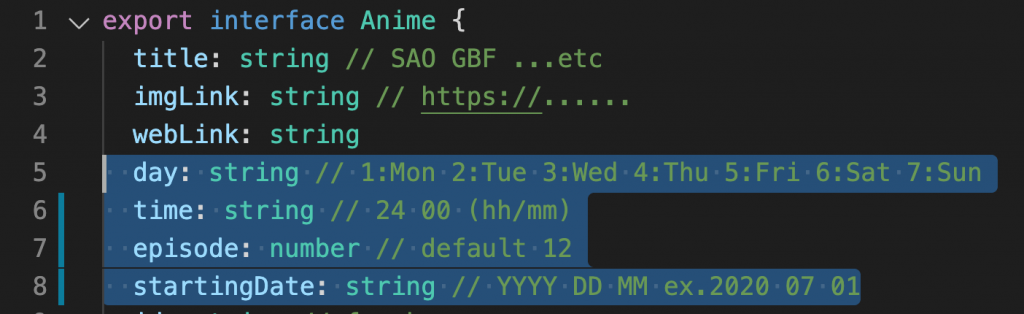

Date物件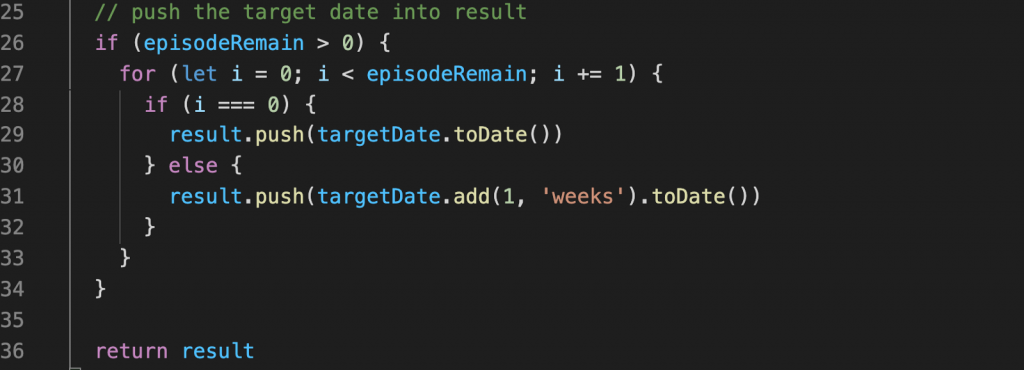
(然後因為種種問題這個函式庫以後不再更新,替代方案請看這裡)
不過既有的功能還是沒問題的
其中看起來比較容易的轉換是透過day.js
主打的就是從moment.js無痛轉換
甚至改善了mutable及大小的問題
是個不錯的選擇
不過基於練習的目的
這裡選擇了date-fns
yarn add date-fns
date-fns並沒有自己格式的物件,而是以function操作原生的Date
這裡就來以上面的例子看看寫法的差異
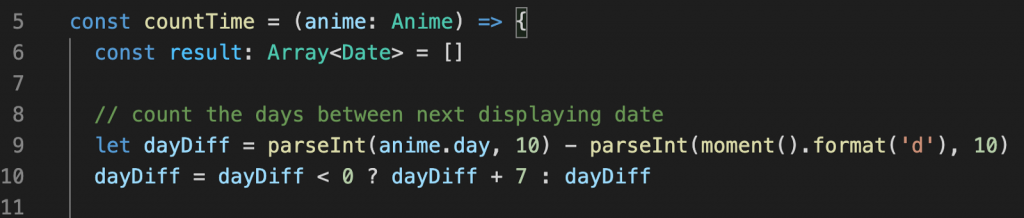
計算相差的天數
import { format } from 'date-fns'
// let dayDiff = parseInt(anime.day, 10) - parseInt(moment().format('d'), 10)
let dayDiff = parseInt(anime.day, 10) - parseInt(format(new Date(), 'i'), 10)
format的格式從d換成i
由於我本來的時間的寫法是2020 09 19 21 30
並非標準格式,date-fns不理我
在對於超過24:00的時間轉換時順便轉回標準格式
  // deal with time over 24:00
  let displayingTime = anime.time
  let displayingTimeISO
  if (parseInt(displayingTime.replace(' ', ''), 10) > 2400) {
    displayingTime = displayingTime.replace(' ', '')
    dayDiff += 1
    const timeToNextDay = parseInt(displayingTime, 10) % 2400
    const hourTimeToNextDay = Math.floor(timeToNextDay / 100)
    const minuteTimeToNextDay = timeToNextDay % 100
    displayingTime = `${hourTimeToNextDay} ${minuteTimeToNextDay}`
    displayingTimeISO = `${hourTimeToNextDay}:${minuteTimeToNextDay}`
  } else {
    // format to ISO
    displayingTimeISO = displayingTime.replace(' ', '')
    const hourTime = Math.floor(parseInt(displayingTimeISO, 10) / 100)
    const minuteTime = parseInt(displayingTimeISO, 10) % 100
    displayingTimeISO = `${hourTime}:${minuteTime}`
  }
取得下次播放日期
使用上面的ISO字串
import { parseISO } from 'date-fns'
// get the next displaying date
// const targetDay = moment().add(dayDiff, 'days').format('YYYY M D')
const targetDayISO = format(add(new Date(), { days: dayDiff }), 'yyyy-MM-dd')
// const targetTime = `${targetDay} ${displayingTime}`
const targetTimeISO = `${targetDayISO}T${displayingTimeISO}`
// const targetDate = moment(targetTime, 'YYYY M D, h:mm')
const targetDateISO = parseISO(targetTimeISO)
提早十分鐘通知
import { sub } from 'date-fns'
// substract 10 minutes from displaying time
// targetDate.subtract(10, 'minutes')
const beforeTenMinutes = sub(targetDateISO, { minutes: 10 })
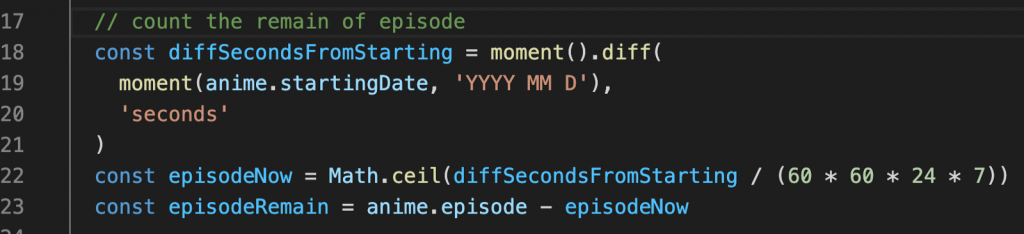
計算剩幾集沒播
import { parse, differenceInSeconds } from 'date-fns'
// count the remain of episode
const startingDate = parse(anime.startingDate, 'yyyy MM d', new Date())
// const diffSecondsFromStarting = moment().diff(
//   moment(anime.startingDate, 'YYYY MM D'),
//   'seconds'
// )
const diffSecondsFromStarting = differenceInSeconds(new Date(), startingDate)
const episodeNow = Math.ceil(diffSecondsFromStarting / (60 * 60 * 24 * 7))
const episodeRemain = anime.episode - episodeNow
計算結果
  // push the target date into result
  if (episodeRemain > 0) {
    for (let i = 0; i < episodeRemain; i += 1) {
      result.push(add(beforeTenMinutes, { weeks: i }))
      // if (i === 0) {
      //   result.push(targetDate.toDate())
      // } else {
      //   result.push(targetDate.add(1, 'weeks').toDate())
      // }
    }
  }
  return result
寫法還是有點差異,不過也不至於到太難
不過比起moment.js,date-fns更符合最近流行的fp思維
不過這些計算其實根本不該在App上弄
如果之後有做後台的話應該會轉移到後台計算
還要補上取消通知的功能
先來看看範例的寫法
id作為取消通知的key值,不過昨天被我砍掉了...
不過通知內我還有塞入動畫物件作爲傳輸資料
其中的標題因為不會重複
也可以當作鍵值使用
  static cancelNotif(anime: Anime) {
    const { title } = anime
    PushNotification.cancelLocalNotifications({ title })
  }
由於這個函式沒使用到this所以記得補上static的前綴
最後在按鈕上補上取消的動作
onPress={() => {
  const animeCopy = { ...anime }
  animeCopy.isReminding = !animeCopy.isReminding
  if (animeCopy.isReminding) {
    notif.scheduleNotif(anime)
  } else {
    NotifService.cancelNotif(anime)
  }
  dispatch(renewData(animeCopy))
}}
由於cancelNotif是static方法所以要直接從Class呼叫
正當我以為要告一段落時
突然發現iOS模擬機對於計畫通知也是ok的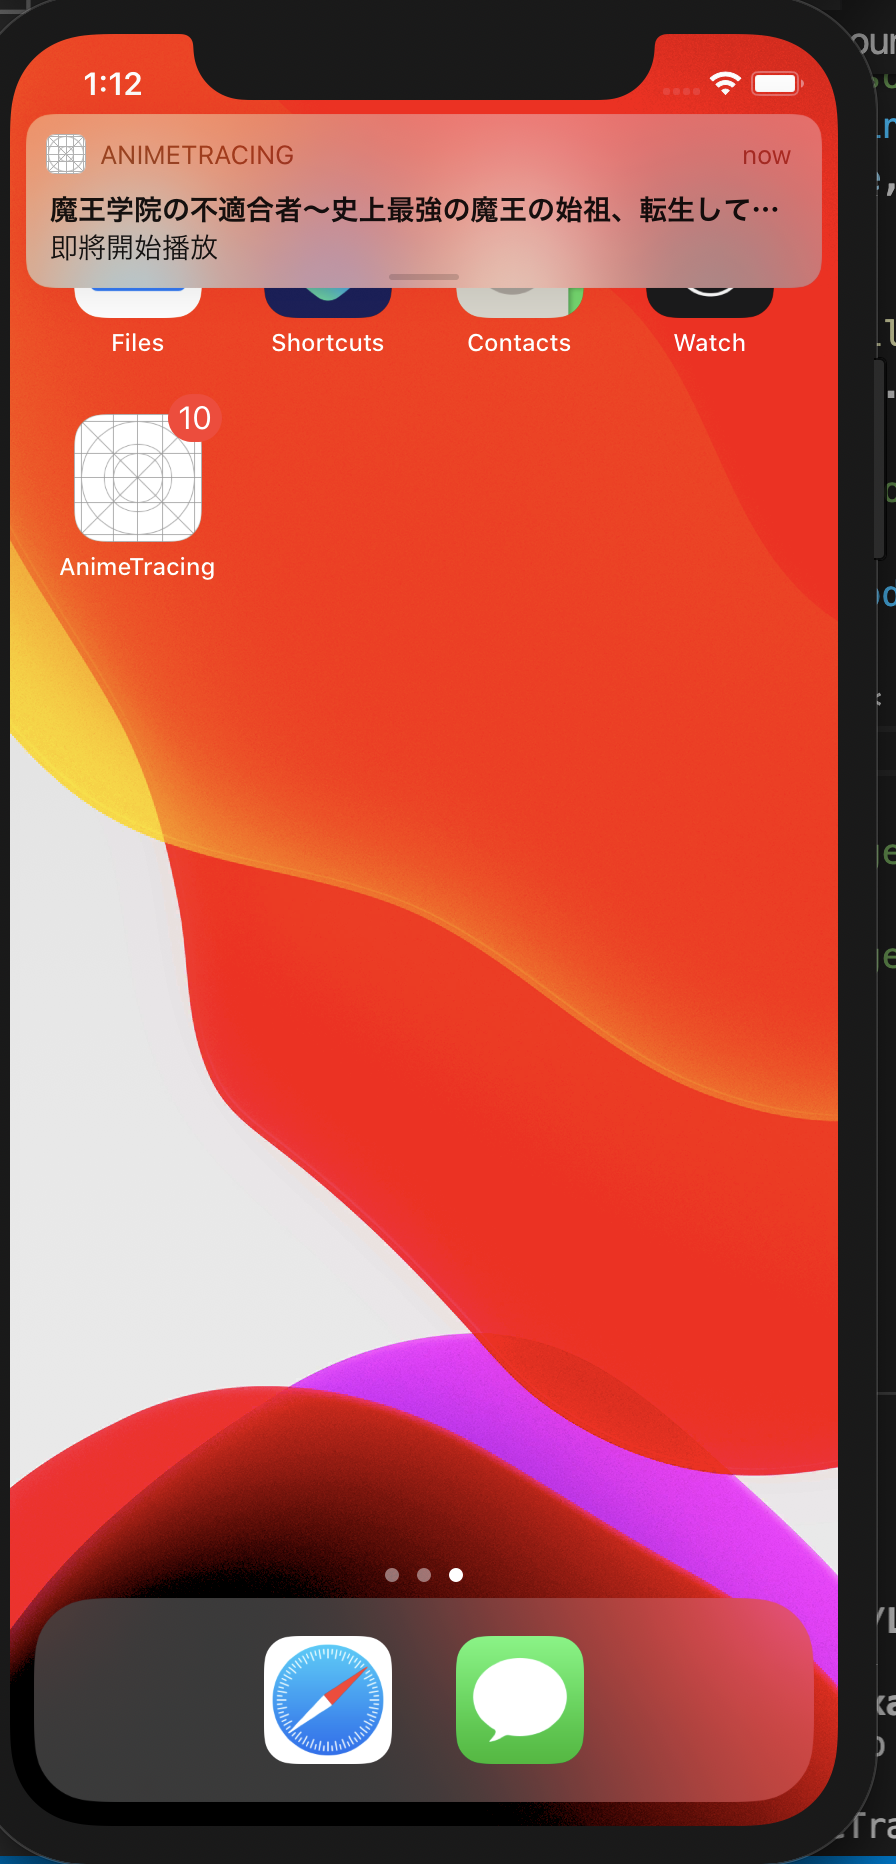
只是我在使用app的期間沒跳出來過啊
查了一下後
這其實是iOS的預設行為
app執行時通知不會跳出
當然還是要來試著找找看怎麼解決
// /ios/專案名/AppDelegate.m

#import <UserNotifications/UserNotifications.h>
@interface AppDelegate : UIResponder <UIApplicationDelegate, RCTBridgeDelegate, UNUserNotificationCenterDelegate>
// /ios/專案名/AppDelegate.h
- (BOOL)application:(UIApplication *)application didFinishLaunchingWithOptions:(NSDictionary *)launchOptions
{
  // ...

  // define UNUserNotificationCenter
  UNUserNotificationCenter *center = [UNUserNotificationCenter currentNotificationCenter];
  center.delegate = self;

  return YES;
}
// Called when a notification is delivered to a foreground app.
-(void)userNotificationCenter:(UNUserNotificationCenter *)center willPresentNotification:(UNNotification *)notification withCompletionHandler:(void (^)(UNNotificationPresentationOptions options))completionHandler{
    completionHandler(UNAuthorizationOptionSound | UNAuthorizationOptionAlert | UNAuthorizationOptionBadge);
}
兩支檔案做完更正後iOS模擬機使用時也能跳出通知了
另外由於iOS取消通知時讀取的內容放在userInfo這個屬性中
所以需要塞進我當作讀取標的的標題
明天來試著在客戶端儲存資料吧
參考: