嗨,大家好,今天我想要分享 Speech Service 的操作心得,準備好讓你的電腦也能辨識你說的話了嗎?
使用 Speech Service 就可以讓你的專案或產品實現語音相關的功能
大致上有 5 種功能:
大家可以到以下 3 個網站玩玩看官方範例。
0.1 準備好一個 Azure Account
0.2 建立好 Python 環境
0.3 打開 terminal (Powershell or CMD),輸入以下指令
pip install azure.cognitiveservices.speech
1.1 前往 Azure Portal,並搜尋 Speech Service
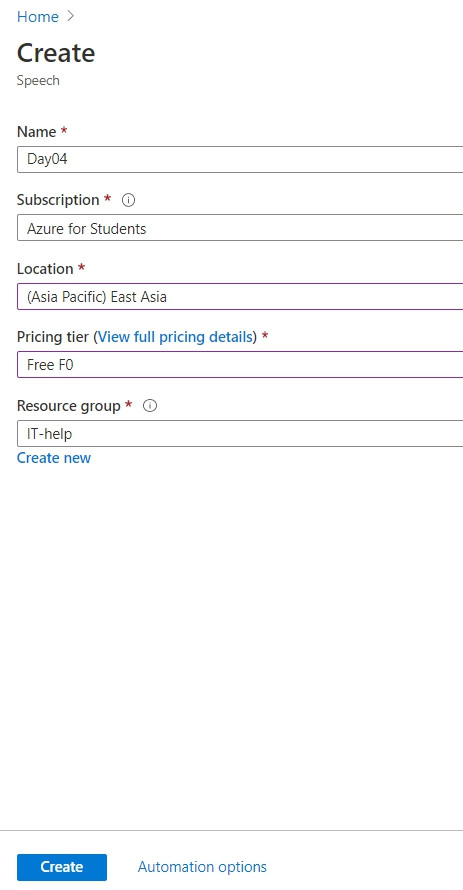
1.2 完成以下所要求的資訊
Name : <任意文字>
Subscription : <可以用的Subscription>
Location : <任意一個區域,建議選East US>
Pricing tier : <F0 為免費方案,你也可以選擇 S0,不過要注意費用>
Resource group : <任意一個 Resource Group,沒有的話創建一個新的>
1.3 待建立完成後,找到你的資源,複製 key + Location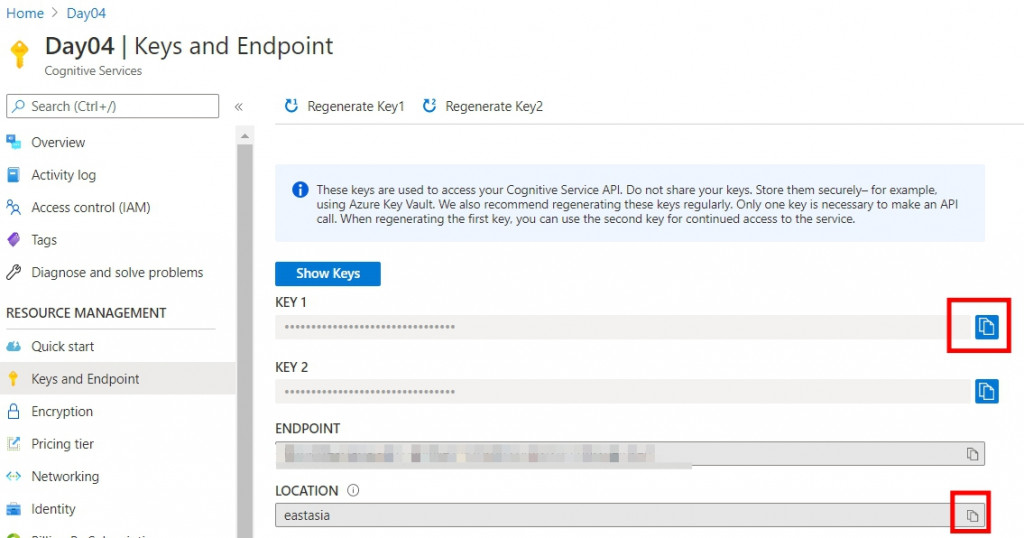
2.1 打開 Visual Studio Code (VS Code)
2.2 新增一個 Python 程式檔,命名為speech-test.py,並將以下程式碼複製貼上
import azure.cognitiveservices.speech as speechsdk

# 複製貼上你的剛剛的參數
speech_key, service_region = "<貼上你的key>", "<貼上你所選的區域>"  ## 沒有 <> 這個符號

def STT(text="說出一句話"):
    #先config
    speech_config = speechsdk.SpeechConfig(subscription=speech_key, region=service_region, speech_recognition_language='zh-tw')
    #創建分辨器
    speech_recognizer = speechsdk.SpeechRecognizer(speech_config = speech_config)
    result = speech_recognizer.recognize_once()

    if result.reason == speechsdk.ResultReason.RecognizedSpeech:
        print("Recognized: {}".format(result.text))
        return result.text
    elif result.reason == speechsdk.ResultReason.NoMatch:
        print("No speech could be recognized: {}".format(result.no_match_details))
    elif result.reason == speechsdk.ResultReason.Canceled:
        cancellation_details = result.cancellation_details
        print("Speech Recognition canceled: {}".format(cancellation_details.reason))
        if cancellation_details.reason == speechsdk.CancellationReason.Error:
            print("Error details: {}".format(cancellation_details.error_details))

def TTS(text):
    print(text)
    #先config
    speech_config = speechsdk.SpeechConfig(subscription=speech_key, region=service_region)

    # The full list of supported languages can be found here:
    # https://docs.microsoft.com/azure/cognitive-services/speech-service/language-support#text-to-speech
    #設定語系或是設定指定人的聲音(擇一)

    # #特定語系
    language = "zh-TW"
    speech_config.speech_synthesis_language = language

    # #特定人聲
    # voice = "Microsoft Server Speech Text to Speech Voice (en-US, BenjaminRUS)"
    # speech_config.speech_synthesis_voice_name = voice

    # 創建語音合成器Creates a speech synthesizer using the default speaker as audio output.
    speech_synthesizer = speechsdk.SpeechSynthesizer(speech_config = speech_config)


    # Synthesizes the received text to speech.
    # The synthesized speech is expected to be heard on the speaker with this line executed.
    result = speech_synthesizer.speak_text_async(text).get()

    # Checks result.
    if result.reason == speechsdk.ResultReason.SynthesizingAudioCompleted:
        # print("Speech synthesized to speaker for text [{}]".format(text))
        pass
    elif result.reason == speechsdk.ResultReason.Canceled:
        cancellation_details = result.cancellation_details
        print("Speech synthesis canceled: {}".format(cancellation_details.reason))
        if cancellation_details.reason == speechsdk.CancellationReason.Error:
            if cancellation_details.error_details:
                print("Error details: {}".format(cancellation_details.error_details))
        print("Did you update the subscription info?")
2.3 若要測試「語音轉文字」,則複製貼上以下程式碼
#測試 speech to text
print("說一句話")
text = STT()
2.4 打開terminal,確認位置為程式檔案的位置後,輸入以下指令
python speech-test.py
2.5 若要測試「文字轉語音」,則複製貼上以下程式碼
#測試 text to speech
print("測試打一句話")
text = input()
TTS(text)
2.6 打開terminal,確認位置為程式檔案的位置後,輸入以下指令
python speech-test.py
以上是今天 Speech Service 的內容,明天將會為大家介紹有關搜尋引擎的 AI 服務喔~