這是一套線上 Office 編輯器服務,由 LibreOffice 延伸出來的服務,目前是由國內研發出來並且修改在地化的服務,目前有分社群及商用如果要求不多功能的話可以用社群版就可以使用,兩個版本差異請在參考最下方的網址去比較,本篇只先教怎麼安裝,下一篇在教怎麼與 NextCloud 結合服務。
Nginx 官方下載 yum 版本,目前的版次
先在 vim /etc/yum.repos.d/nginx.repo 上新增下載路徑

#這是目前穩定的版本(1.16.X)

[nginx-stable]
name=nginx stable repo
baseurl=http://nginx.org/packages/centos/$releasever/$basearch/
gpgcheck=1
enabled=1
gpgkey=https://nginx.org/keys/nginx_signing.key
module_hotfixes=true

[nginx-mainline]
name=nginx mainline repo
baseurl=http://nginx.org/packages/mainline/centos/$releasever/$basearch/
gpgcheck=1
enabled=0
gpgkey=https://nginx.org/keys/nginx_signing.key
module_hotfixes=true
先安裝可以選擇指定的 yum 的套件
yum install yum-utils -y

指定要安裝的套件,這樣子就不會去選擇內鍵的路徑
yum-config-manager --enable nginx-stable

接下來就可以開始安裝 Nginx 服務
yum install nginx -y

啟動及自動啟動服務
systemctl start nginx ; systemctl enable nginx
1. 安裝必要的套件服務
yum install sudo vim net-tools unzip wget -y

2. 進到來源庫目錄
cd /etc/yum.repos.d

3. 下載官方所提供來源庫的設定檔
wget --no-check-certificate https://demo.oxoffice.com.tw/yum.repo/oxool-community.repo

4. 更新來源庫
yum update -y

5. 開始安裝 OxOOL 服務
yum groupinstall "OxOOL Community Group" -y
vim /etc/oxool/oxool.xml

憑證設定
<ssl desc="SSL settings">
        <enable type="bool" desc="Controls whether SSL encryption is enable (do not disable for production deployment). If default is false, must first be compiled with SSL support to enable." default="true">true</enable>
        <termination desc="Connection via proxy where oxoolwsd acts as working via https, but actually uses http." type="bool" default="true">false</termination>
        <cert_file_path desc="Path to the cert file" relative="false">/etc/nginx/ssl/fullchain.pem</cert_file_path> ----修改憑證路徑
        <key_file_path desc="Path to the key file" relative="false">/etc/nginx/ssl/privkey.pem</key_file_path> ----修改憑證路徑
        <ca_file_path desc="Path to the ca file" relative="false"></ca_file_path> ----刪除路徑
        <cipher_list desc="List of OpenSSL ciphers to accept" default="ALL:!ADH:!LOW:!EXP:!MD5:@STRENGTH"></cipher_list>
        <hpkp desc="Enable HTTP Public key pinning" enable="false" report_only="false">
            <max_age desc="HPKP's max-age directive - time in seconds browser should remember the pins" enable="true">1000</max_age>
            <report_uri desc="HPKP's report-uri directive - pin validation failure are reported at this URL" enable="false"></report_uri>
            <pins desc="Base64 encoded SPKI fingerprints of keys to be pinned">
            <pin></pin>
            </pins>
        </hpkp>
    </ssl>

信任網域
<storage desc="Backend storage">
        <filesystem allow="false" />
        <wopi desc="Allow/deny wopi storage. Mutually exclusive with webdav." allow="true">
            <host desc="Regex pattern of hostname to allow or deny." allow="true">localhost</host>
            <host desc="Regex pattern of hostname to allow or deny." allow="true">nc\.xxx\.com</host> #增加您的hostname或是IP,這個IP或是hostname是WOPI Server(也就是Nextcloud的所在IP)
            <host desc="Regex pattern of hostname to allow or deny." allow="true">192\.168\.[0-9]{1,3}\.[0-9]{1,3}</host>
            <host desc="Regex pattern of hostname to allow or deny." allow="false">192\.168\.1\.1</host>

            <max_file_size desc="Maximum document size in bytes to load. 0 for unlimited." type="uint">0</max_file_size>
        </wopi>
        <webdav desc="Allow/deny webdav storage. Mutually exclusive with wopi." allow="false">
            <host desc="Hostname to allow" allow="false">localhost</host>
        </webdav>
    </storage>

網頁管理者帳號設定
    <admin_console desc="Web admin console settings.">
        <enable desc="Enable the admin console functionality" type="bool" default="true">true</enable>
        <enable_pam desc="Enable admin user authentication with PAM" type="bool" default="false">false</enable_pam>
        <username desc="The username of the admin console. Ignored if PAM is enabled.">username</username>
        <password desc="The password of the admin console. Deprecated on most platforms. Instead, use PAM or loolconfig to set up a secure password.">password</password>
    </admin_console>
systemctl restart oxool && systemctl enable oxool
user nginx;
worker_processes auto;
error_log /var/log/nginx/error.log;
pid /run/nginx.pid;
include /usr/share/nginx/modules/*.conf;
#
events {
    worker_connections 1024;
}
#
http {
    log_format main  '$remote_addr - $remote_user [$time_local] "$request" '
                      '$status $body_bytes_sent "$http_referer" '
                      '"$http_user_agent" "$http_x_forwarded_for"';
#
    access_log /var/log/nginx/access.log  main;
#
    server_tokens off;
#
# Default is 60, May need to be increased for very large uploads
#
    sendfile on;
#
    tcp_nopush on;
    tcp_nodelay on;
    keepalive_timeout 65;
    types_hash_max_size 2048;
# set max upload size
    client_max_body_size 512M;
    fastcgi_buffers 64 4K;
# Enable gzip but do not remove ETag headers
    gzip on;
    gzip_vary on;
    gzip_comp_level 4;
    gzip_min_length 256;
    gzip_proxied expired no-cache no-store private no_last_modified no_etag auth;
    gzip_types application/atom+xml application/javascript application/json application/ld+json application/manifest+json application/rss+xml application/vnd.geo+json application/vnd.ms-fontobject application/x-font-ttf application/x-web-app-manifest+json application/xhtml+xml application/xml font/opentype image/bmp image/svg+xml image/x-icon text/cache-manifest text/css text/plain text/vcard text/vnd.rim.location.xloc text/vtt text/x-component text/x-cross-domain-policy;
#
    include /etc/nginx/mime.types;
    include /etc/nginx/conf.d/*.conf;
#
    default_type application/octet-stream;
}
server {
    listen 80;
    server_name 您的網域;
#
    access_log /var/log/nginx/oc_access.log;
    error_log /var/log/nginx/oc_error.log;
#
    client_max_body_size 1G;
    fastcgi_buffers 64 4K;
#
  # Static files
  location ^~ /loleaflet {
    proxy_pass https://127.0.0.1:9980;
    proxy_set_header Host $http_host;
  }

  # WOPI discovery URL
  location ^~ /hosting/discovery {
    proxy_pass https://127.0.0.1:9980;
    proxy_set_header Host $http_host;
  }

  # Capabilities
  location ^~ /hosting/capabilities {
    proxy_pass https://localhost:9980;
    proxy_set_header Host $http_host;
  }

  # Main websocket
  location ~ ^/lool/(.*)/ws$ {
    proxy_pass https://127.0.0.1:9980;
    proxy_set_header Upgrade $http_upgrade;
    proxy_set_header Connection "Upgrade";
    proxy_set_header Host $http_host;
    proxy_read_timeout 36000s;
  }

  # Download, presentation and image upload
  location ~ ^/lool {
    proxy_pass https://127.0.0.1:9980;
    proxy_set_header Host $http_host;
  }

  # Admin Console websocket
  location ^~ /lool/adminws {
    proxy_pass https://127.0.0.1:9980;
    proxy_set_header Upgrade $http_upgrade;
    proxy_set_header Connection "Upgrade";
    proxy_set_header Host $http_host;
    proxy_read_timeout 36000s;
  }

  # 可以自行查看是否有安裝看成功,如果有會顯示 ok ,如果有對外公開的話會建議在這裡限制來源的 ip
   location /{
    allow 127.0.0.1;
    deny all;
    proxy_pass https://127.0.0.1:9980;
  }
}
檢視看 OxOOL Community 運作狀態 「 https://你的網域/loleaflet/dist/admin/admin.html 」會要求輸入帳號密碼登入後畫面如下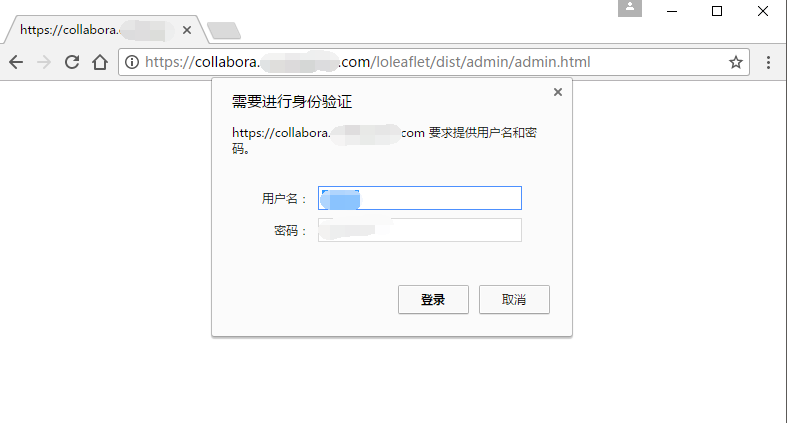
登入後畫面


 iThome鐵人賽