早安 今天是週二美好的早晨
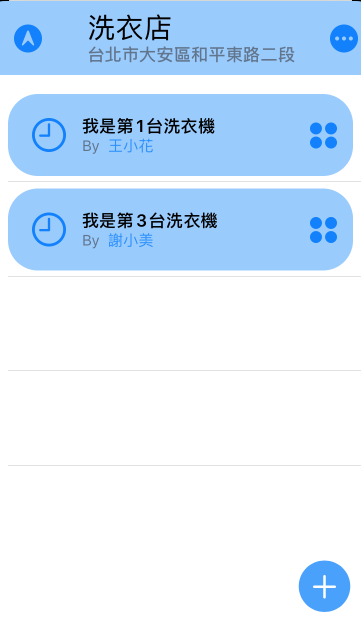
今天來做怎麼生成標記點以及自訂標記點
let createAnnotation = MKPointAnnotation()
// 設定大頭針座標
createAnnotation.coordinate = CLLocationCoordinate2D(latitude: 123, longitude: 123)
// 將大頭針加入 mapView 中
mapView.addAnnotation(createAnnotation)
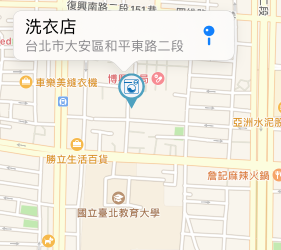
這是一般加入大頭針的方式
然後老方法
func mapView(_ mapView: MKMapView, viewFor annotation: MKAnnotation) -> MKAnnotationView? {
            let identifier = "placemark"
            var annotationView = mapView.dequeueReusableAnnotationView(withIdentifier: identifier)
            if annotationView == nil {
                annotationView = MKPinAnnotationView(annotation: annotation, reuseIdentifier: identifier)
                annotationView?.canShowCallout = true
                annotationView?.image = UIImage(named: "icon_map.png")
                //這裡是圖片樣子
                let infoButton = UIButton(type: .detailDisclosure)
                infoButton.setImage(UIImage(named: "nav_map_blue"), for: [] )
                // 按鈕按下後的動作
                infoButton.addTarget(self, action: #selector(Coordinator.onClickDetailButton(_:forEvent:)),
                 for: UIControl.Event.touchUpInside)
                annotationView?.rightCalloutAccessoryView = infoButton

            } else {
                annotationView?.annotation = annotation
            }
            return annotationView
}
並讓他在點擊的時候觸發onClickDetailButton(_:forEvent:)
讓你利用 objc 做些什麼出來
我的話
是在點擊的時候生出視圖出來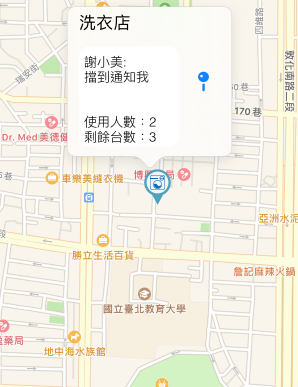
以及在點擊第二次後 出現sheet
sheet 就是判斷式的改變以及值的輸入