當已經寫好自動化設定雲端服務腳本,卻又怕在本機端定時執行會不小心關機斷掉,或是想要自動化更新Azure服務上的SSL憑證,該怎麼辦呢? Azure 的答案是,用Automation Accounts吧!
Azure Automation Accounts 提供的服務包含:程序自動化、組態管理、更新管理、共用功能及異質功能。
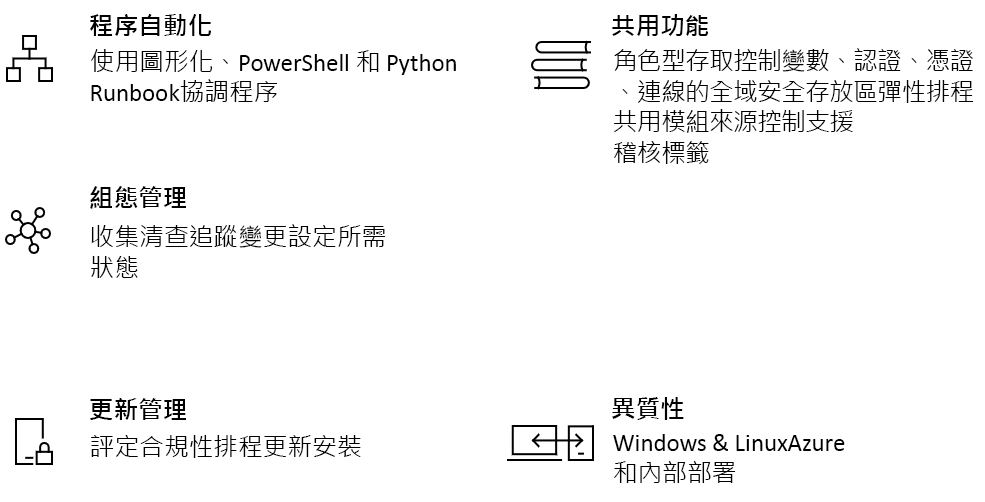
Automation Account 使用 Runbook 來執行動作,有4種方法可以使用:圖形化、PowerShell、PowerShell workflow、Python,今天試著執行圖形化的Runbook!
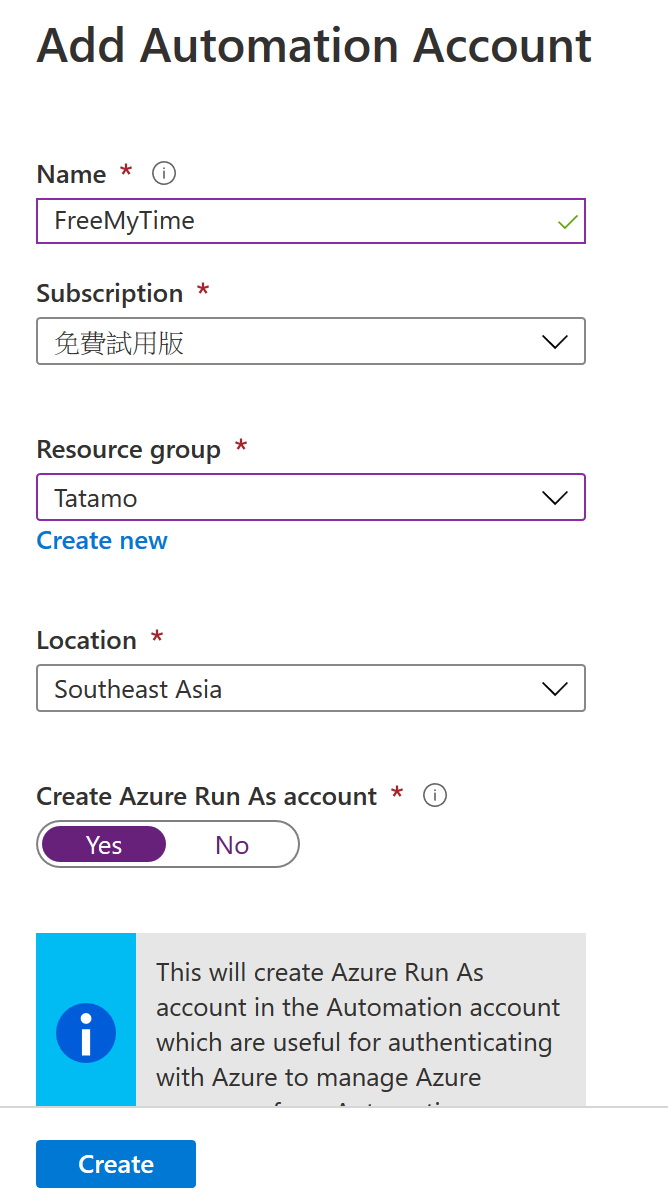
進入Automation Accounts並建立新的資源,命名並選擇Resource group後,按下Create即可。
最下方有一個Create Azure Run As account的設定,若建立的使用者不是管理者身分,此項目將無法建立,也就是說你建立的Automation Account會無法以使用者身分做一些需要授權的動作。像我之前執行專案時,需要建立一個Automation Account來自動更新Application Gateway的SSL憑證,因為建立時權限不夠,無法同時建立Azure Run As account,導致沒有權限存取Application Gateway的資訊,請管理員調整我的權限後才可以使用。
建立後進入並按一下Runbook,可以看到系統自動幫你建立了3個範例,由上而下個別是圖形、python及power shell的範例。

按一下第一個範例進入圖形化Runbook的畫面,再按一下Edit就可以看到圖形化的Runbook長這樣:
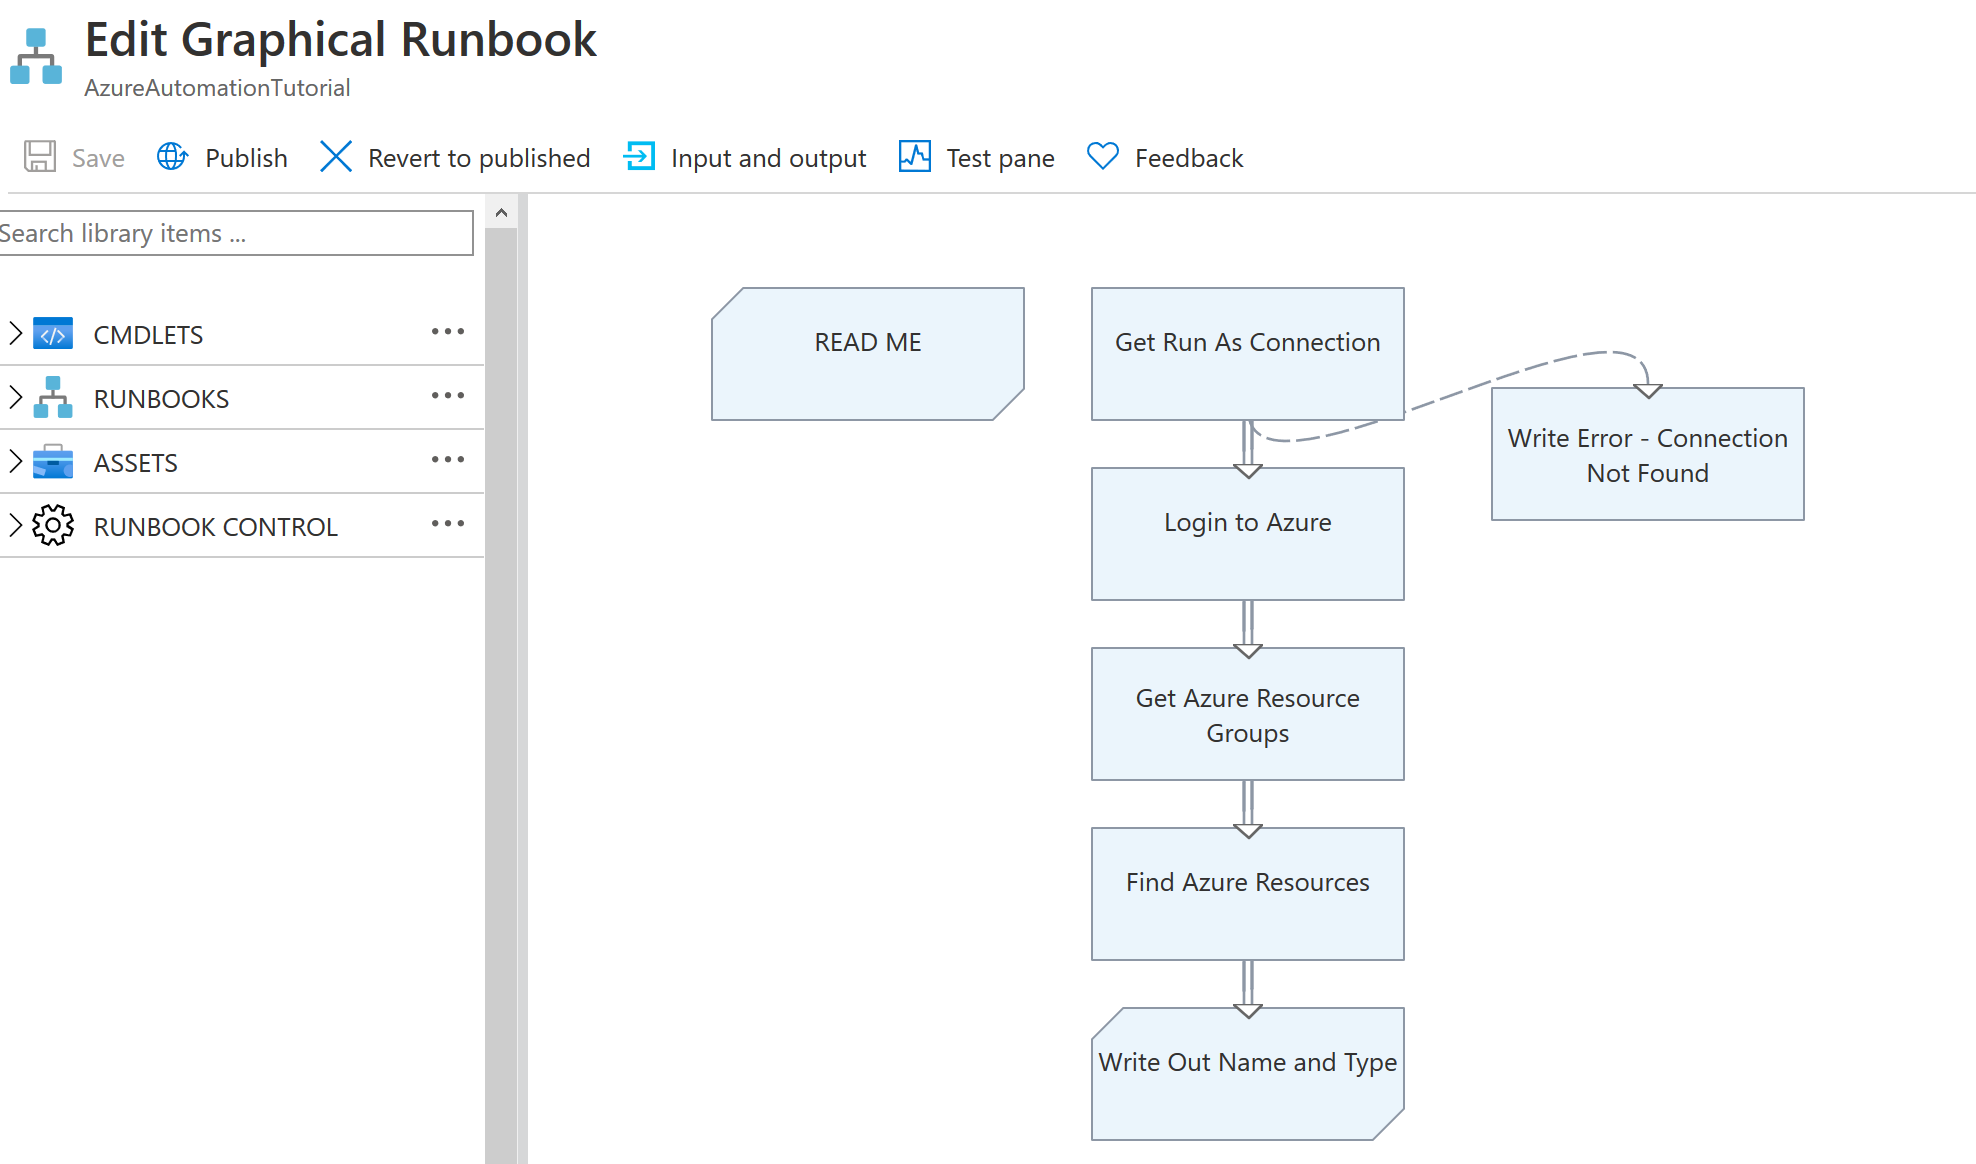
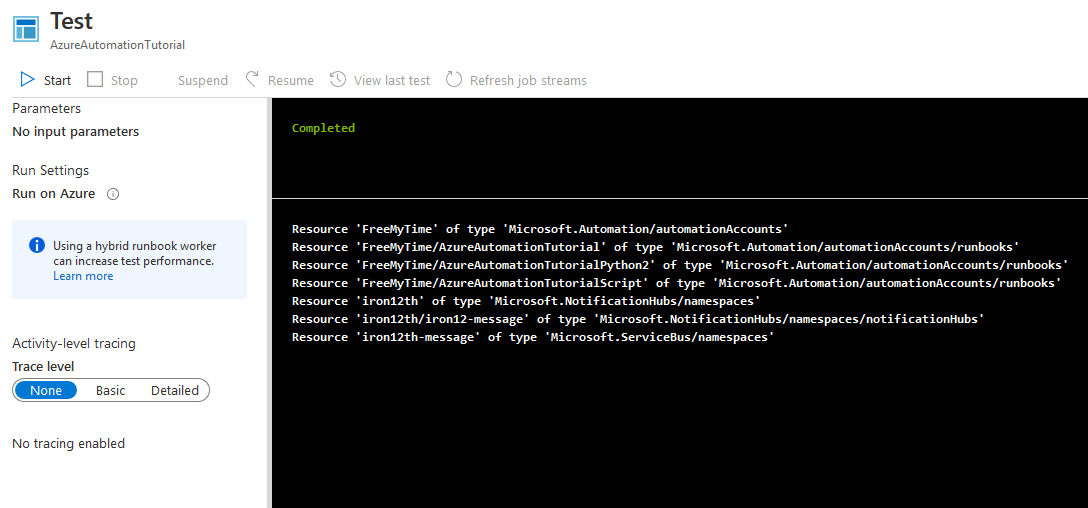
圖形化的用法目的是讓流程能夠一眼看出來,但需要執行的項目都需要從CMDLETS尋找並加入畫布,設定好每一個指令的流程後,他就會依照箭頭方向逐一執行指令!按下Test pane 並按Start便可以看到輸出結果,這個範例按照上圖的流程逐一執行,將此租用戶中所有資源列出。
而python及powershell的runbook就是執行以python及powershell寫的指令,來個別看一下吧。點一下圖片第2個範例進入python runbook,並按edit檢視程式碼。

須注意的是這邊是使用python2,不支援python3。
"""
Python support for Azure automation is now public preview!

Azure Automation documentation : https://aka.ms/azure-automation-python-documentation
Azure Python SDK documentation : https://aka.ms/azure-python-sdk

This tutorial runbook demonstrate how to authenticate against Azure using the Azure automation service principal and then lists the resource groups present in the specified subscription.
"""
import azure.mgmt.resource
import automationassets
from msrestazure.azure_cloud import AZURE_PUBLIC_CLOUD

def get_automation_runas_credential(runas_connection, resource_url, authority_url ):
    """ Returns credentials to authenticate against Azure resoruce manager """
    from OpenSSL import crypto
    from msrestazure import azure_active_directory
    import adal

    # Get the Azure Automation RunAs service principal certificate
    cert = automationassets.get_automation_certificate("AzureRunAsCertificate")
    pks12_cert = crypto.load_pkcs12(cert)
    pem_pkey = crypto.dump_privatekey(crypto.FILETYPE_PEM, pks12_cert.get_privatekey())

    # Get run as connection information for the Azure Automation service principal
    application_id = runas_connection["ApplicationId"]
    thumbprint = runas_connection["CertificateThumbprint"]
    tenant_id = runas_connection["TenantId"]

    # Authenticate with service principal certificate
    authority_full_url = (authority_url + '/' + tenant_id)
    context = adal.AuthenticationContext(authority_full_url)
    return azure_active_directory.AdalAuthentication(
        lambda: context.acquire_token_with_client_certificate(
            resource_url,
            application_id,
            pem_pkey,
            thumbprint)
    )


# Authenticate to Azure using the Azure Automation RunAs service principal
runas_connection = automationassets.get_automation_connection("AzureRunAsConnection")
resource_url = AZURE_PUBLIC_CLOUD.endpoints.active_directory_resource_id
authority_url = AZURE_PUBLIC_CLOUD.endpoints.active_directory
resourceManager_url = AZURE_PUBLIC_CLOUD.endpoints.resource_manager
azure_credential = get_automation_runas_credential(runas_connection, resource_url, authority_url)

# Intialize the resource management client with the RunAs credential and subscription
resource_client = azure.mgmt.resource.ResourceManagementClient(
    azure_credential,
    str(runas_connection["SubscriptionId"]),
    base_url=resourceManager_url)

# Get list of resource groups and print them out
groups = resource_client.resource_groups.list()
for group in groups:
    print group.name.encode('utf-8')
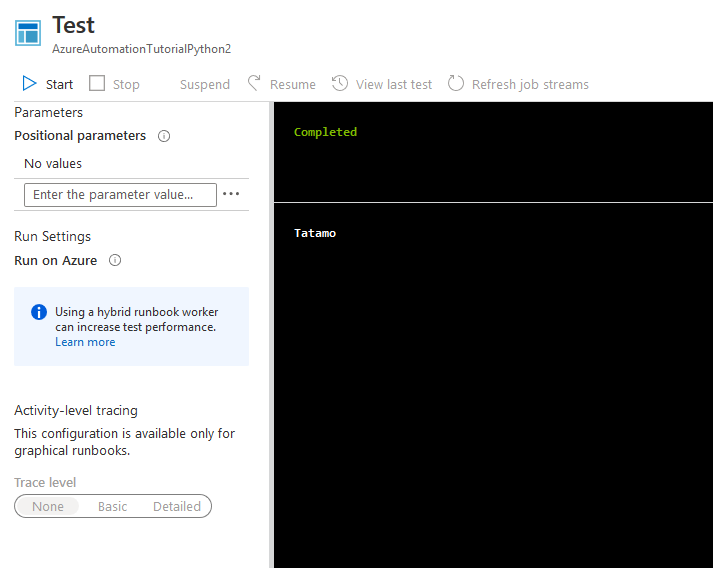
進入Test pane可以測試執行後的結果,範例程式最後會取得此租用戶的所有resource group。因為我目前只有建立一個Tatamo,這邊也只建立一個。
最後來看powershell,同樣的方式進入第3個範例並檢視程式碼。
<#
    .DESCRIPTION
        An example runbook which gets all the ARM resources using the Run As Account (Service Principal)

    .NOTES
        AUTHOR: Azure Automation Team
        LASTEDIT: Mar 14, 2016
#>

$connectionName = "AzureRunAsConnection"
try
{
    # Get the connection "AzureRunAsConnection "
    $servicePrincipalConnection=Get-AutomationConnection -Name $connectionName

    "Logging in to Azure..."
    Add-AzureRmAccount `
        -ServicePrincipal `
        -TenantId $servicePrincipalConnection.TenantId `
        -ApplicationId $servicePrincipalConnection.ApplicationId `
        -CertificateThumbprint $servicePrincipalConnection.CertificateThumbprint
}
catch {
    if (!$servicePrincipalConnection)
    {
        $ErrorMessage = "Connection $connectionName not found."
        throw $ErrorMessage
    } else{
        Write-Error -Message $_.Exception
        throw $_.Exception
    }
}

#Get all ARM resources from all resource groups
$ResourceGroups = Get-AzureRmResourceGroup

foreach ($ResourceGroup in $ResourceGroups)
{
    Write-Output ("Showing resources in resource group " + $ResourceGroup.ResourceGroupName)
    $Resources = Find-AzureRmResource -ResourceGroupNameContains $ResourceGroup.ResourceGroupName | Select ResourceName, ResourceType
    ForEach ($Resource in $Resources)
    {
        Write-Output ($Resource.ResourceName + " of type " +  $Resource.ResourceType)
    }
    Write-Output ("")
}
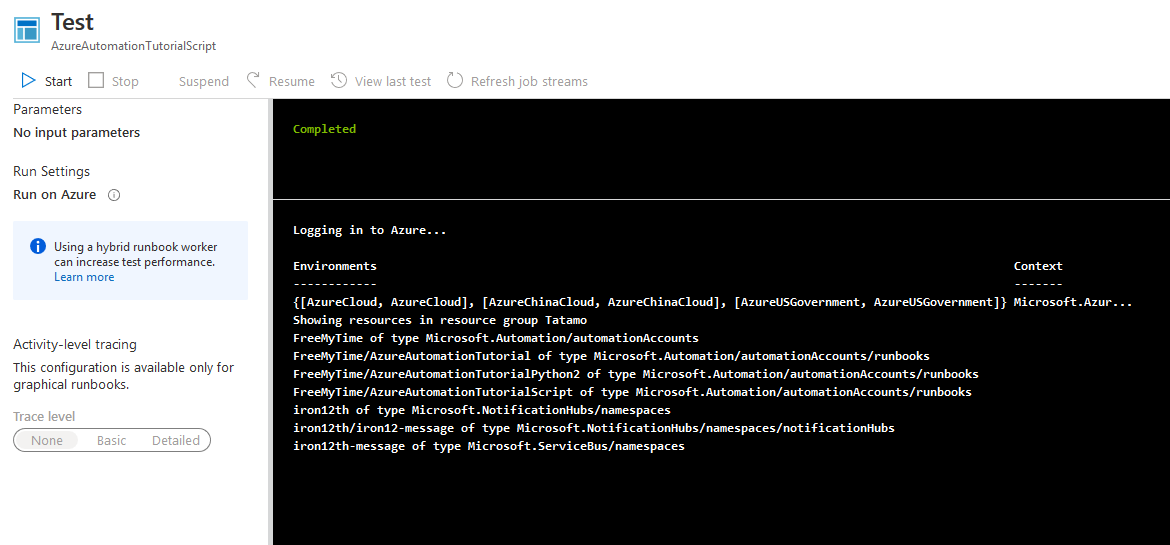
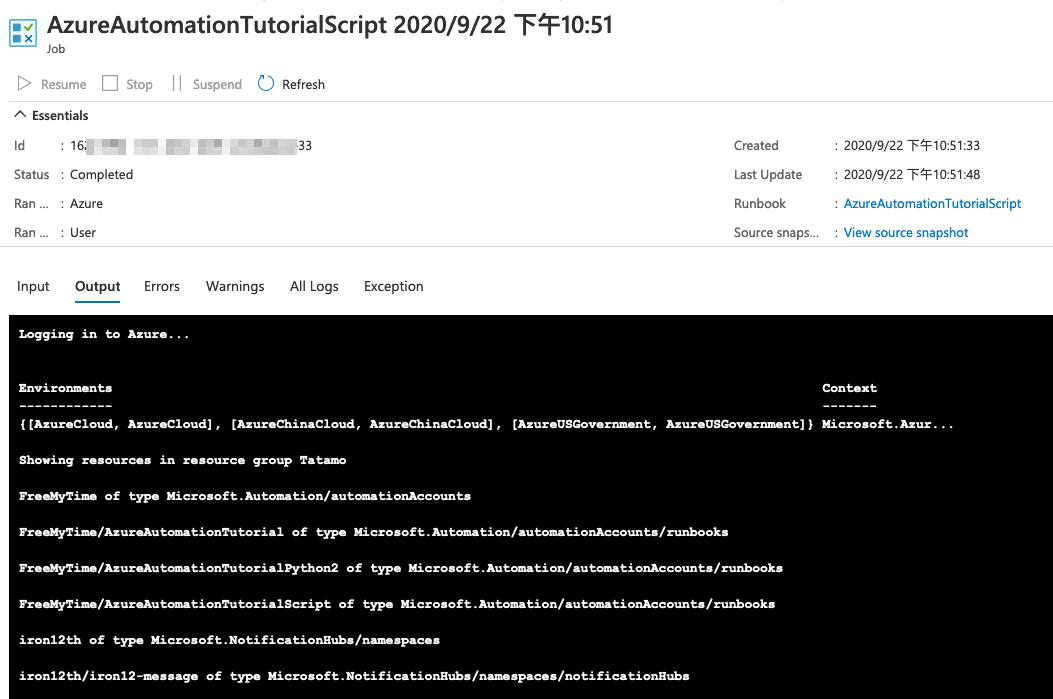
與圖形化runbook範例一樣,最後輸出此租用戶中所有資源。
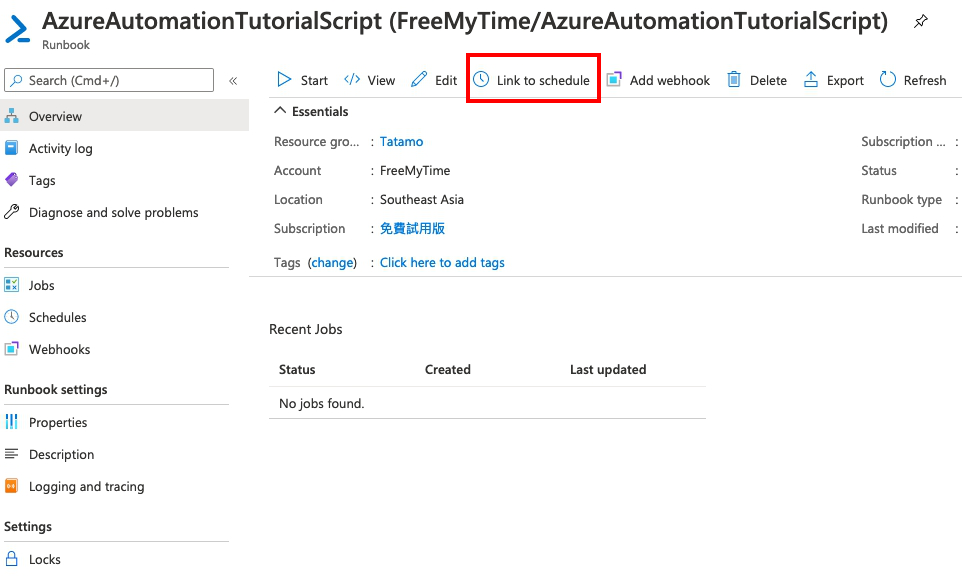
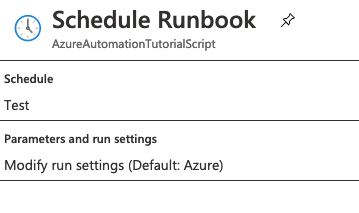
每一個runbook都可以設定排程執行,在進入runbook後,可以看到一個Link to shedule按鈕,按一下可以進入設定。
接著會跳出兩個選項,一個是要你設定排程的時間以及頻率、終止時間等;另一個則是設定執行使用的參數,當runbook中有需要讀取參數的時候,這裡需要設定。
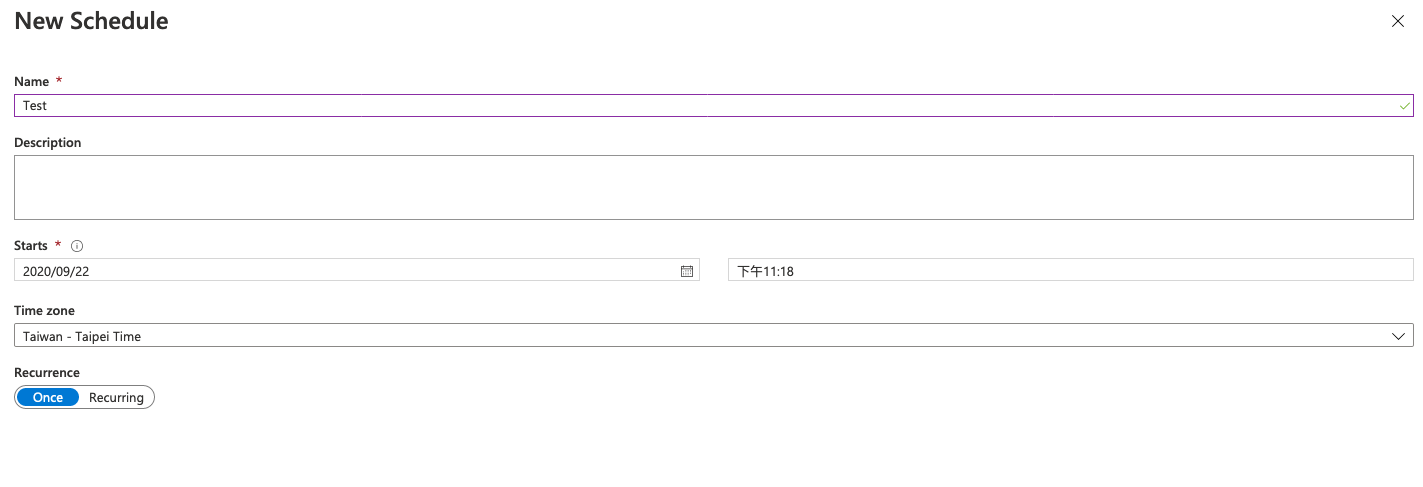
我這邊使用的是powershell的排程,因為不需要輸入任何參數,在設定好排程後按一下OK就完成囉!
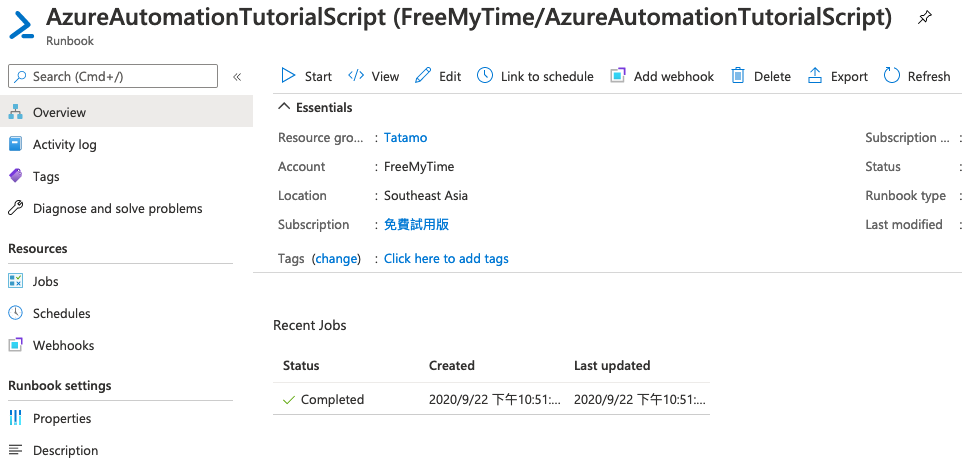
接下來就是等待執行結果,可以在進入runbook後的畫面下方區塊看到執行進度。
再點進去可以看到個別執行結果,包含輸出的結果及錯誤或警告訊息等,讓你了解此次執行是否成功,或遇到哪些問題。
今天主要介紹了Automation Accounts 的功能以及操作解說,以及圖形化runbook、powershell runbook及python runbook的操作方式,另外也有提到設定時間排程的方式。
★ Amos3.0 團隊系列文 ★
以下為團隊所有成員的主題,也歡迎大家前往欣賞喔!
