今天小通的團隊,是使用 Quasar 框架
他的主管希望他先了解,如何使用Quasar CLI 建立一個新的Quasar專案
小通照著官方文件指示,打開了系統的終端機,輸入了「npm install -s @quasar/cli」
結果出現了「npm not found」,請問:
根據Quasar 的官方文件說明:
Make sure that you have Node >=10 and NPM >=5 installed on your machine.
(1)執行 npm install -s @quasar/cli 之後,他會在你「目前」的資料夾位置安裝 「Quasar CLI」
離開了當前路徑之後,使用Quasar CLI 的指令,會出現「'quasar' 不是內部或外部命令、可執行的程式或批次檔。」或「quasar not found」,無法執行Quasar CLI 的指令

(2)安裝指令應該修正為 「npm install -g  @quasar/cli」,這樣子在任何路徑都可以使用Quasar CLI 的工具指令

(3)如果手賤安裝下去,可以在原本的安裝路徑下,執行「npm uninstall -s @quasar/cli」移除
$ quasar -v
1.1.0
$ quasar create -h

  Description
    Creates a Quasar App or App Extension project folder

  Usage
    $ quasar create <project-name> [--kit <kit-name>] [--branch <version-name>]

  App Examples
    $ quasar create my-project
      # installs an App project with the latest App starter kit
    $ quasar create my-project --branch v0.17
      # installs an App project from a specific version (only major+minor version)
    $ quasar create my-project --kit user/github-starter-kit
      # installs an App project with a custom starter kit from GitHub
    $ quasar create my-project --kit ./starter-kit-folder
      # installs an App project using a starter kit located at ./starter-kit-folder

  App Extension Examples
    $ quasar create my-extension-project --kit app-extension
      # installs an App Extension project with the latest Quasar App Extension starter kit
    $ quasar create my-extension-project --kit user/github-extension-starter-kit
      # installs an App Extension project with a custom starter kit from GitHub
    $ quasar create my-extension-project --kit user/github-extension-starter-kit --branch dev
      # installs an App Extension project with a custom starter kit from GitHub using the dev branch

  Options
    --kit, -k      Use specific starter kit
    --branch, -b   Use specific branch of the starter kit
    --clone, -c    Use git clone
    --offline, -o  Use a cached starter kit
    --help, -h     Displays this message
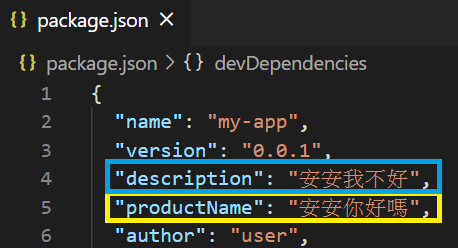
? Project product name (must start with letter if building mobile apps) 安安你好嗎

? Project description 安安我不好

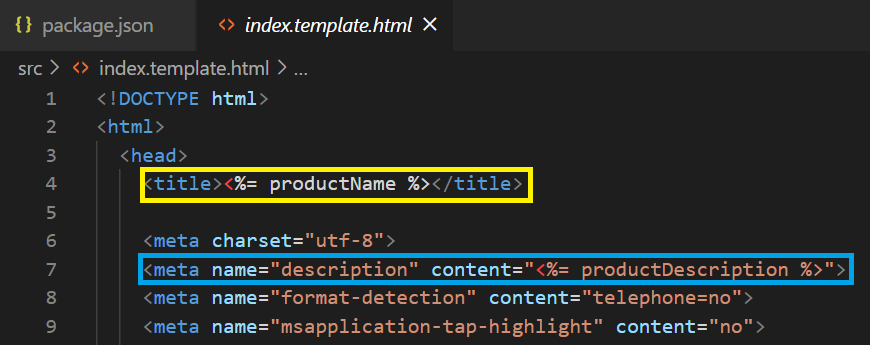
這兩個問題的回答會分別寫到Package.json裡面
每當Webpack編譯的時候帶入src/index.template.html
如下方兩張圖的藍色與黃色標示處


切到專案資料夾底下,執行「quasar dev」
"scripts": {
    "dev": "quasar dev -m"
}
從Git下來的專案,並不包「node_modules」的資料夾與所有套件檔案
需要先執行「npm install」將package.json裡面的所有套件下載到專案目錄底下
公司的主管看到小通成功使用Quasar CLI 建立一個專案後
依照專案開發要了解的問題,提出問題請小通研究:
quasar.config.js
.gitignore
public
src/layouts
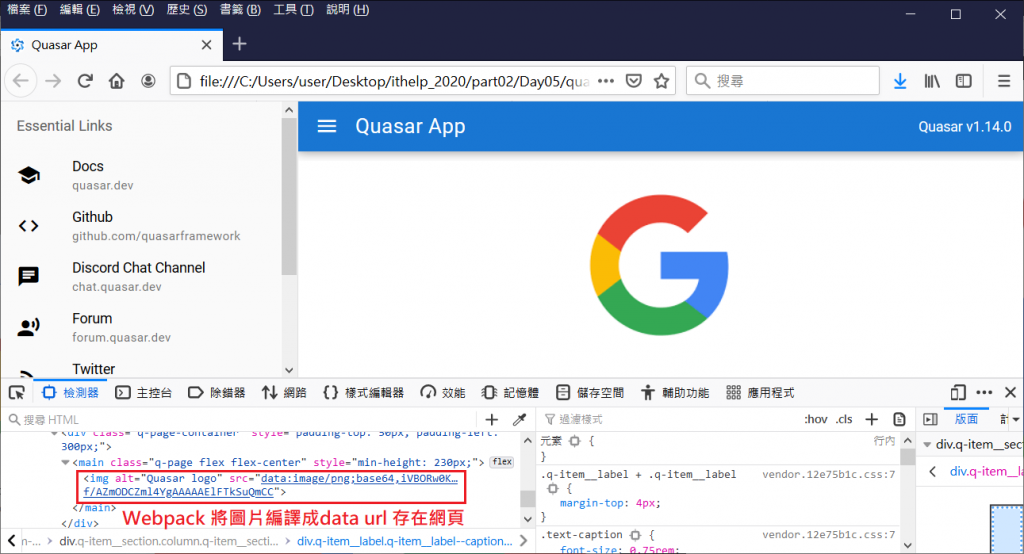
正常,圖片經過url loader 和 file loader處理後,轉成base64,存放在前端的程式碼

src/pages
src/components
在「scr/boot」資料夾,新增一個cookie.js
將取得cookie的過程在cookie.js寫在export default function ({ssrContext}) {} 裡面

有關Vuex的資料夾是 「src/store」
在「src/router/routes.js」
針對每個頁面,設定 meta: {} 來註記必須登入,以及限制登入的身分
例如:
// http://xxx.com.tw/backend/
// http://xxx.com.tw/backend/area01
// http://xxx.com.tw/backend/area01/post
// http://xxx.com.tw/backend/area01/edit/01

{
    path: '/backend',
    component: () => import('layouts/Back.vue'),
    children: [
      { path: '', name: 'back.index', component: () => import('pages/Index.vue') },
      {
        path: '/area01',
        component: { render: h => h('router-view') }, /* 使用父層的Layout component */
        children: [
          { path: '', name: 'back.area01.list', component: () => import('pages/back/area01/list.vue'), meta: { requireLogin: true, roles: ['user'] } },
          { path: 'post', name: 'back.area01.post', component: () => import('pages/back/area01/post.vue'), meta: { requireLogin: true, roles: ['user', 'manager'] } },
          { path: 'edit/:ID', name: 'back.area01.edit', component: () => import('pages/back/area01/edit.vue'), meta: { requireLogin: true, roles: ['user', 'manager'] } },
        ]
      }
    ]
}
形象網站需要搜尋引擎的曝光,需要SSR解決SPA的SEO問題
網站的管理後台通常是不能在搜尋引擎上曝光,甚在拆開成獨立的位置,因此不需要SSR
透過 hot module replacement 將更改前與更改後的資訊轉換成hash值做比對
決定是否更新部分的內容,或者重新整理畫面
XMLHttpRequest cannot load https://api.example.com. No 'Access-Control-Allow-Origin' header is present on the requested resource. Origin 'http://localhost:8080' is therefore not allowed access.
quasar dev 啟動的Webpack Dev HTTP Server,預設網址是「http://localhost:8080」,跟API的網址「https://api.example.com」是屬於不同的網址來源,API端也不允許來自「https://api.example.com」的的 client端 request
所以你從瀏覽器打開後,此Request不符合CORS 同源政策,由瀏覽器端檔下來

解法有兩種,一種是請後端於API端允許http://localhost:8080 的Origin,另外一個是透過Webpack的 devServer 設定 Proxy,並將Origin改變成和後端API相同
if ()
{

}
else
{

}
檔案「.eslintrc.js」 的「rules:[]」裡面,加入下面的規則:
'brace-style': 'allman'
檢查檔案「.eslintrc.js」 的「extends」,是否包含下面三個其中任一個
'plugin:vue/essential', // Priority A: Essential (Error Prevention)
'plugin:vue/strongly-recommended', // Priority B: Strongly Recommended (Improving Readability)
'plugin:vue/recommended', // Priority C: Recommended (Minimizing Arbitrary Choices and Cognitive Overhead)

沒有的話,依照文件安裝Plugin,並將規則加到.eslintrc.js
https://eslint.vuejs.org/user-guide/#installation
在檔案「.eslintignore」裡面加入「/src/lib」
在 quasar.config.js 裡面的 build: {}
新增「distDir: 'dist/xxx',」,xxx就是build之後的資料夾名稱
CommonJs 是使用 require 與 module.exports 對模組引用與輸出,但不論如何都是「整支檔案」的輸出與輸入,無法像ESModule做到「部分」輸出與輸入。因此無法透過Tree Shaking 來移除不必要的程式碼。
Code Splitting:將核心功能與和各個功能模組的程式碼拆分到不同的檔案,在需要的時候,以程式的方式動態載入

Cache Brusting:瀏覽器會用檔名來判斷是否需要更新檔案,如果檔案名稱一樣,它就不會重新下載。因此在檔案名稱裡面加上[chunkhash],解決檔案更新時因快取存取到舊版的問題

Minify & Uglify:替除HTML、CSS、Javascript 的程式碼多餘的空白與空白行
quasar build 打包後,會產生一個「dist」資料夾,裡面會有一個「spa」資料夾
把「spa」資料夾裡面的所有檔案壓縮交給後端佈署
