Vue:設定基本路由,可以拆解成以下步驟:
本節利用引入的方式來實作Vue Router的基本設定:
<head>
    <meta charset="UTF-8">
    <meta name="viewport" content="width=device-width, initial-scale=1.0">
    <script src="https://unpkg.com/vue/dist/vue.js"></script>
    <!--Router-Link透過cdn的方式掛載-->
    <script src="https://unpkg.com/vue-router/dist/vue-router.js"></script>
    <title>day18 Router-Setting</title>
</head>

  定義兩個template:

    const Index1 = { template: '<div>Page1</div>' }
    const Index2 = { template: '<div>Page2</div>' }

  route陣列中,所帶的物件,都有兩個主要屬性:(1)path(網址) (2)component(畫面)。
  因為,在此其中,網址要對應到畫面上。

    const routes = [
        {
            path: "/index1",
            component: Index1,
        },
        {
            path: "/index2",
            component: Index2,
        }
    ]

  實例化router

    const router = new VueRouter({
        routes
    })

  註冊Router於Vue實例中

    const vm = new Vue({
        el: "#app",
        //註冊router
        router,
        data() {
            return {

            }
        }
    })
完成第四步驟後,可以透過Vue Devtools來看看目前router是否有被偵測到: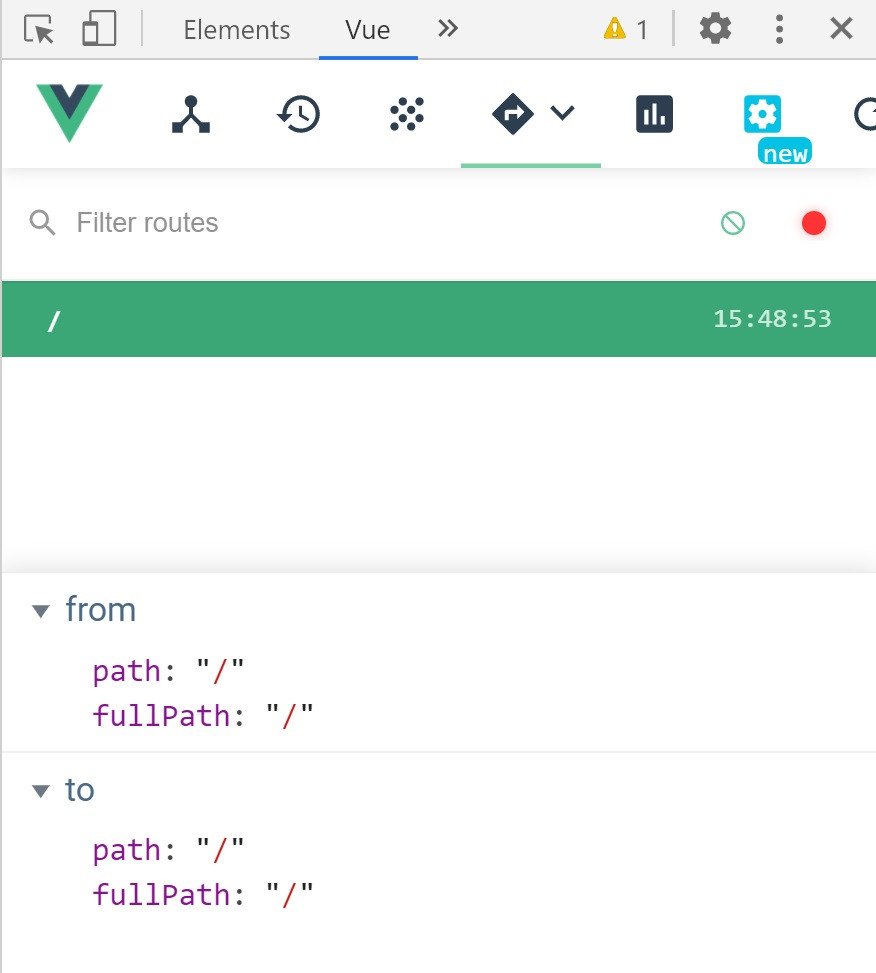
你會很快發現,vue devtools已經偵測到有router的設置。我們可以試著在網址上輸入我們設定好的path:
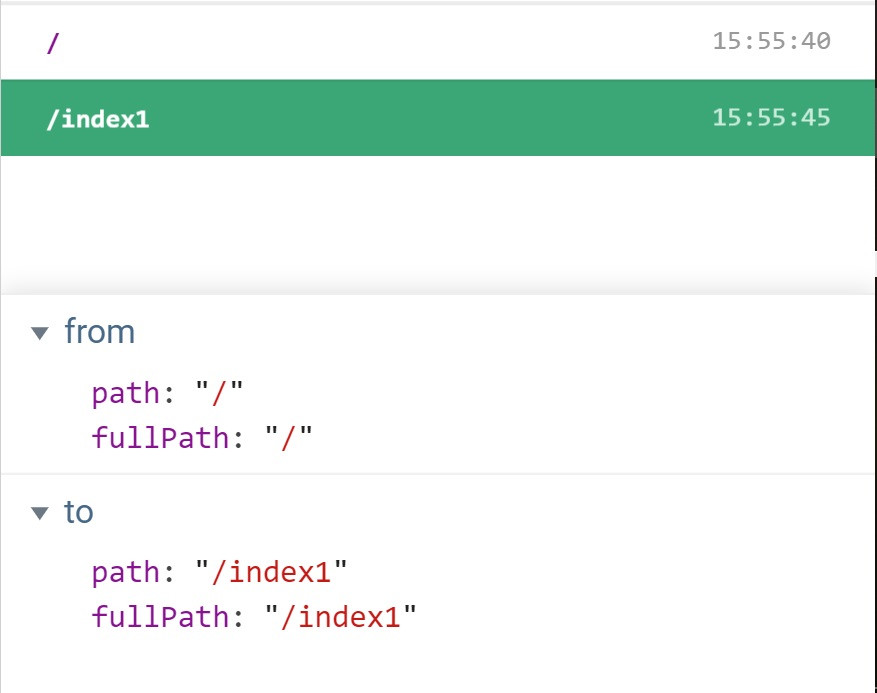
如此,我們可以很明顯地看到,路徑是從主頁到/index1的頁面上。
ps(透過Vue DevTools,可以觀察vue的數據資料、路徑等,是一套非常好用的開發輔助工具)
如果,沒有將模組掛載到頁面上,當然不會顯示,所以,記得要將router-view掛載到頁面上喔!(以本範例,路由規則對應的component放在#app的區塊中)
<div id="app">
        <router-view></router-view>
 </div>


Vue是模組化的設計概念,而router是處理網址和畫面上的搭配,最後搭配router-view為顯示畫面的地方。
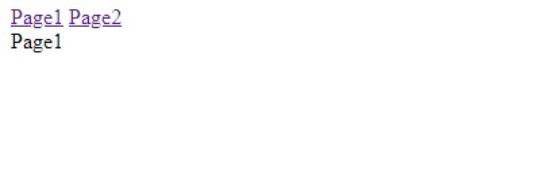
但是,你應該不會想每次都在網址上輸入相對應的頁面吧!此時的你,就需要使用router-link。
<div id="app">
        <router-link to="/index1">Page1</router-link>
        <router-link to="/index2">Page2</router-link>
        <router-view></router-view>
</div>
到這裡,我們看一下Vue Devtools:
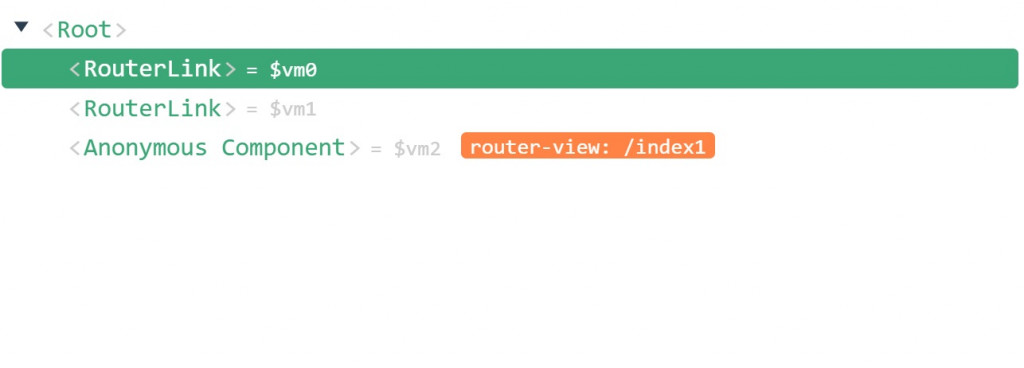
透過$vm,我們來認識一下router及route的差異:
*** Router:**
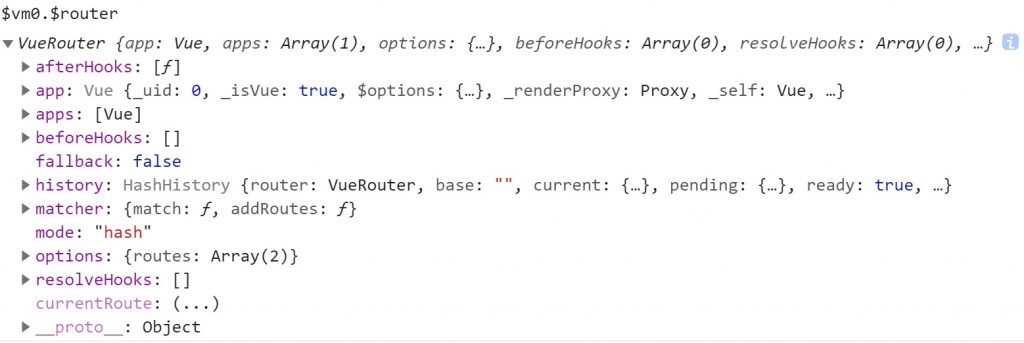
這邊可以很清楚的看到router的相關資訊($vm0.$router為router實體),包含本範例使用hash模式,掛載在app下、路由設定等資訊。
*** route:**

如果是route,專門負責讀取或記錄資料。裡面包含說明完整路徑、使用正則判斷路徑等。
Vue:只有搞清出router及route的狀況,才不會在撰寫程式碼上,發生錯誤或思路不清楚喔!!
待續......


 iThome鐵人賽