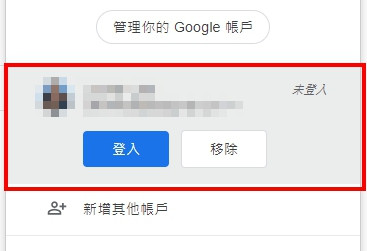
今天要來將頭像菜單中的 [登入] 和 [移除] 功能實作出來唷~
開啟前端(f2e)專案開始吧!!
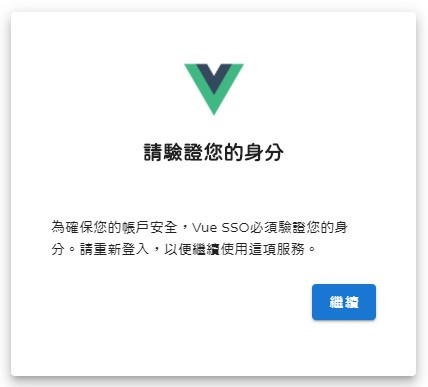
擴展面板的登入會導向 [驗證帳號] 頁面,目的是提醒使用者需要驗證後才能登入
在 [登入] 按鈕加上click事件,傳入帳號及姓名:
<v-btn
  ...
  v-text="`登入`"
  @click="goToVerifyUser(item.accountId, item.username)"
></v-btn>
對應的事件內容使用 $router.push() 方法導向,並傳遞帳號姓名參數:
goToVerifyUser(accountId, username) {
  this.$router.push({ name: "VerifyUser", query: { accountId, username } });
},
這邊教學一個小技巧,和一位神人學到的
開啟路由設定檔 /router/index.js 加上自定義function: mixProps,用途是將傳入的參數合併:
const mixProps = function () {
  return route => {
    return Object.assign({}, route.params, route.query)
  }
}
合併後的 mixProps 在路由設定上對應給 props,例如:
const routes = [
  ...,
  {
    path: '/login',
    name: 'Login',
    component: Login,
    props: mixProps(),
  },
]
完成之後在頁面中在取得參數時就不用分params、query,全都用 props 就能接收囉~
是不是超方便der![]()
打開 /views/Login.vue 來用props接收參數吧!!
export default {
  name: "Login",
  props: ["accountId", "username"],
  ...
}
接著用 watch 來監聽 accountId 和 username,如果有值就對應到 user 中:
watch: {
  accountId: {
    handler(newValue, oldValue) {
      if (newValue) {
        this.user.accountId = newValue;
      }
    },
    immediate: true,
  },
  username: {
    handler(newValue, oldValue) {
      if (newValue) {
        this.user.username = newValue;
      }
    },
    immediate: true,
  },
}
可以看到驗證身分頁抓的到帳號,點 [繼續] 之後的輸入密碼頁也能抓到帳號和姓名!!
接著要做的是擴展面板中的 [移除] 按鈕功能
在 [移除] 按鈕加上click事件,傳入帳號:
<v-btn
  ...
  v-text="`移除`"
  @click="removeUser(item.accountId)"
></v-btn>
對應事件內容呼叫移除帳戶API,網址帶上帳號參數:
removeUser(accountId) {
  const api = `${process.env.VUE_APP_APIPATH}/users/signintokens/${accountId}`;
  this.$http({
    method: "PUT",
    url: api,
  })
    .then((response) => {
      if (response.data.success) {
        console.log("帳戶移除成功");
      }
    })
    .catch((error) => {
      console.log(error);
    });
},
注意這裡用的是 http PUT 方法!!
測試點 [移除] 按鈕,會看到console確實有跳出「帳戶移除成功」!!
仔細看了一下,原來是因為data並沒有被更新
於是我在移除成功之後,再次呼叫帳戶清單API把data更新!!
移除成功之後,要將帳戶清單資料更新,所以這裡要再次呼叫帳戶清單API!!
因為 created hook 也有呼叫帳戶清單API的動作,可以把它們合併
於是寫了新的method: getSigninTokens() 將呼叫API的程式碼丟進去:
getSigninTokens() {
  const api = `${process.env.VUE_APP_APIPATH}/users/signintokens`;
  this.$http({
    method: "GET",
    url: api,
  })
    .then((response) => {
      if (response.data.success) {
        this.users = response.data.users;
      }
    })
    .catch((error) => {
      console.log(error);
    });
},
帳戶移除成功之後呼叫它來做更新:
if (response.data.success) {
  this.getSigninTokens();
  console.log("帳戶移除成功");
}
created hook也改為呼叫它:
created() {
  this.getSigninTokens();
},
到這邊就完成串接帳戶移除API囉~
可以看到我把帳戶移除時,帳戶清單也會跟著更新:
加碼把 [新增其他帳戶] 功能也做出來吧~
在 [新增其他帳戶] 外層的 <v-list-item> 加上事件:
<v-list-item @click="goToLogin">
  ...
  <v-list-item-content>
    <v-list-item-title v-text="`新增其他帳戶`"></v-list-item-title>
  </v-list-item-content>
</v-list-item>
結束...(xD)
說明一下,goToLogin 事件是之前寫首頁上方 [登入] 按鈕的觸發事件,功能是前往登入頁面,而 [新增其他帳戶] 也是要前往登入頁面來用其他帳號登入,也就是說它們的功能是一樣的!!
今日重點:
有需要改進或是任何意見建議歡迎下面留言~
