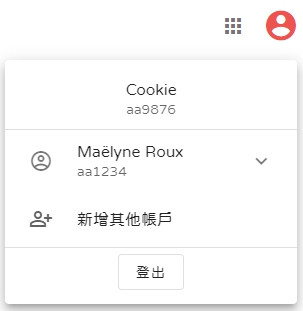
回到前端,要來接上帳戶清單資料囉!!
開啟前端(f2e)專案開始吧!!
打開 /views/Index.vue
呼叫帳戶清單API的時機我設定在 created hook,成功後將回覆的帳戶清單資料放進data:
created() {
  const api = `${process.env.VUE_APP_APIPATH}/users/signintokens`;
  this.$http({
    method: "GET",
    url: api,
  })
    .then((response) => {
      if (response.data.success) {
        this.users = response.data.users;
      }
    })
    .catch((error) => {
      console.log(error);
    });
},
data() {
  return {
    users: []
  };
},
註: 注意呼叫時使用http GET方法唷!!
帳戶清單分為 啟用中 及 未啟用 的帳號使用 computed 來過濾分類:
computed: {
  inactiveUsers() {
    return this.users.filter(function(item) {
      return item.active === false;
    });
  },
  activeUser() {
    return this.users.find(function(item) {
      return item.active === true;
    });
  },
},
內容用到了陣列的 filter 及 find 方法
filter作用是將陣列根據條件做篩選find作用是搜尋符合條件的第一筆資料
順便學到了 active 的反義詞是 inactive ![]()
未啟用的帳戶清單放在 v-expansion-panel 擴展面板中
原來 v-for 的設定從2改為 inactiveUsers:
<v-expansion-panel
  v-for="(item, index) in inactiveUsers"
  ...
>
下方 v-list-item-title,v-text值改為 item.username:
<v-list-item-title
  v-text="item.username"
></v-list-item-title>
v-list-item-subtitle,v-text值改為 item.accountId:
<v-list-item-subtitle
  v-text="item.accountId"
></v-list-item-subtitle>
啟用中的帳號放在最上方,將原來的假資料替換掉吧!!
v-list-item-title,v-text值改為 activeUser.username:
<v-list-item-title
  class="text-center"
  v-text="activeUser.username"
></v-list-item-title>
v-list-item-subtitle,v-text值改為 activeUser.accountId:
<v-list-item-subtitle
  class="text-center"
  v-text="activeUser.accountId"
></v-list-item-subtitle>
最後差點忘了,昨天沒提到我有先把 [登入] 按鈕加上 v-if="false",所以它沒出現,其實原本兩個會同時出現:
那這個怎麼解呢? 很簡單,利用剛剛做好的 activeUser 就可以摟~
[登入] 按鈕加上 v-if="!activeUser",只要找不到登入中的帳號它就會出現!!
<v-btn
  v-text="`登入`"
  v-if="!activeUser"
  ...
></v-btn>
頭像Menu則是加上 v-else 就可以了!!
<v-menu
  v-else
>
</v-menu>
到這裡就完成串接帳戶清單API囉~
當我登入了第二個帳號,第一個就會被設定為未啟用,並且呈現在帳戶清單中:
今日重點:
有需要改進或是任何意見建議歡迎下面留言~
