
今天這篇也是被遺忘的xD
趕快把他補起來哈哈
在 Day 08. F2E-選擇帳號 時已經將畫面做完,並且使用假資料來生成
忘記製作過程可以回頭複習一下~
我們就直接從真實資料替換開始做囉!!
將 /views/Index.vue 的 getSigninTokens() 複製過來:
getSigninTokens() {
  const api = `${process.env.VUE_APP_APIPATH}/users/signintokens`;
  this.$http({
    method: "GET",
    url: api,
  })
    .then((response) => {
      if (response.data.success) {
        this.users = response.data.users;
      }
    })
    .catch((error) => {
      console.log(error);
    });
},
在 created hook 觸發,就可以得到目前的帳戶清單囉!!
created() {
  this.getSigninTokens();
},
頁面最上方帳戶的 v-for 迴圈將2改為 users,並將帳號及姓名都替換掉:
<template v-for="(item, index) in users">
  <v-list-item
    :key="`account_${item.accountId}`"
    @click="
      removeMode
        ? confirmRemove(`${item.username} - ${item.accountId}`)
        : ''
    "
  >
    <v-list-item-avatar>
      <v-icon
        class="grey lighten-1 white--text"
        v-text="`mdi-account`"
      ></v-icon>
    </v-list-item-avatar>
    <v-list-item-content>
      <v-list-item-title
        class="font-weight-black"
        v-text="`${item.username}`"
      ></v-list-item-title>
      <v-list-item-subtitle
        v-text="`${item.accountId}`"
      ></v-list-item-subtitle>
    </v-list-item-content>
    <v-list-item-icon v-if="removeMode">
      <v-icon color="red" v-text="`mdi-minus-circle-outline`"></v-icon>
    </v-list-item-icon>
  </v-list-item>
  <v-divider :key="`d${index}`"></v-divider>
</template>
真實資料的介接就完成囉~
之前登入過的帳號就會顯示在可選擇的清單上,畫面如圖: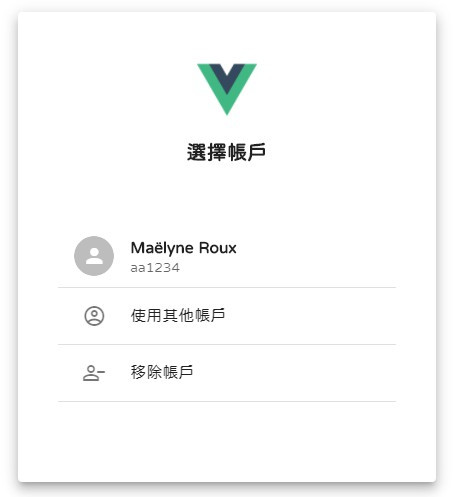
選擇帳號之後要導向 輸入密碼 頁
在原來的判斷後方改為 goToKeyinPswd() 方法並傳入帳號及姓名:
<v-list-item
  @click="
    removeMode
      ? ...
      : goToKeyinPswd(item.accountId, item.username)
  "
></v-list-item>
對應的方法內容:
導向輸入密碼頁並帶上帳號及姓名參數
goToKeyinPswd(accountId, username) {
  this.$router.push({ name: "KeyinPswd", query: { accountId, username } });
},
這樣就完成囉~
點下去之後就可以快速到達輸入密碼的關卡xD
這裡的移除帳戶和首頁的功能相同~
將在移除模式時點擊帳號觸發的 confirmRemove() 方法,修改一下傳入值:
<v-list-item
  @click="
    removeMode
      ? confirmRemove(item.accountId, item.username)
      : ...
  "
></v-list-item>
對應的方法內容改為:
confirmRemove(accountId, username) {
  this.clickAccountId = accountId;
  this.clickUsername = username;
  this.dialogShow = true;
},
對應的data也加上 clickAccountId 與 clickUsername:
data() {
  return {
    clickAccountId: "",
    clickUsername: "",
  };
},
將 /views/Index.vue 的 removeUser() ' 方法複製過來:
removeUser(accountId) {
  const api = `${process.env.VUE_APP_APIPATH}/users/signintokens/${this.clickAccountId}`;
  this.$http({
    method: "PUT",
    url: api,
  })
    .then((response) => {
      if (response.data.success) {
        this.getSigninTokens();
        this.dialogShow = false;
        console.log("帳戶移除成功");
      }
    })
    .catch((error) => {
      console.log(error);
    });
},
在 [是, 我要移除] 按鈕觸發:
<v-btn
  ...
  @click="removeUser"
  v-text="`是, 我要移除`"
>
</v-btn>
這樣就完成移除帳戶功能囉!!
來看看效果吧~
最後回到 /views/Index.vue 首頁
要在點擊登入按鈕時觸發的 goToLogin() 方法加上判斷:
如果帳戶清單有資料就導向 選擇帳戶頁,沒資料就導 輸入帳戶頁
goToLogin() {
  if (this.users.length > 0) {
    this.$router.push({ name: "ChooseUser" });
  } else {
    this.$router.push({ name: "KeyinUser" });
  }
},
今日重點:
沒錯~沒甚麼重點!!
因為90%都是首頁就已經做好的功能,只是複製過來改而已
比較有問題的點會在使用了重複的程式碼
首頁和選擇帳戶用了相同的API,如果可以整合起來就好看很多,這部分就...自行發揮吧xD
除了這個問題以外,有需要改進或是任何意見建議歡迎下面留言~