iT邦幫忙

第 12 屆 iThome 鐵人賽

DAY 25
0
自我挑戰組

從零開始的後端異世界生活系列 第 25

Day 25 - 在 NestJS 中實作 JWT 與 AuthModule (4)

  • 分享至 

  • xImage
  •  

新增 GetUser Decorator

在上一篇章時,我們完成了 JwtStrategy,並用啟用 UseGuards 在新增任務這支 API 上,接下來我們要將驗證 Jwt 成功之後得到的 User Entity 給注入到 TasksService 中,簡單來說要注入的話可以在參數這邊帶入 @Req():
https://ithelp.ithome.com.tw/upload/images/20201010/20119619eyRtDOlSf5.png

不過由於這樣帶入的 req 是 any 型別的,不利於使用:
https://ithelp.ithome.com.tw/upload/images/20201010/20119619IHFcDe8jfS.png

我們可以自訂一個 interface 去接它,比方說先新增一個 interface:
https://ithelp.ithome.com.tw/upload/images/20201010/20119619Y4Anqbz7lB.png

然後讓這個 req 是這個型別:
https://ithelp.ithome.com.tw/upload/images/20201010/20119619DfsifVWqn0.png

而另一個作法是新增一個 Parameter Decorator,就是俗稱的裝飾器,這邊我們自定義一個叫 GetUser 的裝飾器:
https://ithelp.ithome.com.tw/upload/images/20201010/2011961951yP9WabQU.png

然後我們把 @Req 換成我們自己定義的裝飾器 @GetUser:
https://ithelp.ithome.com.tw/upload/images/20201010/20119619fQXHVQ6uwJ.png

這樣就新增完成了,接下來我們再把這個 user 給帶入。

修改新增任務邏輯

小提示:若是這整個 Controller 的 API 都會用到 Guards,可以把 Guards 放到 controller 裝飾層級:
https://ithelp.ithome.com.tw/upload/images/20201010/20119619LeyAYBE0Ts.png

接下來我們到 Service 中,新增一個參數 user:
https://ithelp.ithome.com.tw/upload/images/20201010/20119619RUsMskXXrD.png

並在 controller 這邊帶入:
https://ithelp.ithome.com.tw/upload/images/20201010/20119619poU38lTQLT.png

接下來我們要修改一下 Service,我們要把得到的 User 放進新增任務裡(這任務是屬於這個 User 的):
https://ithelp.ithome.com.tw/upload/images/20201010/20119619CBBalfaqGv.png

好,這樣就完成了(範例用所以整體邏輯沒有很完善)。

試打新增任務 API

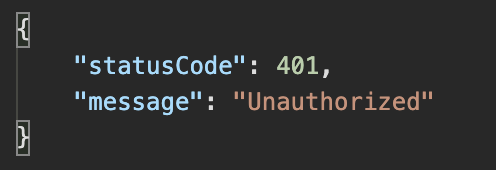
由於我們沒有真的撰寫註冊的邏輯,所以得到的 Token 就算帶入新增任務的 API 也不會通過驗證:
https://ithelp.ithome.com.tw/upload/images/20201010/20119619ZNn9OxZS3t.png

這邊我們做測試用,直接到資料庫去新增一個 User:
https://ithelp.ithome.com.tw/upload/images/20201010/20119619gDC5PtSgCO.png

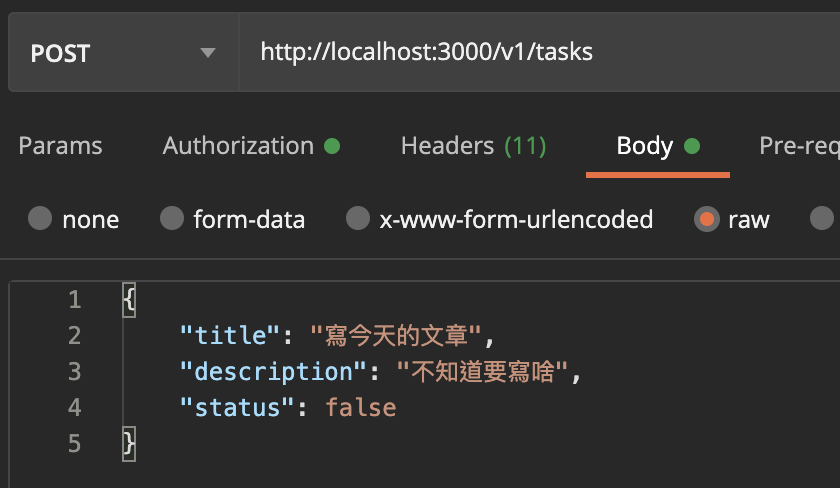
然後再去打新增任務的 API(記得帶 Bearer Token):
https://ithelp.ithome.com.tw/upload/images/20201010/20119619r6MAGsvoq2.png

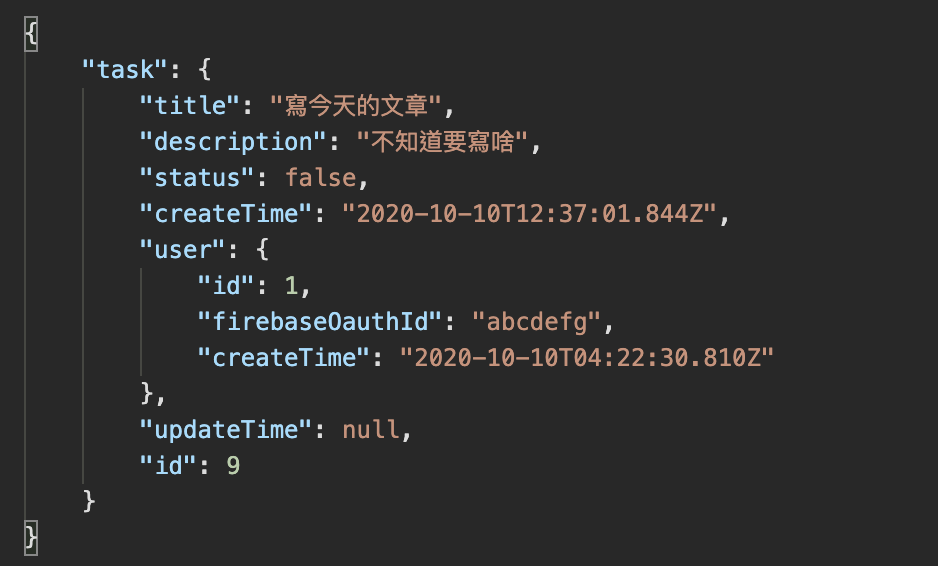
OK,新增成功了:
https://ithelp.ithome.com.tw/upload/images/20201010/20119619RaqYNbzgAS.png

我們去資料庫看也有這筆資料,且是屬於 user: abcdefg 的:
https://ithelp.ithome.com.tw/upload/images/20201010/20119619DBoeaNJ72j.png

這樣我們就算簡單的完成了有關 Auth 這一塊的撰寫了,接下來由於篇章不多了,我個人想研究如何上雲,那就明天見啦。

/*
本系列文係個人新手開發心得,可能會有許多錯誤,煩請多多包容不吝指教。
*/


上一篇
Day 24 - 在 NestJS 中實作 JWT 與 AuthModule (3)
下一篇
Day 26 - 部署 NestJS 到 AWS Elastic Beanstalk (1)
系列文
從零開始的後端異世界生活30
圖片
  直播研討會
圖片
{{ item.channelVendor }} {{ item.webinarstarted }} |
{{ formatDate(item.duration) }}
直播中

尚未有邦友留言

立即登入留言