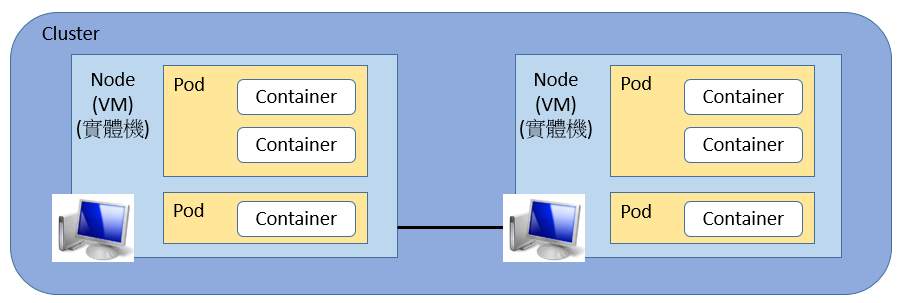
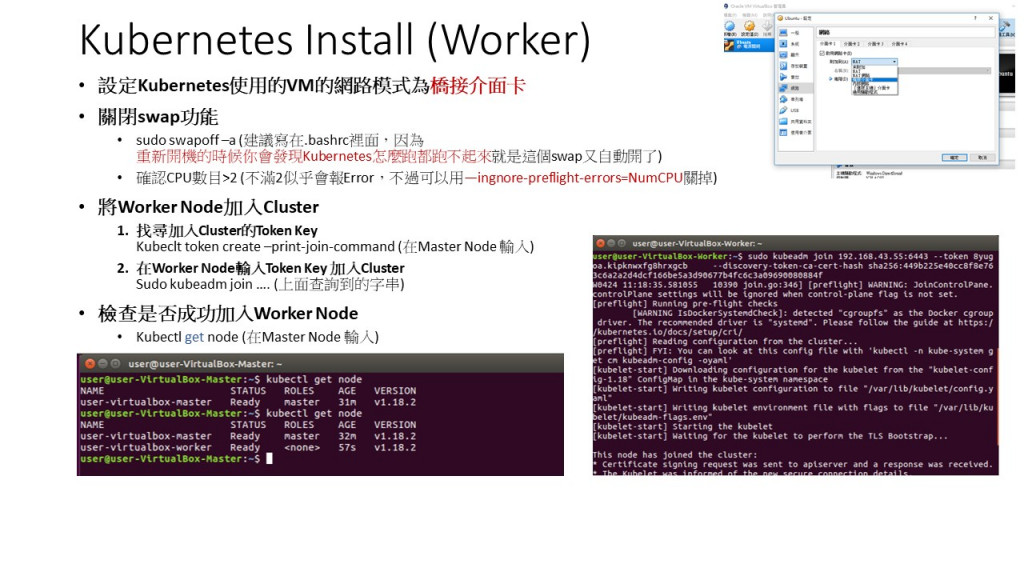
Kubernetes(K8S)是一個可以幫助我們管理微服務(microservices)的系統,他可以自動化地部署及管理多台機器上的多個容器(Container)。簡單來說,他可以做到:
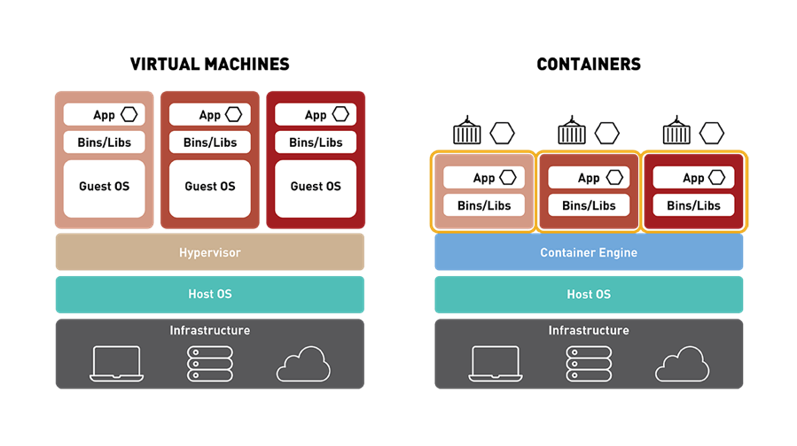
虛擬機佈建方法vs貨櫃佈建方法佈建方法 :
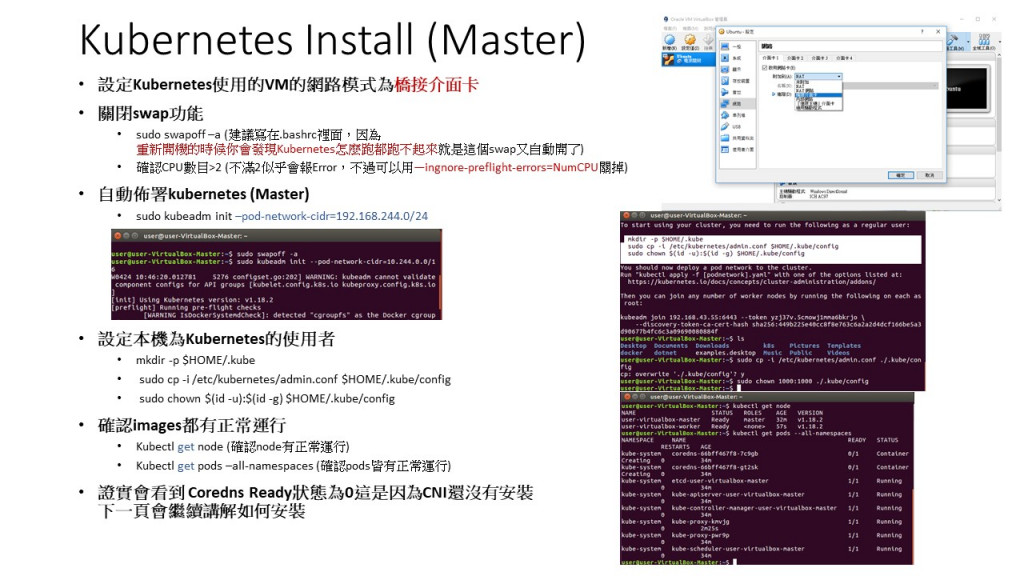
安裝好Docker的virtualbox VM
準備Repository
安裝kubeadm(自動佈署工具),kubelet(管理Pods),kubectl(人機介面)
確認版本
下載Kubernetes建置相關Image檔案
指定安裝特定版本


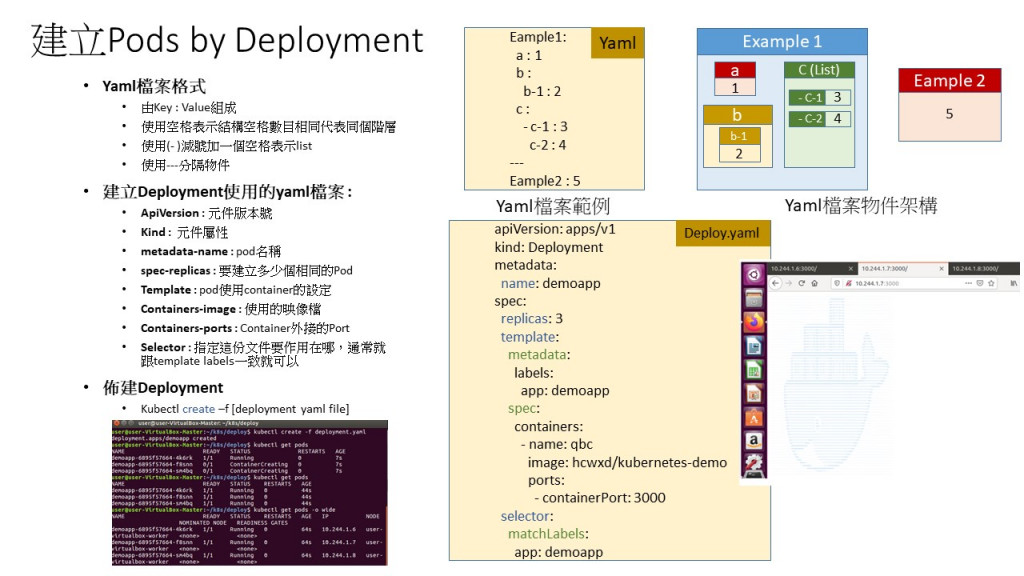
Eample1:
a : 1
b :
b-1 : 2
c :
- c-1 : 3
c-2 : 4
---
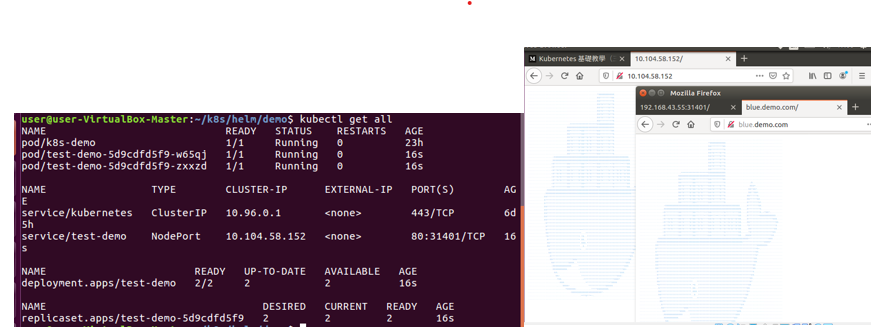
Eample2 : 5
apiVersion: apps/v1
kind: Deployment
metadata:
  name: demoapp
spec:
  replicas: 3
  template:
    metadata:
      labels:
        app: demoapp
    spec:
      containers:
        - name: qbc
          image: hcwxd/kubernetes-demo
          ports:
            - containerPort: 3000
  selector:
    matchLabels:
      app: demoapp

apiVersion: v1
kind: Service
metadata:
  name: my-service
spec:
  selector:
    app: demoapp
  type: NodePort
   ports:
     - protocol: TCP
       targetPort: 3000
       port: 3001
       nodePort: 30390

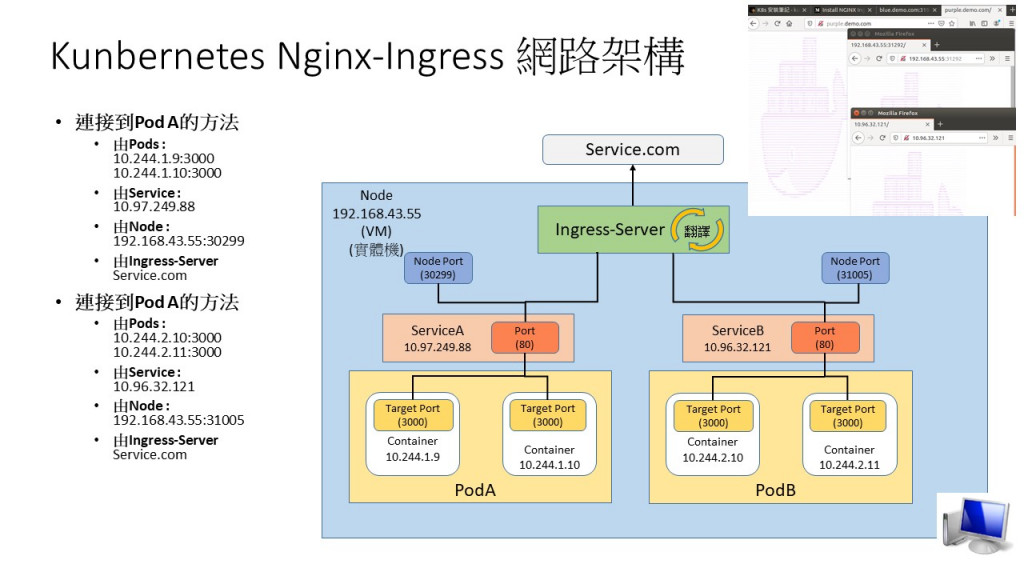
apiVersion: v1
kind: Service
metadata:
  name: blue-service
spec:
  selector:
    app: blue-nginx
  type: NodePort
  ports:
   - protocol: TCP
     port: 80
    targetPort: 3000
---
apiVersion: v1
kind: Service
metadata:
  name: purple-service
spec:
  selector:
    app: purple-nginx
  type: NodePort
  ports:
   - protocol: TCP
     port: 80
    targetPort: 3000
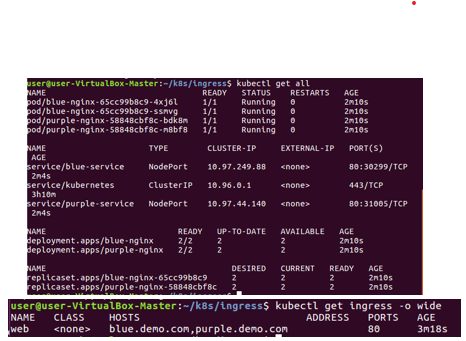
apiVersion: apps/v1
kind: Deployment
metadata:
  name: blue-nginx
spec:
  replicas: 2
  template:
    metadata:
      labels:
        app: blue-nginx
  spec:
    containers:
      - name: nginx
         image: hcwxd/blue-whale
         ports:
          - containerPort: 3000
  selector:
    matchLabels:
      app: blue-nginx
---
apiVersion: apps/v1
kind: Deployment
metadata:
  name: purple-nginx
spec:
  replicas: 2
  template:
    metadata:
      labels:
        app: purple-nginx
  spec:
    containers:
      - name: nginx
         image: hcwxd/purple-whale
         ports:
          - containerPort: 3000
  selector:
    matchLabels:
      app: blue-nginx
apiVersion: extensions/v1beta1
kind: Ingress
metadata:
name: web
spec:
rules:
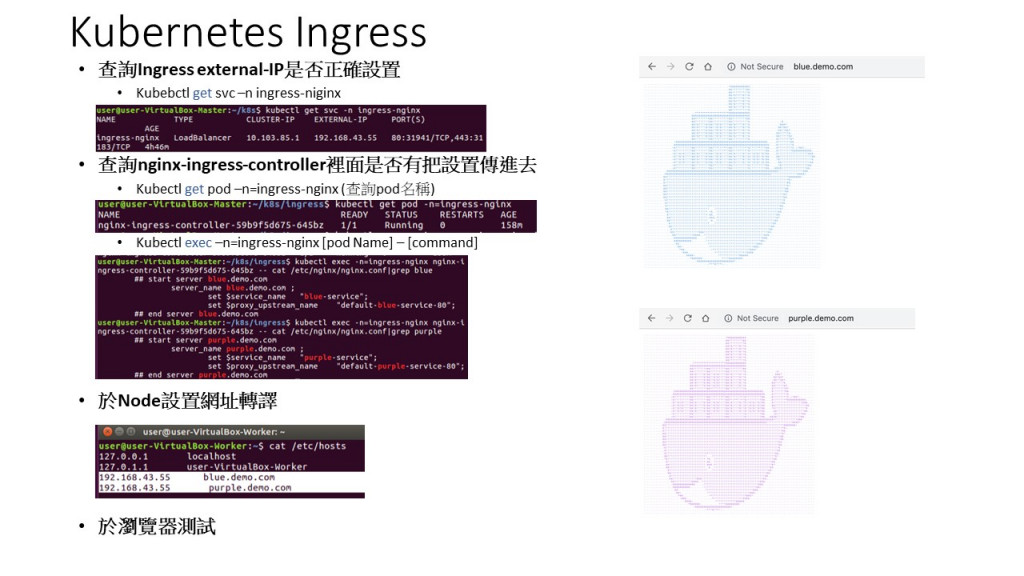
- host: blue.demo.com
http:
paths:
- backend:
serviceName: blue-service
servicePort: 80
- host: purple.demo.com
http:
paths:
- backend:
serviceName: purple-service
servicePort: 80
replicaCount: 2

image:
  repository: hcwxd/blue-whale

service:
  type: NodePort
  port: 80

ingress:
  enabled: true
  hosts:
   - host: blue.demo.com
     paths: [/]

serviceAccount:
  create: false
autoscaling:
  enabled: false
apiVersion: apps/v1
kind: Deployment
metadata:
  name: {{ include "demo.fullname" . }}
spec:
  replicas: {{ .Values.replicaCount }}
  template:
    metadata:
      labels:
        app: {{ include "demo.fullname" . }}
    spec:
      containers:
        - name: {{ .Chart.Name }}
          image: '{{ .Values.image.repository }}‘
          ports:       - containerPort: 3000
    selector:
      matchLabels:
        app: {{ include "demo.fullname" . }}
apiVersion: v1
kind: Service
metadata:
  name: {{ include "demo.fullname" . }}
spec:
  type: {{ .Values.service.type }}
  ports:
    - port: {{ .Values.service.port }}
      targetPort: 3000
      protocol: TCP
  selector:
    app: {{ include "demo.fullname" . }}
{{- if .Values.ingress.enabled -}}
{{- $fullName := include "demo.fullname" . -}}

apiVersion: extensions/v1beta1
kind: Ingress
metadata:
  name: web #{{ $fullName }}
spec:
  rules:
   {{- range .Values.ingress.hosts }}
    - host: {{ .host | quote }}
      http:
        paths:
          {{- range .paths }}
           - backend:
             serviceName:
               test-demo #{{ $fullName }}
              servicePort: 80
          {{- end }}
   {{- end }}
{{- end }}
https://github.com/HcwXd/kubernetes-tutorial
 twfrank159
