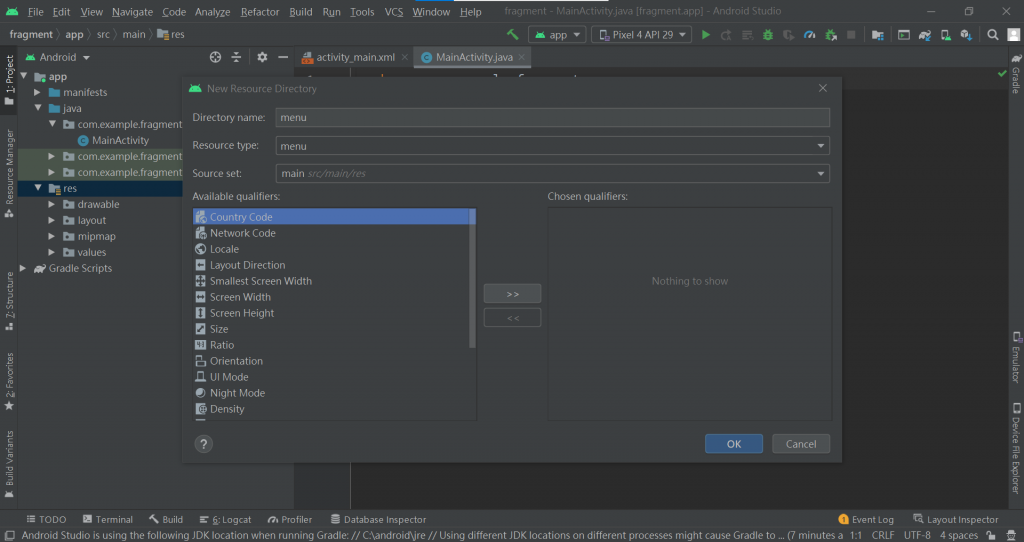
首先在res資料夾下,新增menu的資料夾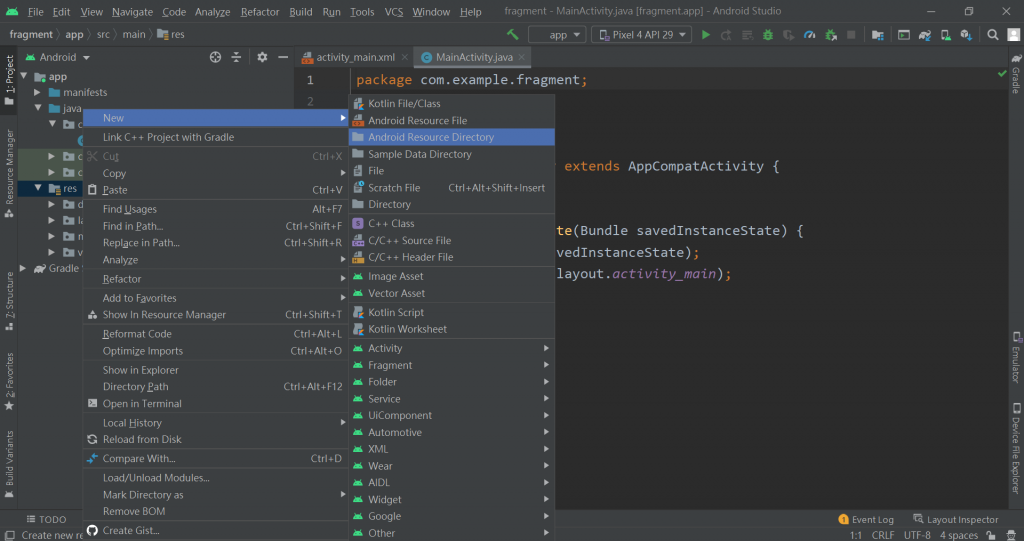
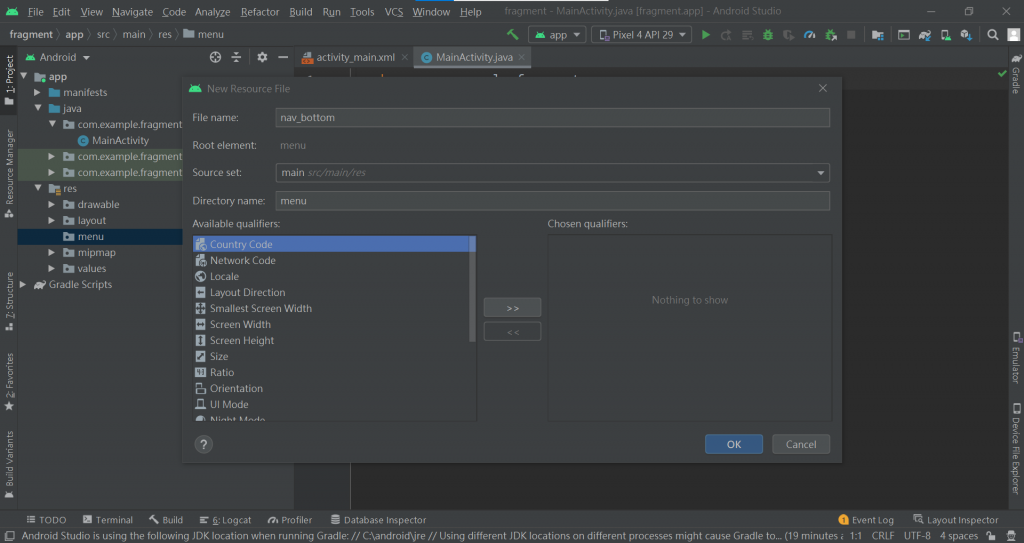
再來新增一個Menu resource file,取名為nav_bottom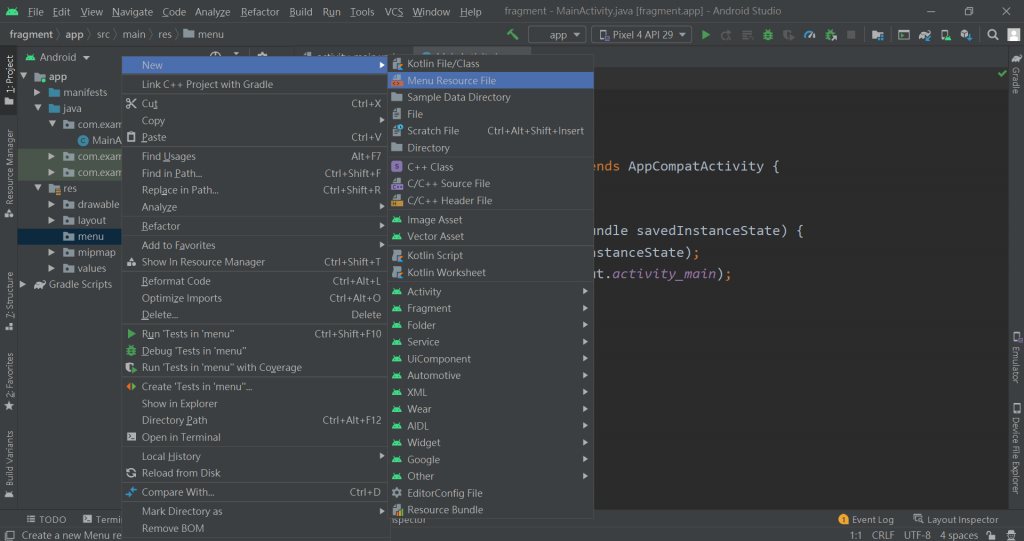
進入到剛剛建立的nav_bottom之前,先在drawable新增幾張圖片,點擊Vector Asset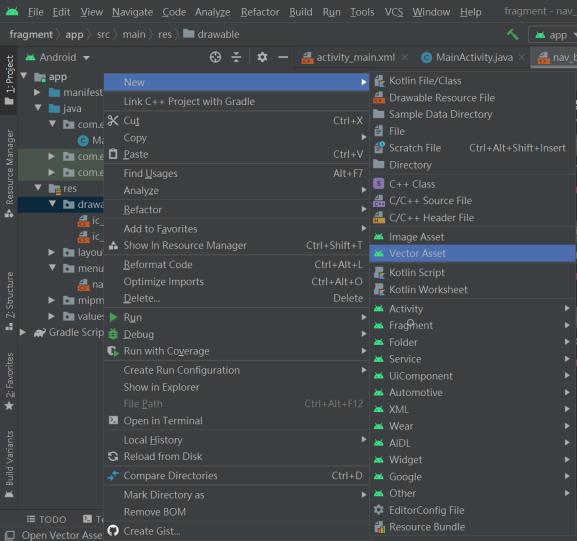
點擊紅色箭頭所指的地方(Clip Art右邊的圖案上)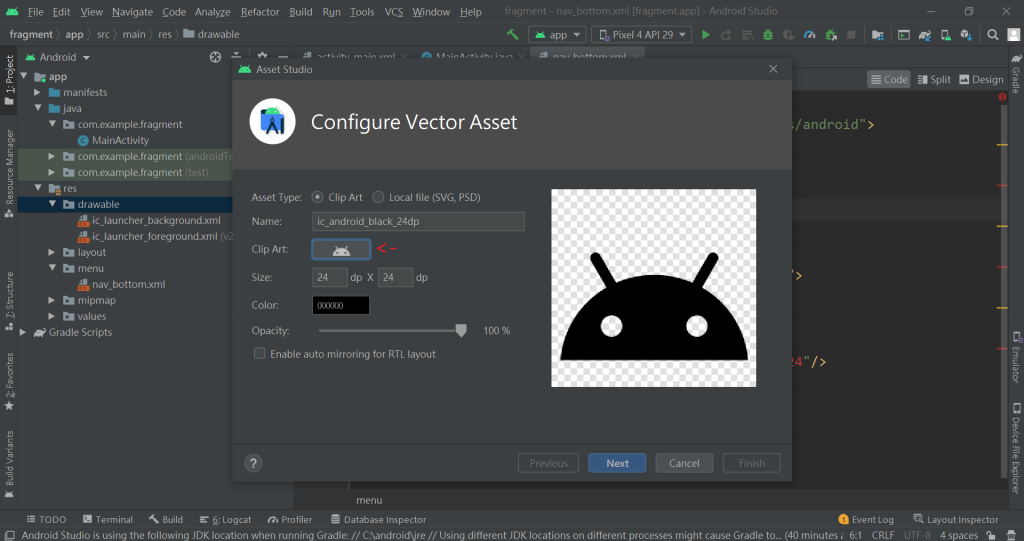
選擇想要的圖片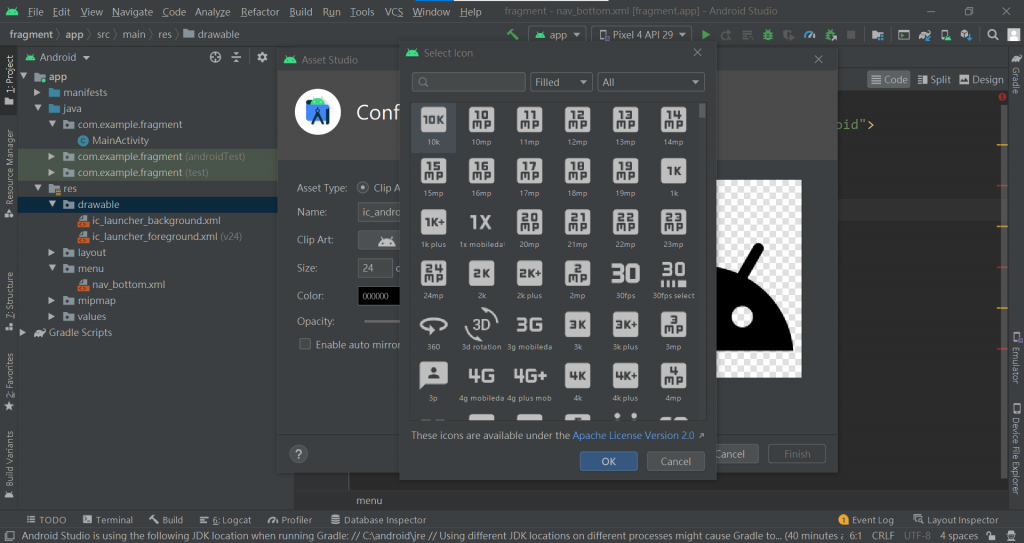
可以換個顏色,按下Next,就新增完成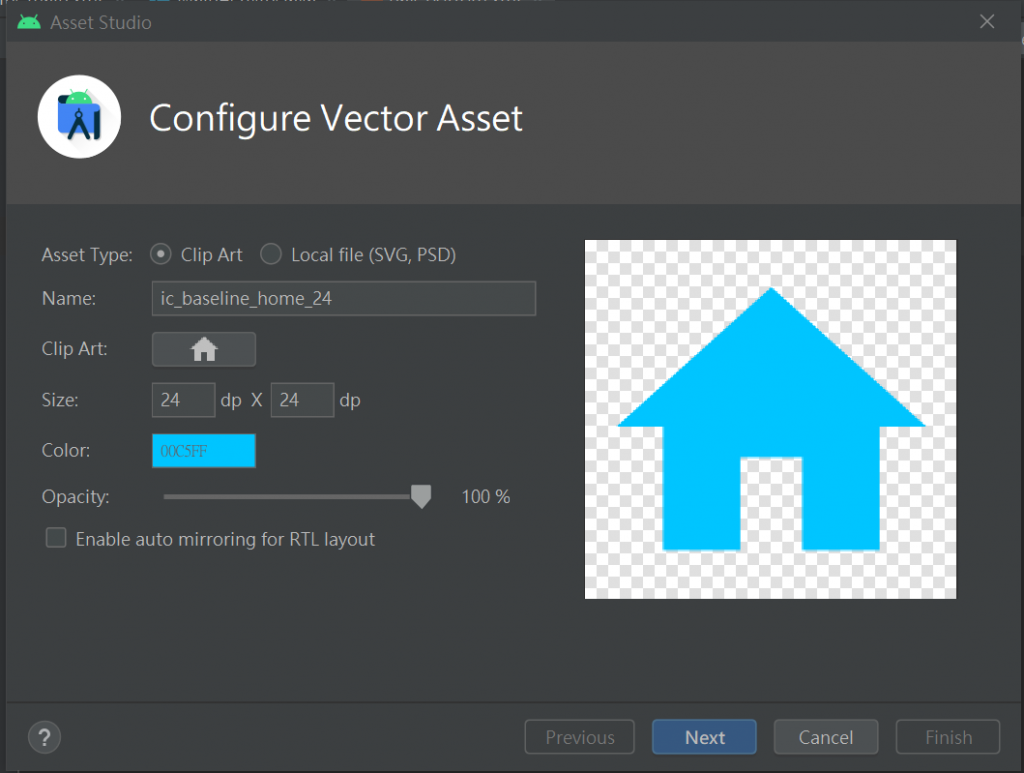
然後進入到剛剛建立的nav_bottom,加入item(BottomView最多只支援五個)
<?xml version="1.0" encoding="utf-8"?>
<menu xmlns:android="http://schemas.android.com/apk/res/android">
    <item android:title="主頁"
        android:id="@+id/homePage"
        android:icon="@drawable/ic_baseline_home_24"/>

    <item android:title="角色"
        android:id="@+id/character"
        android:icon="@drawable/ic_baseline_person_24"/>

    <item android:title="劇情"
        android:id="@+id/plot"
        android:icon="@drawable/ic_baseline_menu_book_24"/>
</menu>
activity_main:
使用ConstraintLayout,再將元件一一放入
<?xml version="1.0" encoding="utf-8"?>
<androidx.constraintlayout.widget.ConstraintLayout
    xmlns:android="http://schemas.android.com/apk/res/android"
    xmlns:tools="http://schemas.android.com/tools"
    xmlns:app="http://schemas.android.com/apk/res-auto"
    android:layout_width="match_parent"
    android:layout_height="match_parent"
    tools:context=".MainActivity">

    // 放fragment
    <FrameLayout
        android:id="@+id/frag"
        android:layout_width="match_parent"
        android:layout_height="wrap_content"
        app:layout_constraintEnd_toEndOf="parent"
        app:layout_constraintStart_toStartOf="parent"
        app:layout_constraintTop_toTopOf="parent">
    </FrameLayout>

    <com.google.android.material.bottomnavigation.BottomNavigationView
        android:id="@+id/nav"
        android:layout_width="match_parent"
        android:layout_height="wrap_content"
        app:menu="@menu/nav_bottom"
        app:labelVisibilityMode="labeled"
        app:layout_constraintBottom_toBottomOf="parent"
        app:layout_constraintEnd_toEndOf="parent"
        app:layout_constraintStart_toStartOf="parent"/>
</androidx.constraintlayout.widget.ConstraintLayout>
BottomNavigationView的功能,會放在下一篇文章與fragment進行應用![]()
