這篇內容是紀錄閱讀官方文件 Create a feature component 的內容。
當專案的內容越來越多的時候,我們不可能再將所有內容都放在同一個元件中,這會讓專案變得比較難維護,所以,我們會將這個元件拆成好幾個小元件,讓每個小元件只專注在特定的任務。
本章就是在記錄如何將一個大元件拆成幾個小元件的內容。
延續 Day04 的專案內容,我們要創一個 hero-detail 的小元件,專門呈現被點擊英雄的詳細資料。
所以,我們在 Angular CLI 中輸入 ng generate component hero-detail ,在專案中創出 hero-detail 這個元件。
當成功創建之後,你會發現在 src/app 目錄底下會出現一個 hero-detail 的資料夾,裡面就放了專屬此元件的三個構成檔案 ts, css, html。且我們也可以在 app.module.ts 看到 CLI 自動幫我們將這個 hero-detail 元件加到declarations 的陣列中。
資料夾結構就會長得像下面這樣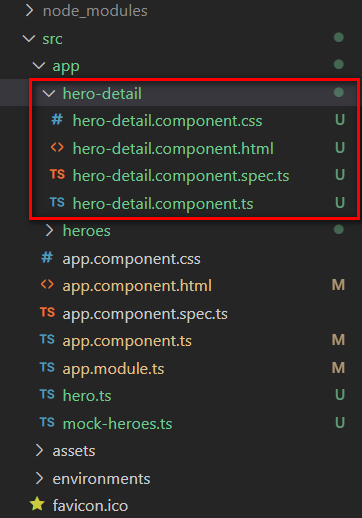
Notice: 這邊注意到一下就是雖然檔名是 hero-detail ,但是,在檔案中這個元件的名稱直接會被改成 HeroDetailComponent 寫法,甚至在 app.module.ts 引入這個元件的時候也是用 HeroDetailComponent 寫法。
接下來,撰寫 hero-detail.component.html 的內容。
我們可以直接把原本在 heroes.component.html 中,有關 selectedHero 的部分,直接貼到 hero-detail.component.html 裡。
在 hero-detail.component.html 中,不需再使用到 selectedHero 這變數了,可以任意命名這個變數,因為這個變數的內容是會由元件外部傳進來的,所以,我們這邊直接將 selectedHero 換成 hero。
所以 hero-detail.component.html 內容會如下
--- hero-detail.component.html ---
<div *ngIf="hero">
  <h2>{{hero.name | uppercase}} Details</h2>
  <div><span>id: </span>{{hero.id}}</div>
  <div>
    <label for="hero-name">Hero name: </label>
    <input id="hero-name" [(ngModel)]="hero.name" placeholder="name">
  </div>
</div>
上面有提到原本 selectedHero 這個資料內容,會由 hero-detail 元件的外部傳入元件內部,所以,我們會需要定義 hero-detail 的媒介屬性,將外部的資料接進來,提供給元件內部使用(很像 Vue 的 props)。
所以,我們會在 hero-detail 元件引入 Input 這個模組,利用它來定義元件的媒介屬性。
接著,就利用它來定義媒介屬性囉,程式碼如下
--- hero-detail.component.ts ---
import { Component, OnInit, Input } from '@angular/core';
import { HERO } from '../hero';

@Component({
  // ...
})
export class HeroDetailComponent implements OnInit {
  // ...
  @Input() hero?: HERO  // 定義 hero 媒介屬性
}
我們利用 Input 模組來定一個叫 hero 的媒介屬性,接著,我們在 HeroesComponent 的 html 檔案中加入 HeroDetailComponent 的 html 標籤。
--- heroes.component.html ---
<h2>My Heroes</h2>
<ul class="heroes">
  <li *ngFor="let hero of heroes" (click)="onSelect(hero)" [class.selected]="hero === selectedHero">
    <span class="badge">{{hero.id}}</span> {{hero.name}}
  </li>
</ul>

<app-hero-detail [hero]="selectedHero"></app-hero-detail>  // 利用 hero 來將外部資料 selectedHero 接進來
用以上的方法,我們就可以將指定英雄的物件,透過 hero 這個屬於 HeroDetailComponent 的媒介屬性傳入 HeroDetailComponent 裡,再透過這個傳入的資料來呈現詳細的英雄資訊在畫面中。
現在我們知道 HeroesComponent 是父層元件,HeroDetailComponent 是子層元件,而將子層元件加入父層元件的方式就是將它的 @Compoent 的 selector 的內容貼到到父層元件的 html 中,所以,可以看到上面的 heroes.component.html 中加入了 app-hero-detail 標籤,讓 HeroDetailComponent 元件的內容加入到 HeroesComponent 中。
而本文中 HeroDetailComponent 的媒介屬性 hero ,是 Angular 中 one way data binding 的用法。
經過以上的操作之後,網頁的畫面結果會像下面這樣
雖然,看起來跟昨天的操作結果沒有不同,但是,我們確實的將呈現英雄詳細資料的功能切分給 hero-detail 元件來處理囉~
這邊做個總結,
Input 模組來定義元件的媒介屬性,並透過這個媒介屬性來將外部的資料引入元件中使用。