在上一章中介紹了如何建立客製化的 attribute directive 與使用,而本章將會介紹如何建立 structural directives,那就接著往下看吧!

本章一樣會利用 Angular 官方文檔的例子建立一個範例,範例內容是會建立一個 UnlessDirective 以及該如何設置他的條件值,這個 UnlessDirective 與 *ngIf 相法,當為 true 時會顯示 NgIf 的內容反之則顯示 UnlessDirective 的
首先利用 Angular CLI 建立一個 directive
ng generate directive unless
ng g d unless
在 @angular/core 中引入 Input, TemplateRef, ViewContainerRef
import { Directive, Input, TemplateRef, ViewContainerRef } from '@angular/core';

@Directive({ selector: '[appUnless]'})
export class UnlessDirective {
}
在 unless.directive.ts 的 constructor 中 inject TemplateRef 與 ViewContainerRef 成為他的私有變量
import { Directive, Input, TemplateRef, ViewContainerRef } from '@angular/core';

@Directive({ selector: '[appUnless]' })
export class UnlessDirective {
  constructor(
    private templateRef: TemplateRef<any>,
    private viewContainer: ViewContainerRef
  ) {}
}
UnlessDirective 會從 Angular 生成的 <ng-template> 中創建一個 embedded view 並將他插入到宿主 element 相鄰的地方,而 TemplateRef 可以讓你訪問到 <ng-template> 的內容,而 ViewContainerRef 可以讓你訪問 view container。
Note: embedded view 是為 ng-template 中指定的 view node 所創建的 view,簡單來說他類似 component 中的 template 所創建出來的 view,但是他沒有 component 的元素或數據,不過他還是屬於一個有效的 view,會在檢測過程中與其他 view 一樣被檢測到。
在 unless.directive.ts 中添加一個 property 用來表示是否顯示畫面,與使用 setter 添加一個 appUnless property。
import { Directive, Input, TemplateRef, ViewContainerRef } from '@angular/core';

@Directive({ selector: '[appUnless]' })
export class UnlessDirective {
  private hasView = false;                                    // (1)
  constructor(
    private templateRef: TemplateRef<any>,
    private viewContainer: ViewContainerRef
  ) {}

  @Input() set appUnless(condition: boolean) {                // (2)
    if (!condition && !this.hasView) {
      this.viewContainer.createEmbeddedView(this.templateRef);
      this.hasView = true;
    } else {
      this.viewContainer.clear();
      this.hasView = false;
    }
  }
}
在 app.component.ts 中新增一個 property 與 method
import { Component } from '@angular/core';

@Component({
  selector: 'app-root',
  templateUrl: './app.component.html',
  styleUrls: ['./app.component.css']
})
export class AppComponent {
  condition = false;                        // (1)

  onClick() {                               // (2)
    this.condition = !this.condition;
  }
}
在 app.component.html 中使用我們建立的 directive
<!-- app.component.html -->

<div *appUnless="condition">unless display area</div>
<div *ngIf="condition">ngIf display area</div>

<button (click)="onClick()">Click</button>

在畫面中可以看到,我們一開始設計的邏輯就是希望要跟 ngIf 相反,所以當 condition = false 時會顯示我們剛建立的 directive 滿足的區域 unless display area,反之當點擊按鈕將 condition 變為 true 時,則會顯示 ngIf 的內容 ngIf display area。
看完上面的例子後應該會了解該怎麼建立自己的 structural directive,但是可能有人會疑問,連自己建立的 structural directive 也要使用星號 ( * ) 嗎?這個星號是什麼?接著就要來講解一下這個星號是什麼。
structural directive 上面的星號( * )語法是 Angular 將其解釋為更常形式的速記,他會將星號轉換成一個 <ng-template> 並將它圍繞著宿主元素與他的所有子層,舉例來說
<div *ngIf="hero" class="name">{{hero.name}}</div>
當 hero 為 true 時才會顯示英雄的名字,而其實 Angular 看到上面的程式後會將它轉變為
<ng-template [ngIf]="hero">
  <div class="name">{{hero.name}}</div>
</ng-template>
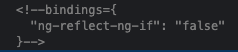
可以看到 Angular 將星號變為一個 <ng-template> ,而 ngIf 變成了他的 property binding,而其他的內容會移動到 <ng-template> 之中,因為 Angular 不會真正的創建 <ng-template> 元素而是指將內部的 <div> 和 comment node placeholder 放到 DOM 中。

而如果 ngIf 為 false 的話則會連 <div> 的內容都不會放在 DOM 中。
看完了 ngIf 的速記用法後,接著來看看 ngFor 會長什麼樣子,一樣先舉個例子
<div *ngFor="let hero of heroes; let i=index; let odd=odd; [class.odd]="odd">
  ({{i}}) {{hero.name}}
</div>
使用了 ngFor 將 heroes 中的內容迭代的顯示在畫面上,並使用了之前提到的 ngFor 的一些參數,而這個例子在經過 Angular 轉換後會變成
<ng-template ngFor let-hero [ngForOf]="heroes" let-i="index" let-odd="odd">
  <div [class.odd]="odd">({{i}}) {{hero.name}}</div>
</ng-template>
可以看到他跟 ngIf 一樣會將星號變為一個 <ng-template> 並且將 ngFor 變為 property binding,比較不同的是在這個 <ng-template> 中使用了 let 宣告了一個模板輸入變量,讓他可以被 template 中被引用,在上面的例子中的輸入變量是 hero, i, 'odd',解析器會將 let hero、let i 和 let odd 轉換為 let-hero、 let-i 和 let-odd ,Angular 會將當前的值在適當的時間點賦予給宣告的輸入變量。
<ng-template>Angular 的 <ng-template> 定義了一個默認不渲染任何東西的 template,可以透過 structural directive 來控制是否要顯示 <ng-template> 中定義的內容
<p>Hip!</p>
<ng-template>
  <p>Hip!</p>
</ng-template>
<p>Hooray!</p>

可以看到,當我們使用 <ng-template> 將 <p>Hip!</p> 包住,但是沒有使用 structural directive 決定他是否要被顯示出來,所以在 DOM 中會看到 comment node placeholder 而不是希望呈現的數據。
本章中介紹了如何建立客製化的 structural directive,他相較於建立客製化的 attribute directive 男的多,所以需要瞭解更多的觀念,比如說 Angular 的 view 觀念其實非常複雜,這邊只有稍微提到而已,如果之後有專案上的需求再回來鑽研就好,這邊只是大概介紹該如何使用與客製化。
本篇是 directive 的最後一篇,明天將會回頭介紹 component 的最後一個例子,動態載入 component,他使用了之前講到的滿多技巧,範例的難度也比較大,那麼就明天來好好的講解一下吧,那我們就明天見吧。