原文寫於2019如無法執行請閱讀官方文件
接下來是Label 透過Label我們可以將IO強大的節點分配給Data Base,擁有眾多計算能力的節點分配給AI系統,具體來說我們可以創造一個Label:GPU=K80並把它貼在有K80 GPU的節點上,並在我們Deployment,Statefulset的yaml中添加Label Selector加上GPU=K80字段,那POD運行時K8s系統就會幫我們把POD分配到有Label:GPU=K80的節點上,如果是使用Spark官方提供的bin/spark-submit方法只要在參數加入--conf spark.kubernetes.node.selector.GPU=K80即可。
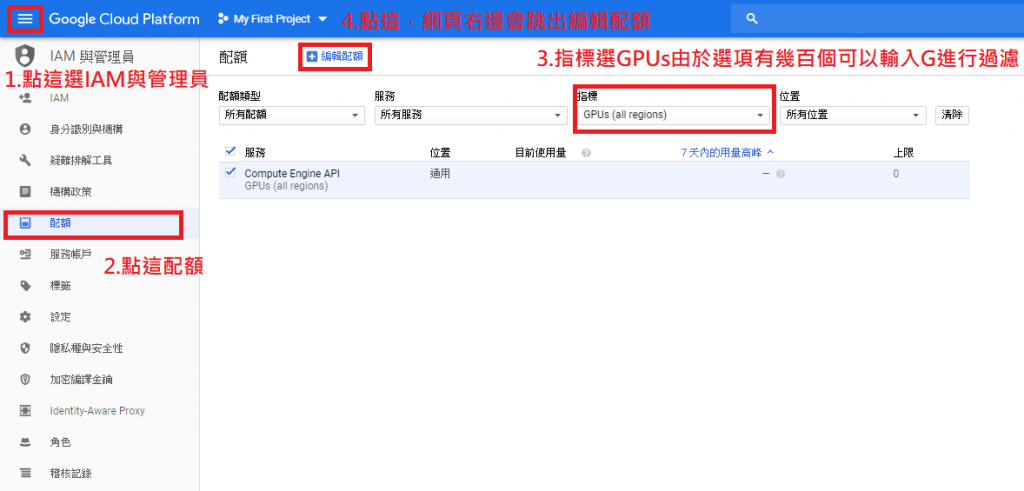
步驟A:
在IAM申請GPU配額,申請後約1~2個工作天就會收到GCP回應

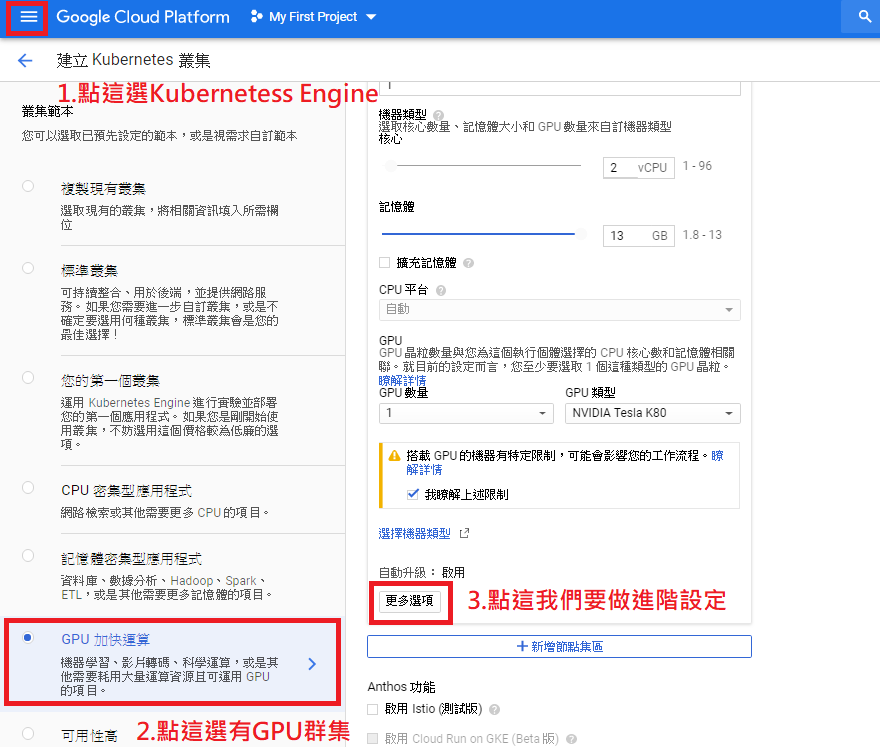
步驟B:
在GKE選GPU加速運算,並點擊更多選項,請注意並不是每個區域都有支援GPU運算

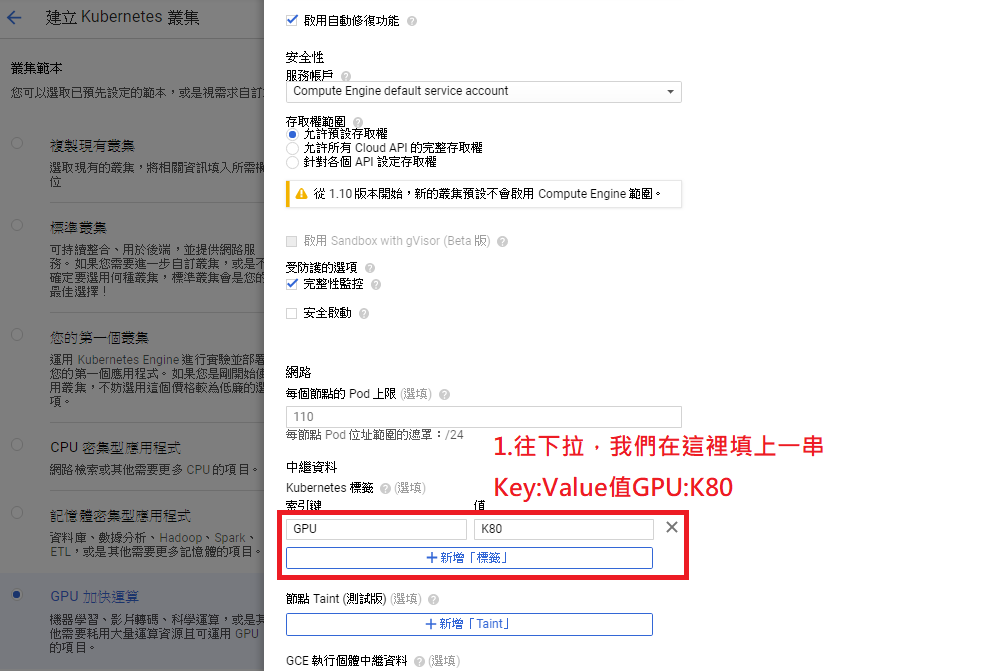
步驟C:
幫節點貼上GPU=K80標籤Label

步驟D:
進入Terminal下kubectl get node會看到兩個node,其一叫gpu-pool是包含gpu的K8s節點
步驟E:
使用kubectl describe node <node-name>就可以看到node貼的標籤

步驟F:
在spark-submit加入--conf spark.kubernetes.node.selector.GPU=K80,這樣K8s就會把spark-executor佈署到GPU節點比用Apache Yarn做簡單很多吧!
bin/spark-submit \
    --master <Your K8sMaster IP> \
    --deploy-mode cluster \
    --name spark-pi \
    --class org.apache.spark.examples.SparkPi \
    --conf spark.executor.instances=1 \
    --conf spark.kubernetes.executor.request.cores=10m \
    --conf spark.kubernetes.executor.limit.cores=50m \
    --conf spark.kubernetes.namespace=spark-intern \
    --conf spark.kubernetes.container.image=ted00132/spark:v1 \
    --conf spark.kubernetes.authenticate.driver.serviceAccountName=spark-intern \
    --conf spark.kubernetes.node.selector.GPU=K80 \
    local:///opt/spark/examples/jars/spark-examples_2.11-2.4.3.jar
步驟E:
執行後你會發現Task卡在Pending,這是因為GCP預設有幫GPU節點打上汙點,為什麼GCP要這樣做呢?與汙點的原理/用途?之後會說明,因為Spark官方參數還沒支援汙點容忍Tolerations技術所以我們先用去除汙點的方法
kubectl taint nodes <gpu_node_name> nvidia.com/gpu-
nvidia.com/gpu是key值,而後面-代表刪除汙點

kubectl get pods --all-namespaces

接著我們用echo $(kubectl describe pods <spark-pod-name> -n <namespace-name> | grep Node:)看Task是否真的跑在GPU節點上

運算時間就不寫了,畢竟只有圖類演算法在GPU上才會有比較好的效果,這篇只是在示範開頭說的如何透過label將算力強大節點分配給特定計算型Task。
