上一篇的未完成品:

先前按鈕的寬度為固定值,所以不會依據視窗的寬度排排站好。修改如下:
kButtonDistance
button_width
void MainComponent::resized()
{
  const int kRowDistance = 10;
  const int kButtonDistance = 20;

  auto bounds = getLocalBounds().reduced(20, 10);
  auto first_row = bounds.removeFromTop(getLocalBounds().getHeight() * 0.2);

  // Caculate width for each button.
  const int button_width = (bounds.getWidth() - (kButtonDistance * 2)) / 3;

  auto google_bounds = first_row.removeFromLeft(button_width);
  google_button_.setBounds(google_bounds);

  // Text Editor
  bounds.removeFromTop(kRowDistance);
  auto second_row = bounds.removeFromTop(getLocalBounds().getHeight() * 0.3);
  editor_.setBounds(second_row);
}
修改後的按鈕寬度會隨著視窗大小改變,這樣的表現已經符合需求:

文字編輯器的寬度原本就跟內縮後的視窗寬度同步,因此不需要調整。
JUCE 的架構中,Component 物件大小改變時,其 resized 函數會被呼叫。上述例子中,當視窗大小改變,MainComponent::resized 函數被呼叫,因而執行「計算按鈕寬度」的邏輯並更新相應的 Component(TextButton, TextEditor)。
修改三個搜尋按鈕的邏輯:
點擊按鈕取得 TextEditor 裡的文字,以搜尋引擎查詢該文字。
TextButton::onClick 修改如下:
this 抓進 Lambda,為了獲得 TextEditor 物件google_button_.onClick = [this]()
{
juce::URL search("https://www.google.com");
const auto query_term = editor_.getText();
if (query_term.isNotEmpty())
search = search.withNewSubPath("search").withParameter("q", query_term);
search.launchInDefaultBrowser();
};

最下方的兩張圖使用 JUCE 的 ImageComponent 類別。同樣在
MainComponent 中加上兩個 ImageComponent 物件:
  juce::ImageComponent left_image_;
  juce::ImageComponent right_image_;
接著在 MainComponent 建構式中,加上載入圖片的邏輯:
按:為示範方便,圖示所放位置取巧,真實世界的專案不要這麼做。
MainComponent::MainComponent()
{
  auto left_image_file = juce::File::getSpecialLocation(juce::File::hostApplicationPath)
                               .getParentDirectory()
                               .getChildFile("left.png");
  jassert(left_image_file.existsAsFile());
  left_image_.setImage(juce::ImageCache::getFromFile(left_image_file));

  addAndMakeVisible(left_image_);

  // Same as image at the right side
}
接著在 MainComponent::resized 函數中的最後面,設定 ImageComponent 物件的位置與大小:
void MainComponent::resized()
{
  bounds.removeFromTop(kRowDistance);
  auto third_row = bounds;
  auto left_bounds = third_row.removeFromLeft(third_row.getWidth() * 0.6);
  left_image_.setBounds(left_bounds);
}

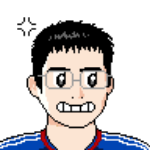
目前的版本與原先的設計相去不遠。下方的圖片大小呈現為 ImageComponent 預設行為,不做調整。

以上排版方式是傳統的作法,更複雜介面單純使用 juce::Rectangle 會很累,之後的文章會介紹其他較「進階」的技術。
話雖如此,juce::Rectangle 排版方式是基本功,而且許多介面單純,用不到更複雜的技術。