iT邦幫忙

2021 iThome 鐵人賽

DAY 16
0
DevOps

DevOps 好想學!新手也能打造雲端 Study Lab系列 第 16

Day16 - 準備 GitLab 的 GitOps 環境

  • 分享至 

  • xImage
  •  

GitOps 介紹

GitOps 是一種 DevOps 的解決方式,方法是以 Git 為中心,將應用程式、部屬檔案(如 Helm Chart )、基礎架構即代碼(如 Terraform ) 等所有所需資源全部都放入 Git 的 Repository 中進行管理,使用者只需要在 Git Repo 進行操作 (如 Push 、 Merge Requests ),部屬環境就會根據 Git 的變動進行更新,透過 GitOps 會有以下好處

  • 開發者只需要通過 Merge Requests 就能完成應用的部屬
  • 每一次的更新都會存在 Git Repo 裡,可以查看各次的差別
  • 使用 Git 作為信任源,達到一致性和標準化

想了解更多的話,在 GitLab 的 What is GitOps? 文章中有更詳細的介紹。
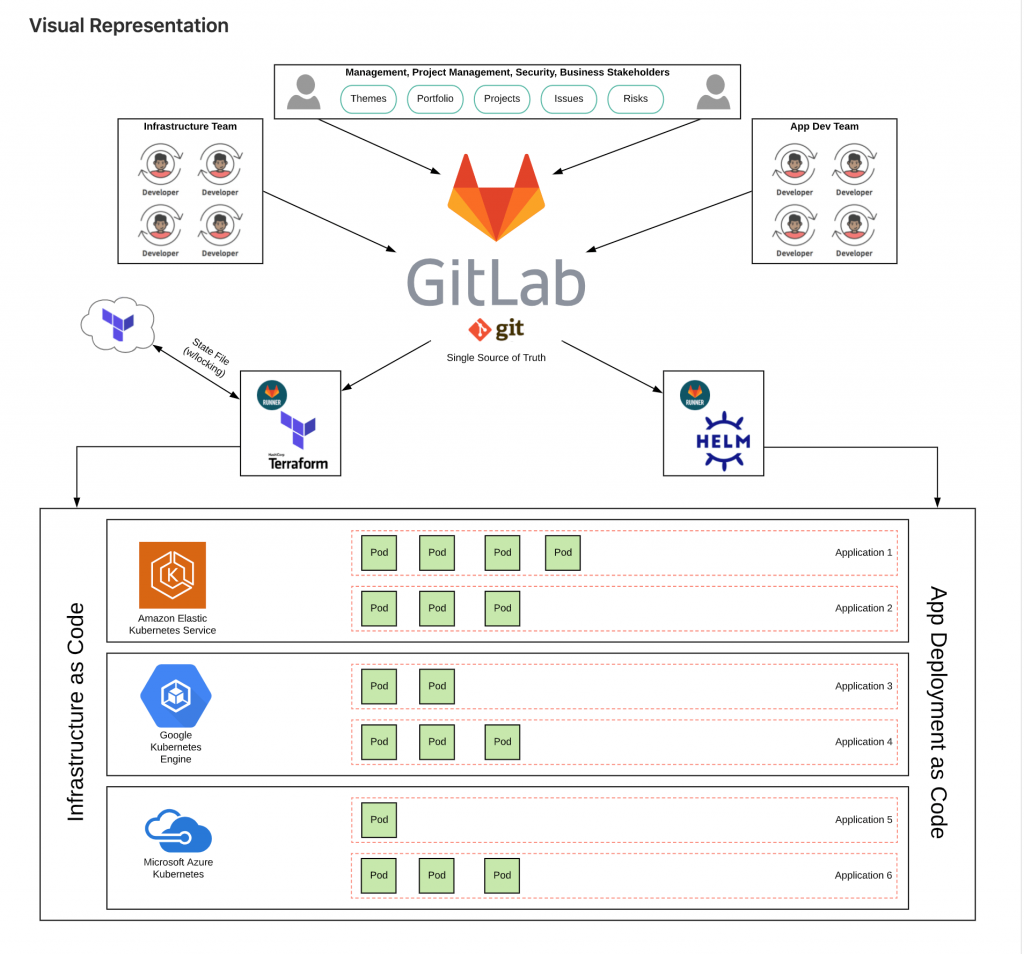
https://ithelp.ithome.com.tw/upload/images/20210915/20139235MaSSoDG0sO.png

下圖是一個 GitOps 流程的示範,開發者與維運人員只需操作 Git Repo ,就可以完成在 Kubernetes 的交付。

建立 App 及 Manifest 的 GitLab Repository

要建置 GitOps 環境的話, Git 的使用是少不了的,今天的任務很簡單,就是建立好 GitLab 的 Repository 並將 App 以及 Manifest 檔案上傳,需要先準備好 GitLab 帳號。

這裡的 App 指的是開發的應用程式,Manifest 則是指宣告 Kubernetes 元件的檔案。

  1. 進入 GitLab 網站。

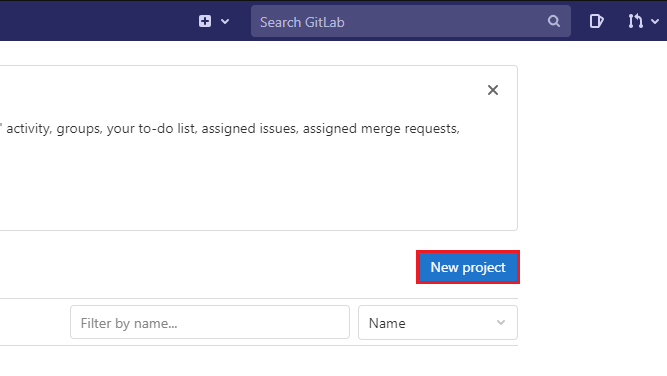
  2. 點擊 New project 建立專案

https://ithelp.ithome.com.tw/upload/images/20210915/20139235h1GybJ9tuU.png

  1. 點擊 Create blank project

https://ithelp.ithome.com.tw/upload/images/20210915/20139235SOz7cH9Af1.png

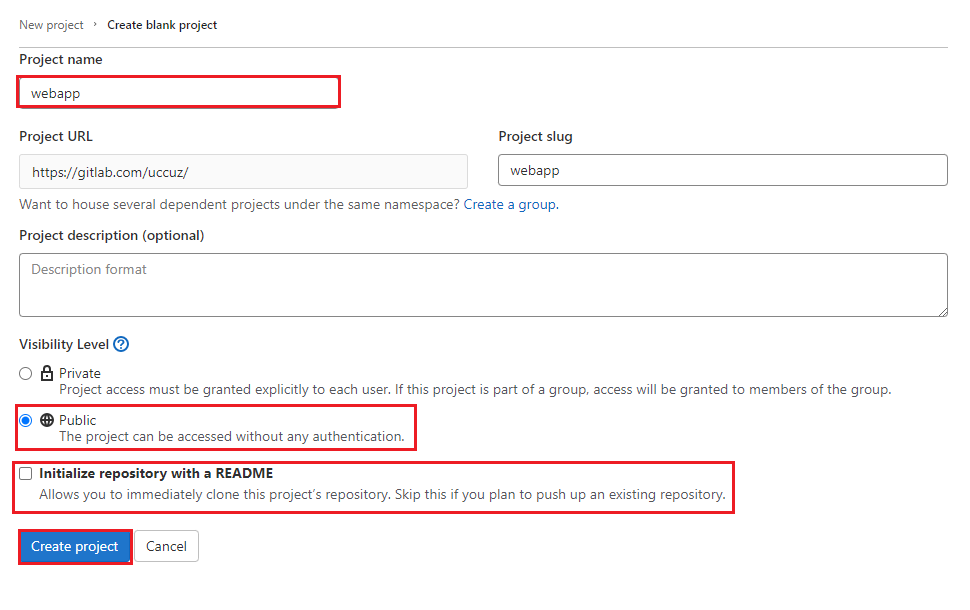
  1. 輸入以下資訊,完成後點擊 Create Project
  • Project name
    • webapp
  • Visibility Level
    • Public
  • Initialize repository with a README
    • 取消打勾

https://ithelp.ithome.com.tw/upload/images/20210915/20139235UC5VpnPTaW.png

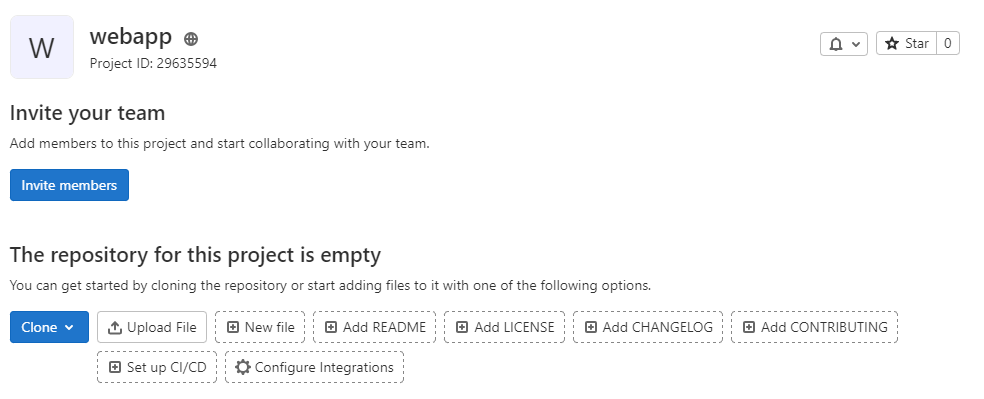
Webapp 的 Repository 就建立成功了。

https://ithelp.ithome.com.tw/upload/images/20210915/20139235PujTTVKuCK.png

接著使用同樣操作,建立 Manifest 的 Repository

  1. 回到 GitLab 網站,點擊 New project 建立專案

https://ithelp.ithome.com.tw/upload/images/20210915/20139235h1GybJ9tuU.png

  1. 點擊 Create blank project後,輸入以下資訊,完成後點擊 Create Project
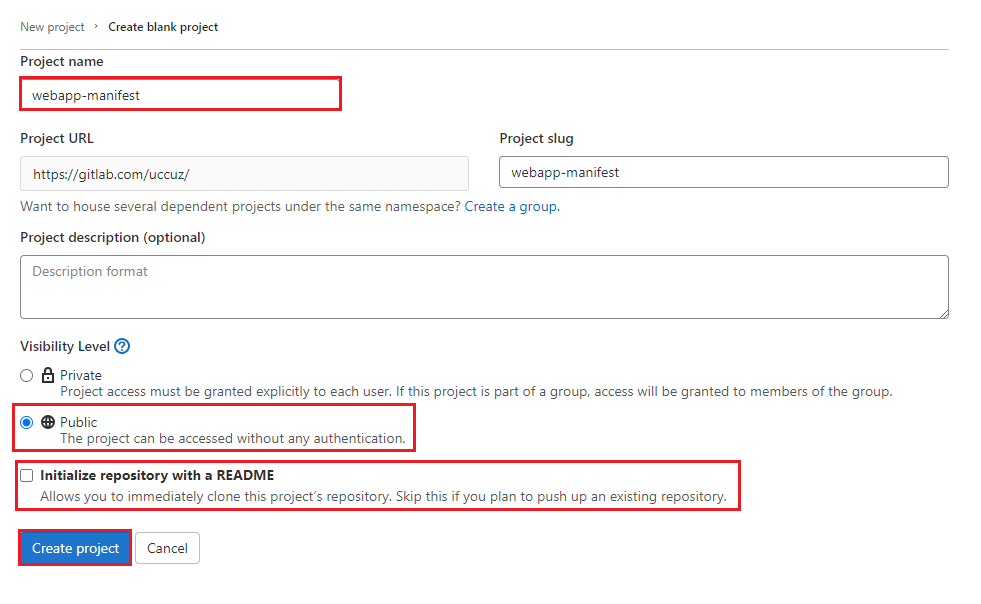
  • Project name
    • webapp-manifest
  • Visibility Level
    • Public
  • Initialize repository with a README
    • 取消打勾

https://ithelp.ithome.com.tw/upload/images/20210915/20139235WFYQ9EyRMq.png

Manifest 的 Repository 也建立成功了。

上傳 App 及 Manifest 檔案到 GitLab Repository

App 會使用在 Day08 創建的 NodeJS Web App,Manifest 則是使用在 Day15 建置的 Helm Chart,還沒準備的可以回去複習一下,準備好的就來把檔案上傳到 GitLab 上。

  1. 進入 Cloud Shell 網站,點擊終端機輸入指令。

  2. 設定 Git Config

git config --global user.name "user"
git config --global user.email "user@example.com"
  1. 首先上傳 WebApp 資料,cd 到 WebApp 的目錄。
cd ~/project
ls

(輸出結果)

app.js  dockerfile  node_modules  package.json  package-lock.json

裡面有如 node_modules 不須進入版本控制的檔案,所以建立.gitignore 來避免傳到 Repo 裡。

  1. 建立 .gitignore 檔案
cat > .gitignore <<EOF
.env
node_modules
npm-debug.log
EOF
  1. 建立 Local Repo
git init
git add .
git commit -m "init"
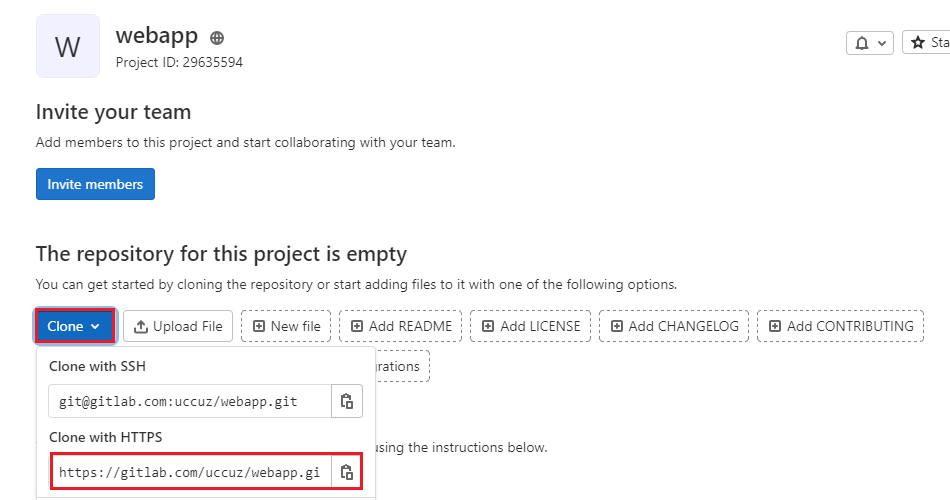
  1. 到 webapp 的 GitLab Repo,點擊 Clone-> Clone with HTTPS 複製地址

https://ithelp.ithome.com.tw/upload/images/20210915/20139235WyBIyu4h3Q.png

  1. 回到 Terminal,推送檔案到 GitLab 上,將 <your webapp repo> 修改成剛剛複製的地址
git remote add origin <your webapp repo>
git push origin master
  1. 輸入 GitLab 帳號密碼後按Enter
Username for 'https://gitlab.com': 
Password for 'https://user@gitlab.com':

在 webapp 的 GitLab Repo 網站重新整理,就可以看到檔案上傳成功。
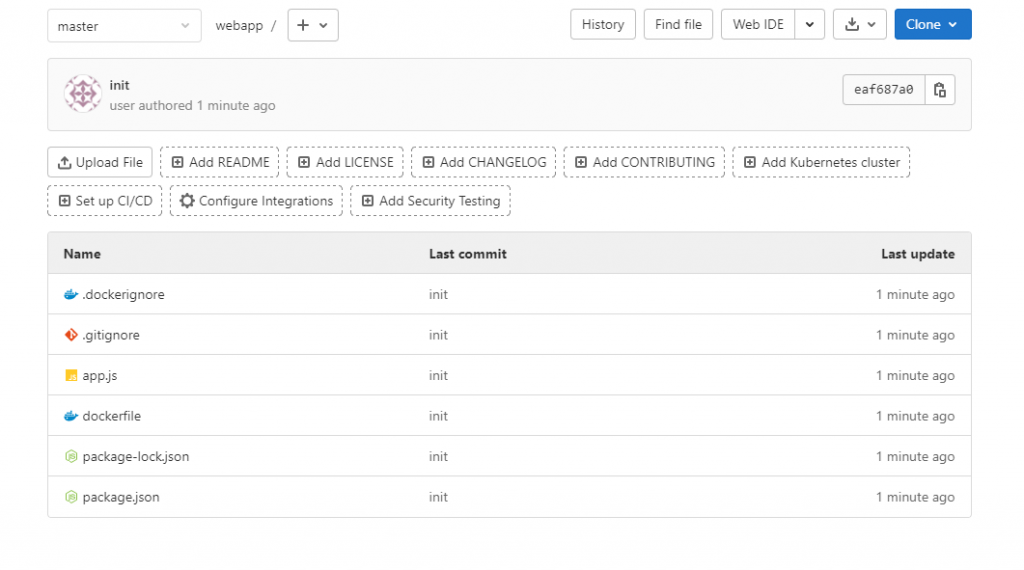
https://ithelp.ithome.com.tw/upload/images/20210915/20139235DZhmgEjUN8.png

接著使用同樣方法,把 Manifest 資料也上傳到 GitLab。

  1. 移動到 Manifest 資料夾
cd ~/webapp
ls

(輸出結果)

charts  Chart.yaml  templates  values.yaml
  1. 建立 Local Repo
git init
git add .
git commit -m "init"
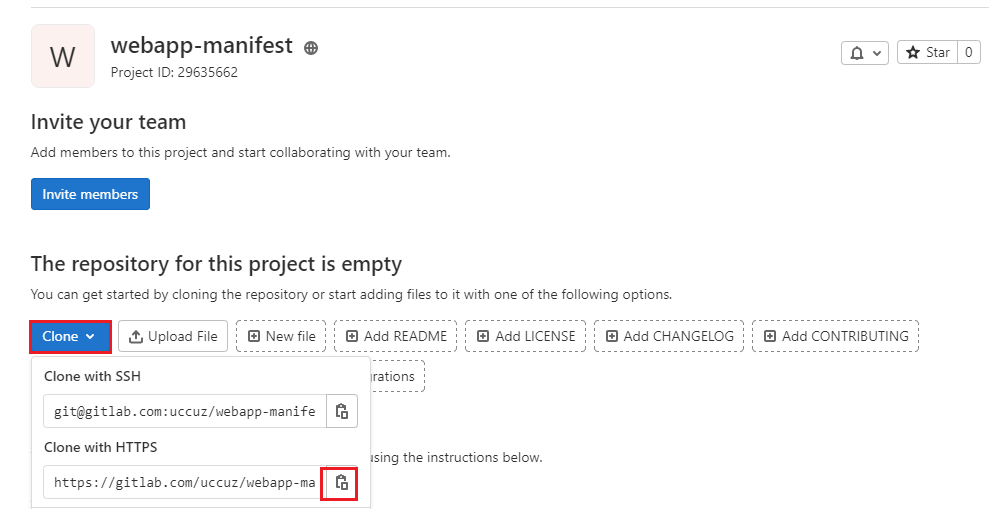
  1. 到 webApp-manifest 的 GitLab Repo,點擊 Clone-> Clone with HTTPS 複製地址

https://ithelp.ithome.com.tw/upload/images/20210916/20139235LiGxTnAuP5.png

  1. 回到 Terminal,推送檔案到 GitLab 上,將<your webapp-manifest repo>修改成剛剛複製的地址
git remote add origin <your webapp-manifest repo>
git push origin master
  1. 輸入 GitLab 帳號密碼後按Enter
Username for 'https://gitlab.com': 
Password for 'https://user@gitlab.com':

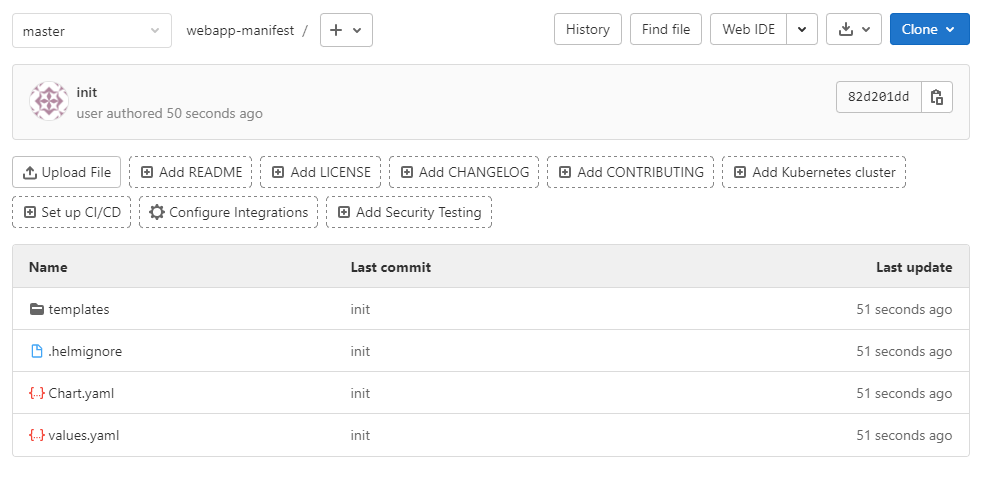
在 webapp-manifest 的 GitLab Repo 網站重新整理,就可以看到檔案上傳成功。
https://ithelp.ithome.com.tw/upload/images/20210915/20139235JPiZ0kyRoM.png

結論

今天了建立 GitLab Repo ,為之後的教學做準備,在後幾天的文章就會學習到如何使用 GitLab CI 來實現 GitOps 技術。


上一篇
Day 15 - 使用 Helm 打包 Kubernetes 應用程式
下一篇
Day17 - GitLab CI 流水線建置
系列文
DevOps 好想學!新手也能打造雲端 Study Lab30
圖片
  直播研討會
圖片
{{ item.channelVendor }} {{ item.webinarstarted }} |
{{ formatDate(item.duration) }}
直播中

尚未有邦友留言

立即登入留言