Shioaji API 是由永豐金證券所開發的API,只要你有永豐金的證券戶,都可以用電子交易的帳號及密碼登入;若完成「API 證券下單簽署」或「API 期貨下單簽署」後,也可透過API進行下單。
相關資源網站如下
Shioaji API官網:https://www.sinotrade.com.tw/ec/20191125/Main/index.aspx
Shioaji API GitHub:https://github.com/Sinotrade/Shioaji
Shioaji 討論區:https://sjapi.tw/index.php
永豐金證券 交易 API - Shioaji FB社群:https://www.facebook.com/groups/2267820226830423/
Shioaji API 有 Python 及 C# 兩種版本,比起C#我比較常使用Python,而且Python有很多現成的套件可以直接使用,省下許多開發上的時間;所以這此次的鐵人賽會以Python版本,來說明Shioaji API有哪些功能可使用
雖然目前Python3的最新版本是3.9版,但Shioaji API僅支援Python 3.6~3.8的版本;而在Windows環境中使用官方的安裝檔,只有3.6及3.7版可以正常執行Shioaji,若要使用Python 3.8,請安裝Anaconda,若是在Linux環境底下則無此問題。
Anaconda:https://www.anaconda.com/products/individual-d
我個人比較偏好的開發環境為 Windows + VS Code + 官方版本Python,並手動安裝套件。若你是以Anaconda,可以略過安裝Python及VS Code這兩個步驟。
首先下載Python。目前Python 3.7版,官網只提供3.7.9版的安裝檔,下載網址如下
https://www.python.org/ftp/python/3.7.9/
開啟下載網址後,請下載「python-3.7.9-amd64.exe」這個安裝檔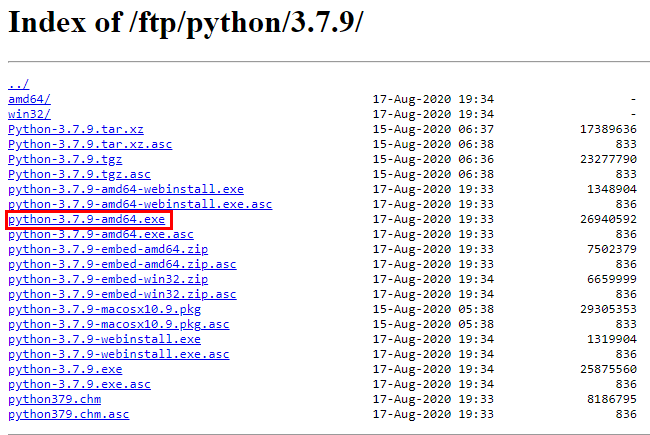
下載完成後,執行安裝檔。執行後,請先勾選「Add Python 3.7 to PATH」這個選項,再按「Install Now」;如果你想變更所要安裝的內容或路徑,請點「Customize installation」。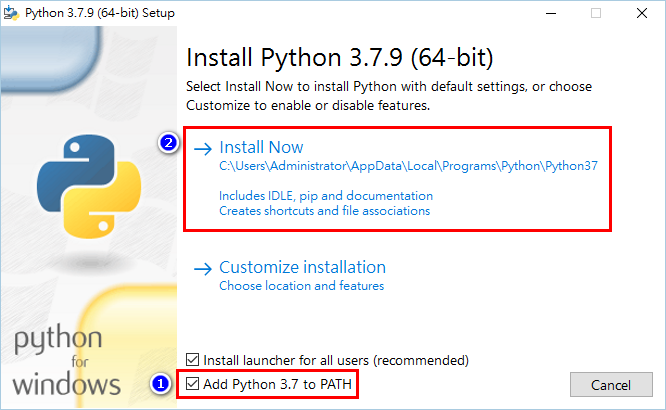
安裝完成後,按「Close」按鈕關閉安裝視窗。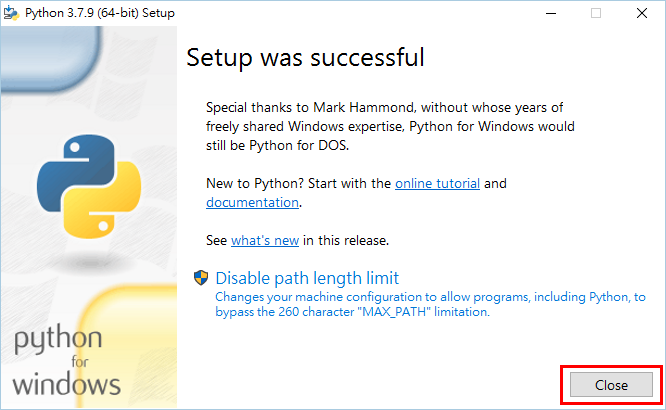
接著按下windows的搜尋按鈕,輸入「cmd」後開啟「命令提示字元」(console)。
在命令提示字元(console)中輸入「python」,按下Enter鍵後,若有成功進到interactive mode(如下圖),表示Python已安裝成功並有加到系統變數PATH中。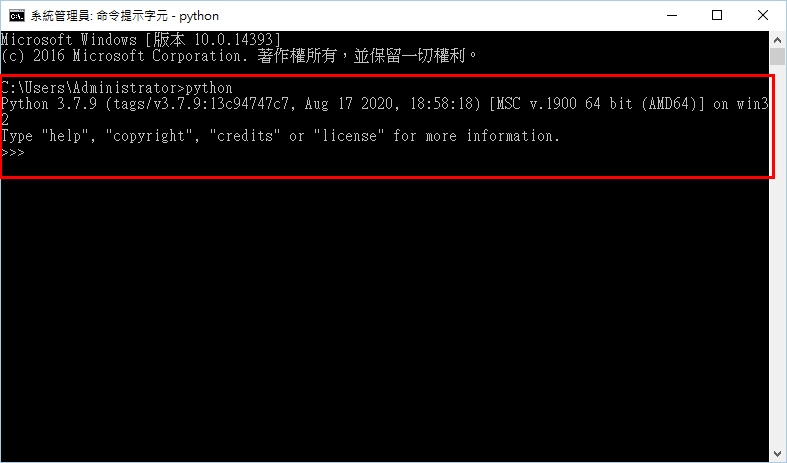
VS Code 官網:https://code.visualstudio.com/
打開VS Code官網後,請點「Download for Windows」進行下載。下載完成後,請執行所下載的安裝檔。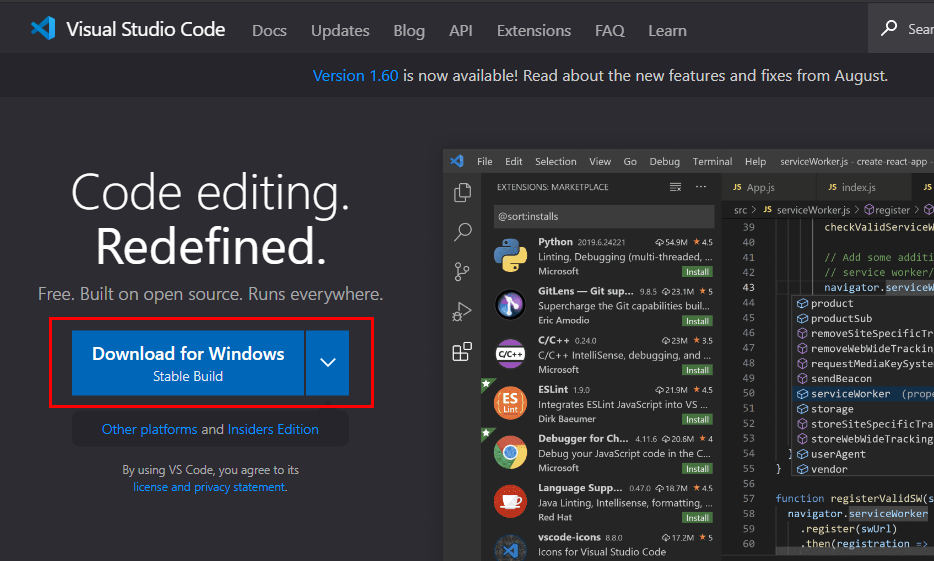
如果你的使用者帳號跟我一樣是系統管理員,在執行安裝檔時會看到這個確認視窗。這個訊息只是要確認你是否要使用User Installer的版本進行安裝,你可以直接按「確定」進行安裝,或是下載System Installer版本進行安裝。
接著,選擇「我同意」並按「下一步」。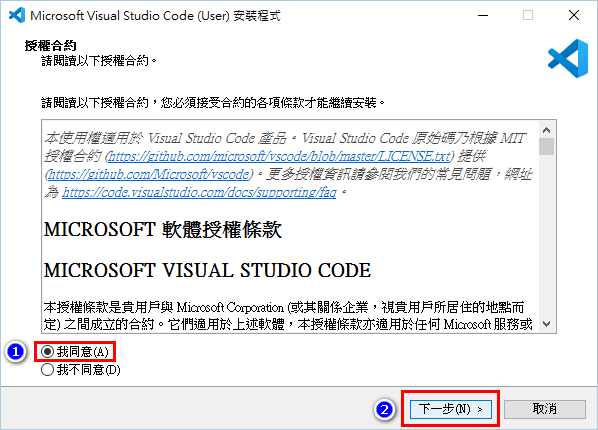
如果你要變更安裝的路徑,可以按「瀏覽」選擇你所要安裝的路徑,確認後按「下一步」。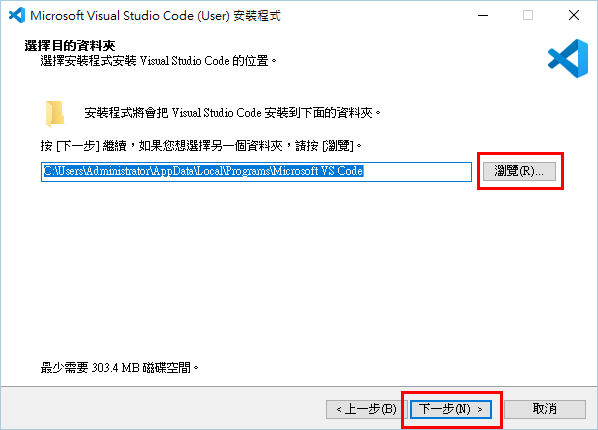
預設下,安裝後會在功能表資料夾中新增一個「Visual Studio Code」的資料夾,若你不想新增,可勾選「不要在「開始」功能表中建立資料夾」。確定後按「下一步」。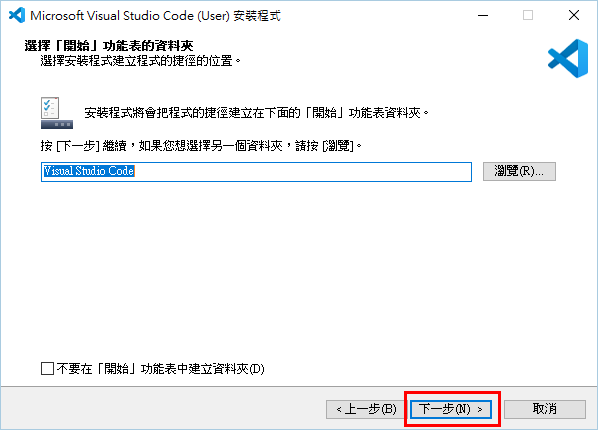
接著,會詢問你安裝完成後,是否要自動執行以下的附加工作。在這裡,我是有勾選「建立桌面圖示」這個選項,在安裝完成後,就會自動在桌面上建立VS Code的捷徑。確認後按「下一步」。
確認相關設定後,按「安裝」。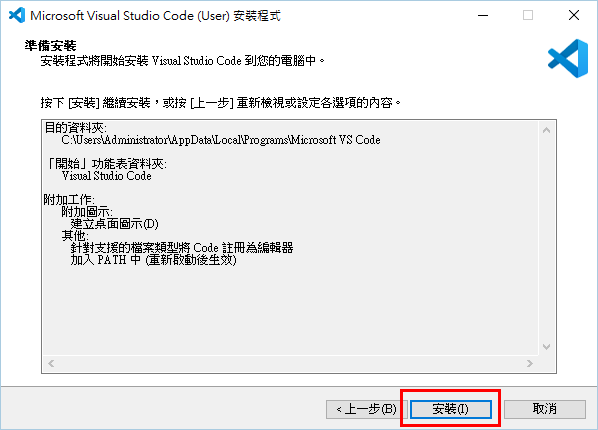
安裝完成後,按「完成」按鈕。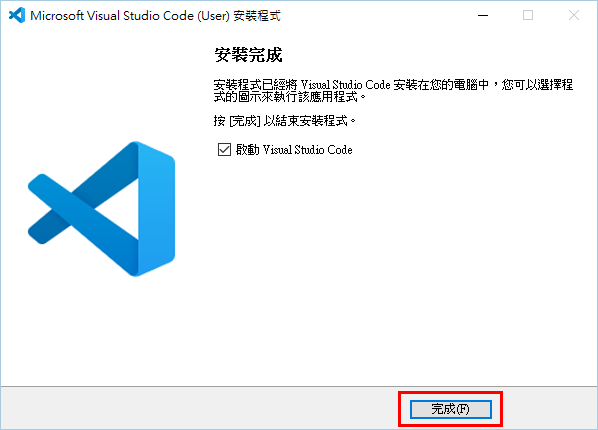
預設情況下,安裝完功後會自動啟動VS Code,若沒有請自行啟動VS Code。第一次執行時,會出現這個確認視窗,請按「Yes, I trust the authors」。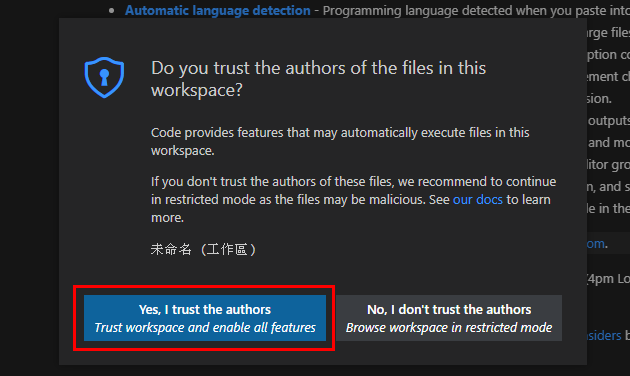
接著,VS Code會提示是否要安裝繁體的語件套件,請按「安裝並重新啟動(Install and Restart)」。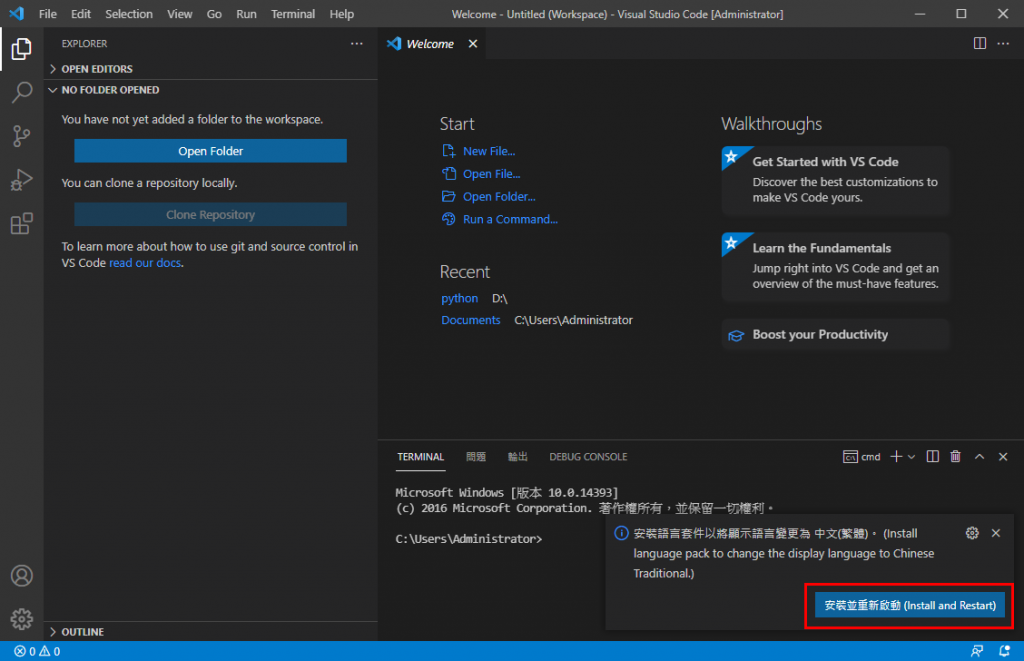
重新啟動後,就可看到VS Code的介面已變成熟悉的繁體中文。接著,先按「檔案>新增檔案」。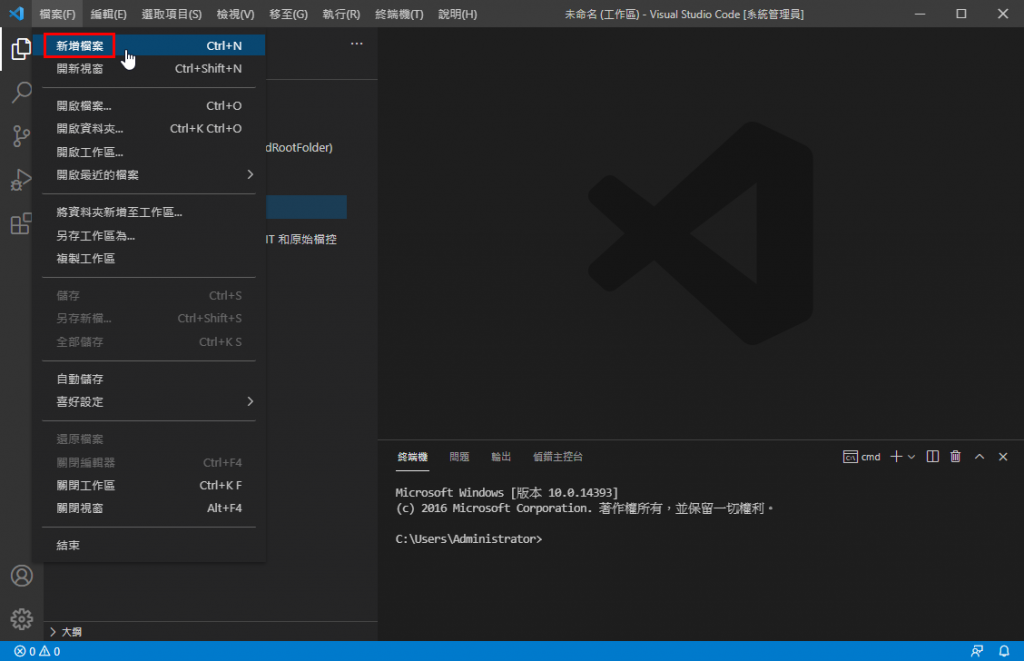
在右邊的編輯區中輸入「print('hello world')」後,按「檔案>儲存」。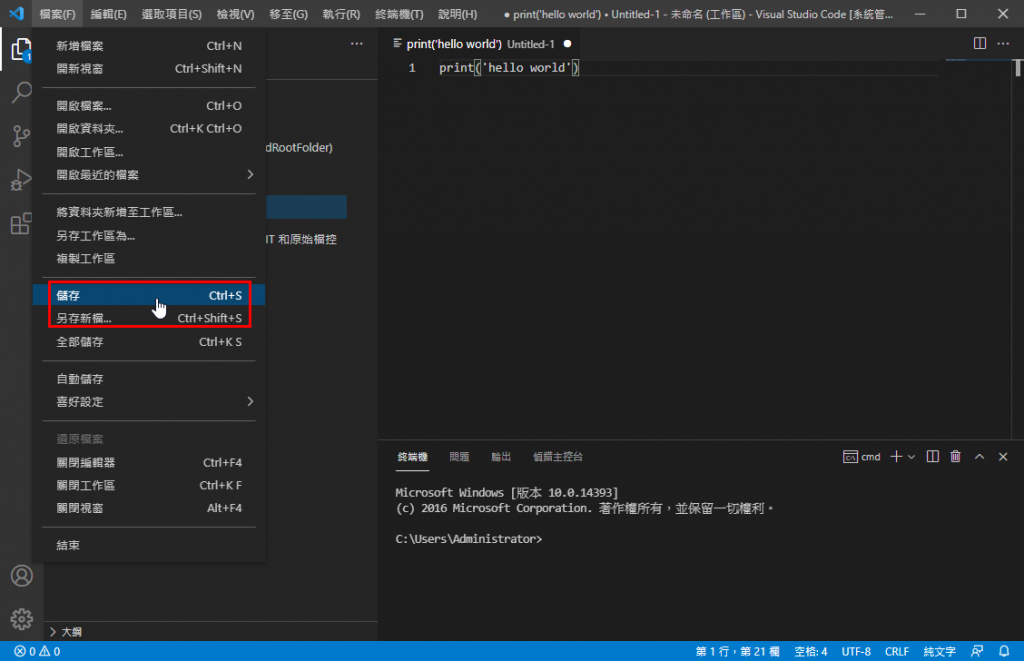
檔案名稱請自行輸入,在「存檔類型」中選擇「Python」並確認所儲存的副檔名為「.py」後按「存檔」。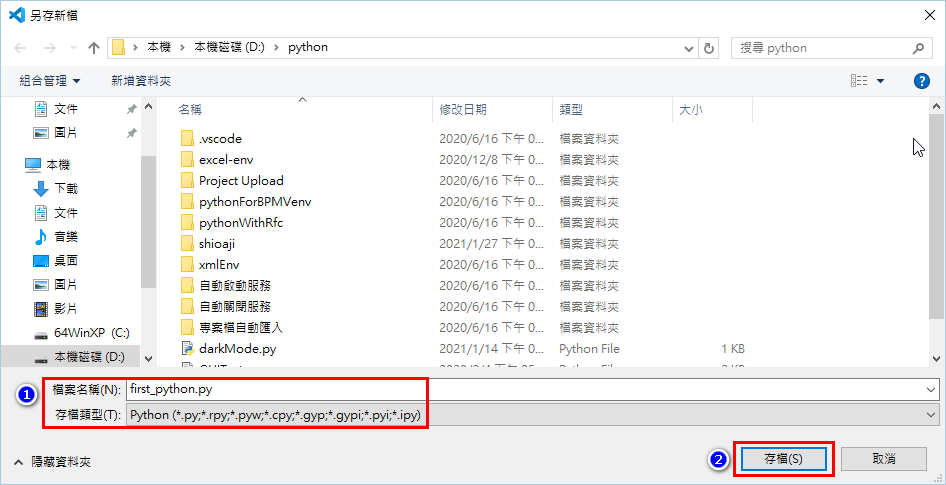
接著,VS Code就會偵測到你是要使用Python進行開發,並在右下角會跳出是否要安裝建議的延伸模組,請按「安裝」。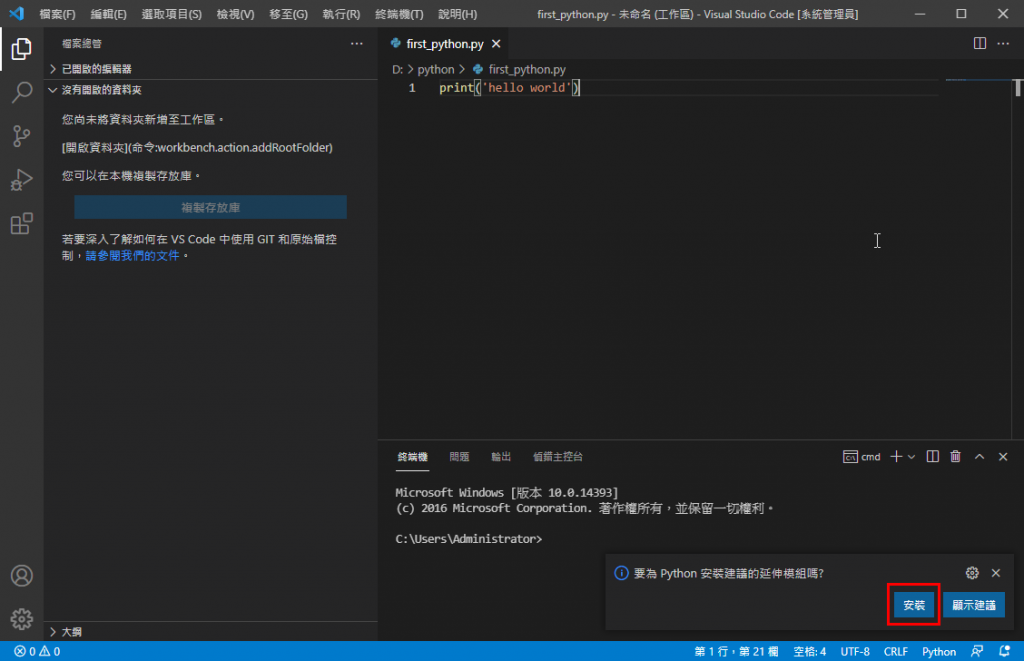
安裝完成後,一樣在右下角會提示你要選擇「Python Interpreter」,請按「Select Python Interpreter」。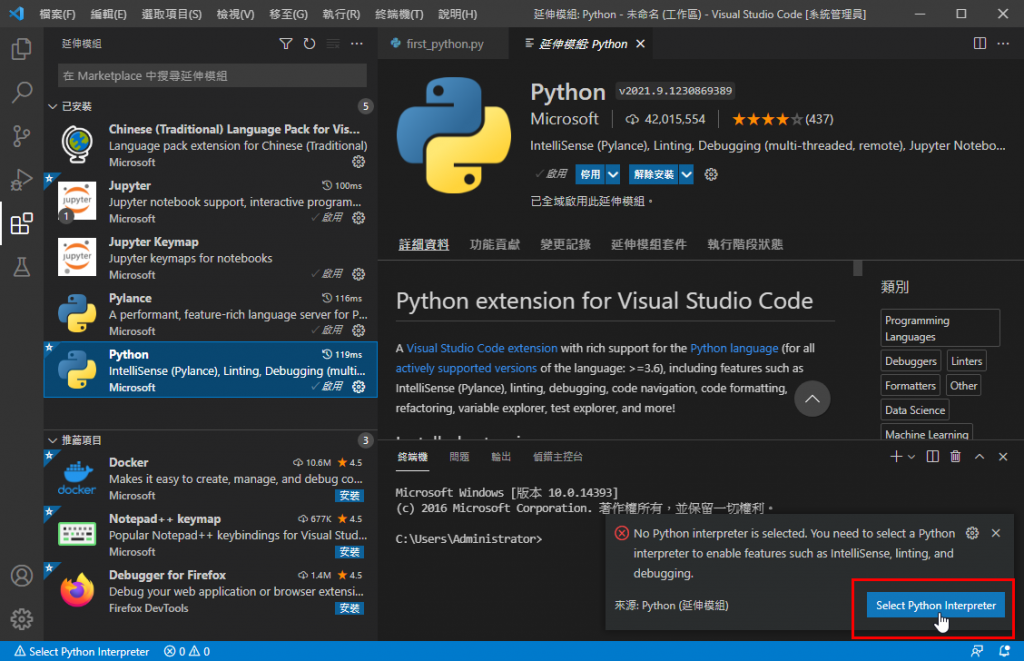
接著VS Code會偵測到系統中目前有安裝的Python Interpreter,請直接選擇即可。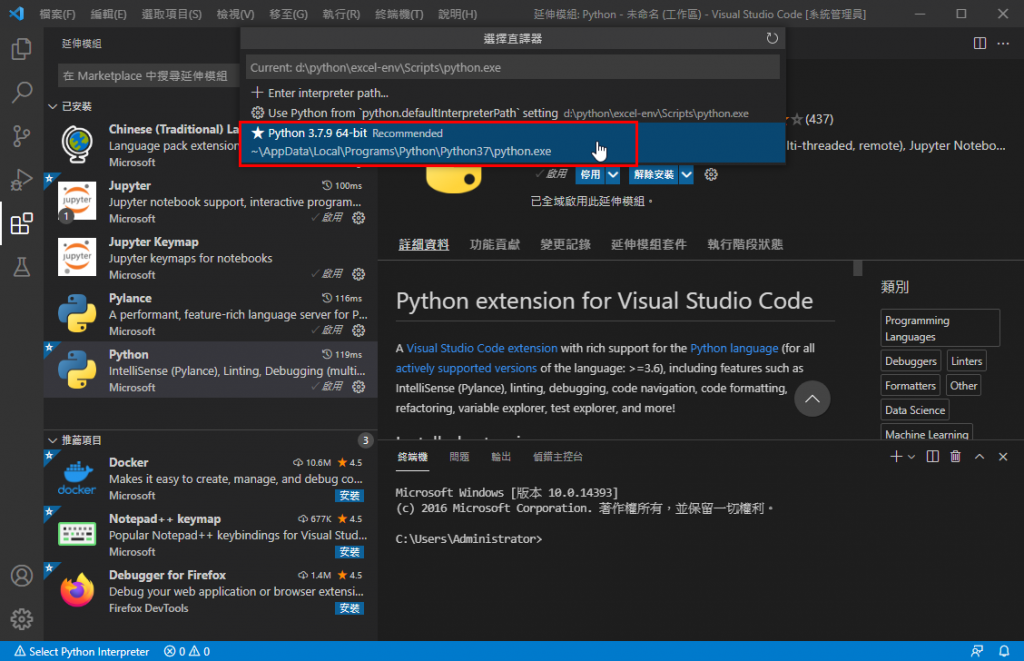
選擇完後,VS Code會詢問是否要安裝Pylance,請按「OK」進行安裝。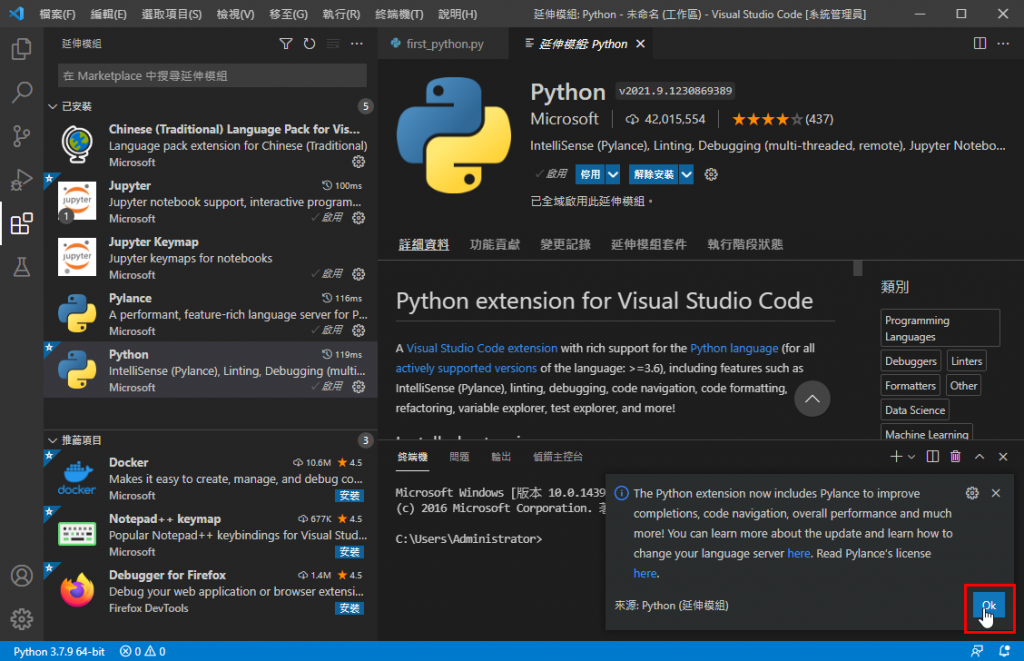
安裝完後,可以按右上角的執行按鈕,執行剛才所建立python程式檔。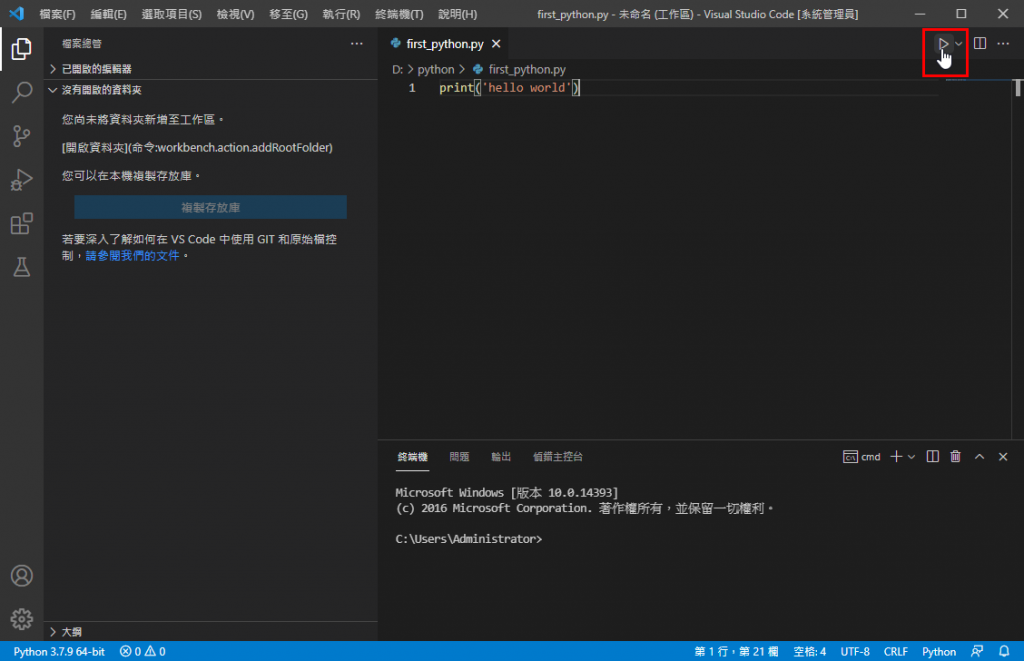
執行後,可以看到下方的終端機中,會有出現「hello world」,這樣就表示VS Code設定完成了。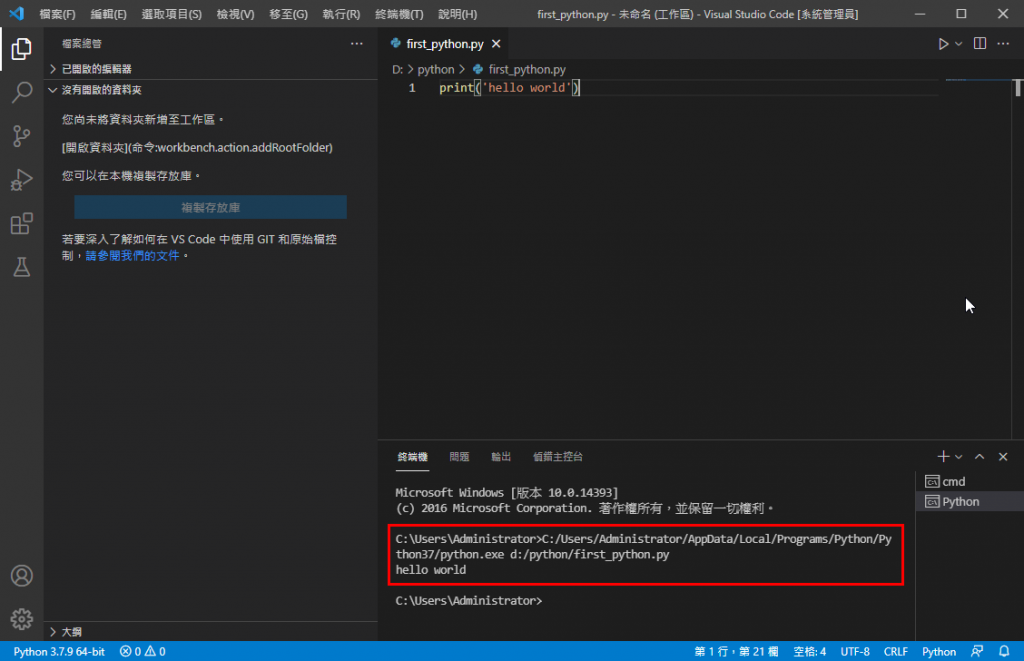
因為Python可用來開發各種類型的程式,在這裡我選擇使用pipenv來建立些擬環境並管理開發環境中的套件。首先,在終端機中輸入「pip install pipenv」並按下Enter鍵,安裝pipenv套件。若在執行pip install時出現問題,可以改為輸入「pip --user install pipenv」並按下Enter鍵進行安裝。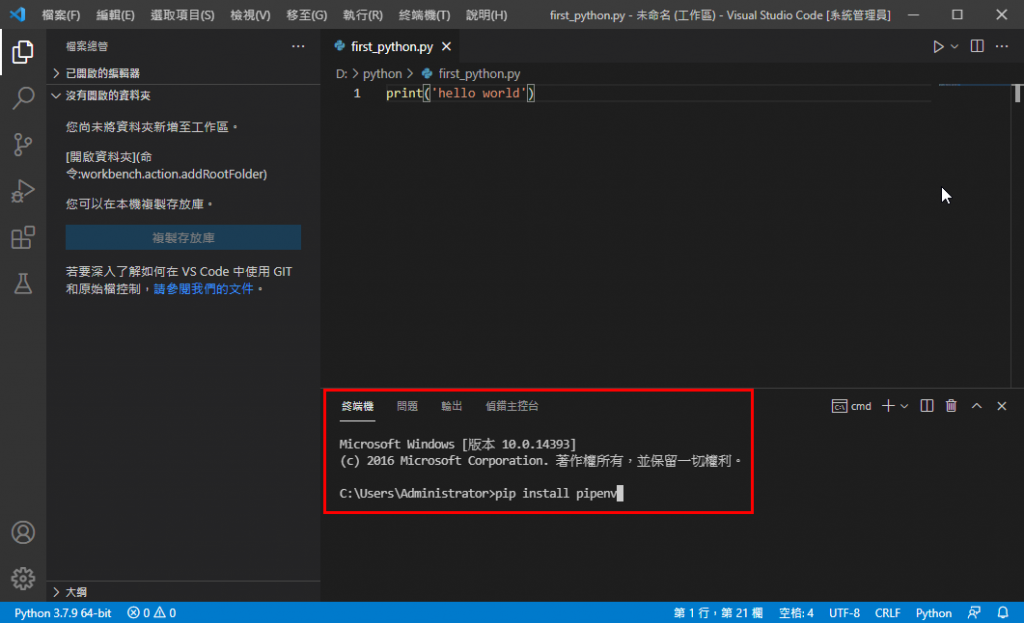
接著,建立一個開發環境的資料夾。我在這裡是建立一個「shioaji」的資料夾,並在終端機中輸入「cd shoiaji」進到資料夾中,並且輸入「pipenv --three」建立虛擬環境。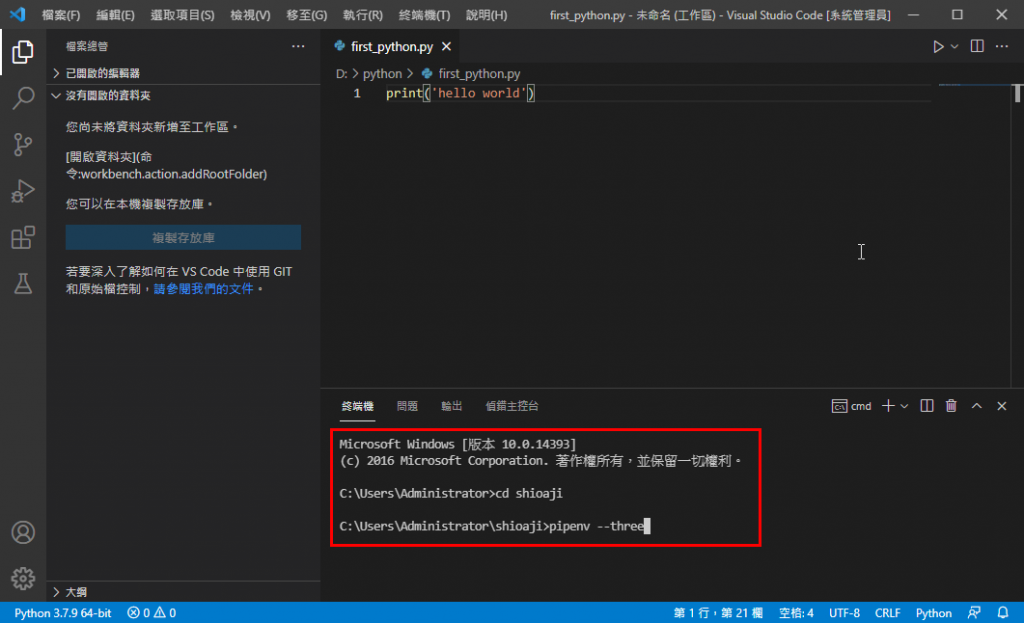
出現下列訊息,就表示虛擬環境已建立完成。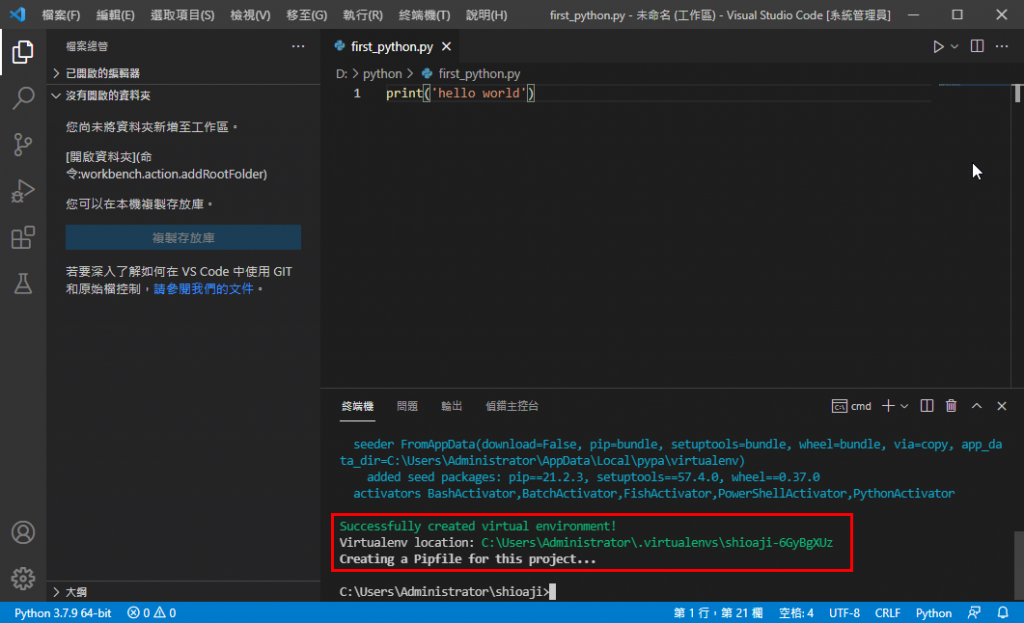
接著輸入「pipenv shell」來啟動虛擬環境。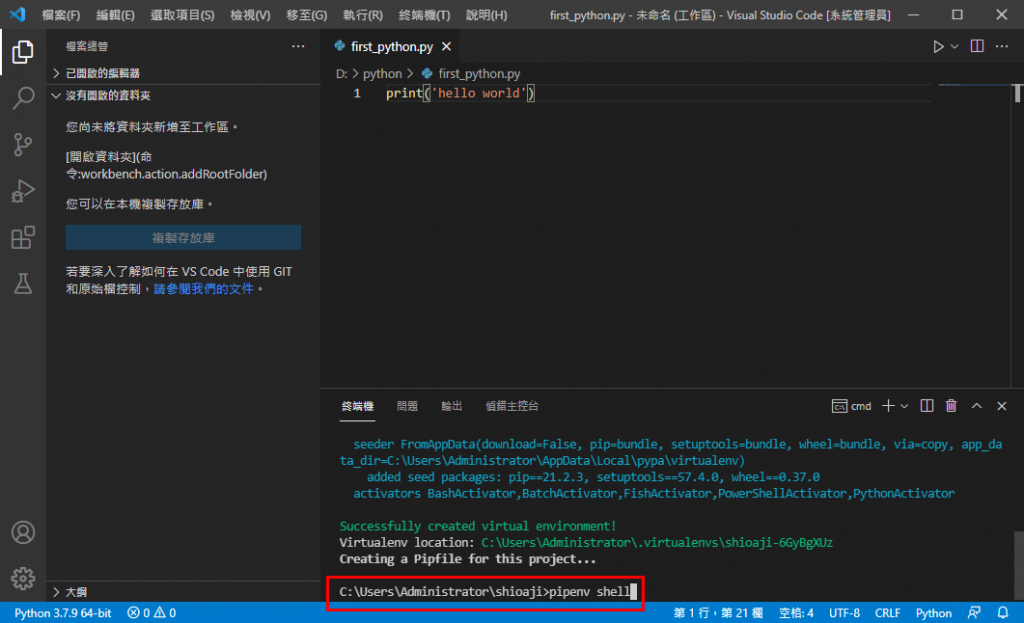
若終端機的最前面有出現類似下圖中的文字,表示已啟動虛擬環境。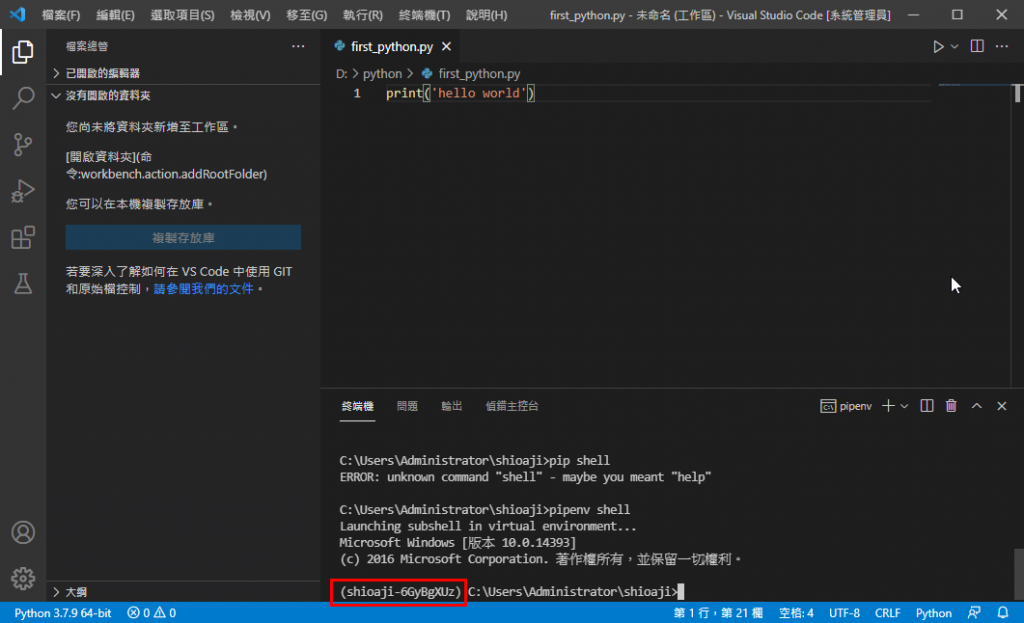
接著,分別輸入「pip install shioaji」及「pip install pandas」,安裝shioaji及pandas這兩個套件。
安裝完後,在終端機中輸入「Python」進到python interactive mode,接著分別輸入以下程式碼
import pandas as pd
import shioaji as sj
exit()
若出現下圖這樣,沒有出現其它錯誤訊息,表示套件已安裝成功並可使用。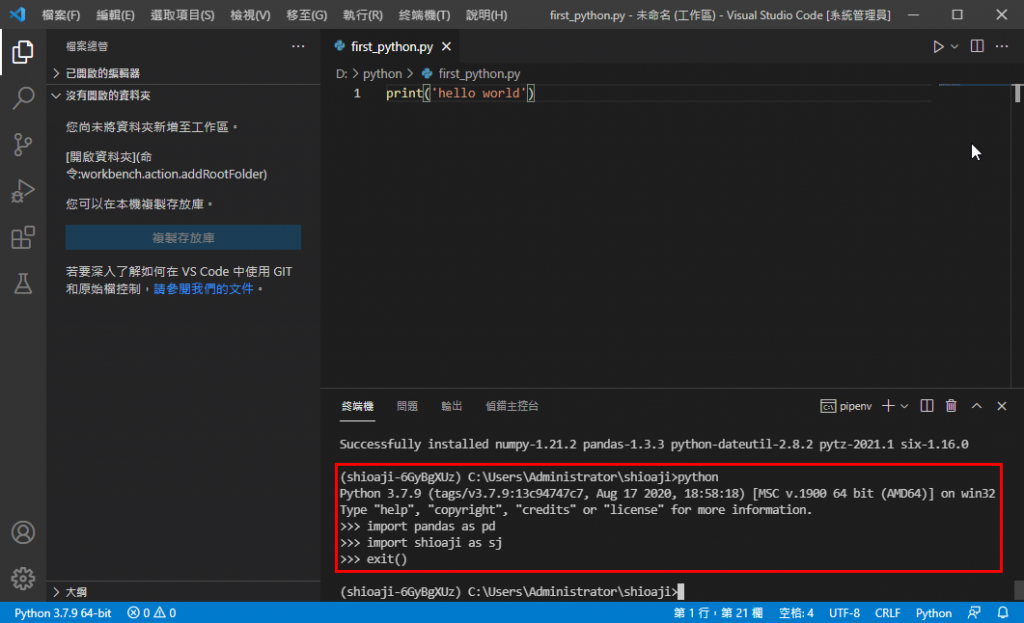
以上即為開發環境的安裝,下一篇將會正式說明Shioaji API。


 iThome鐵人賽