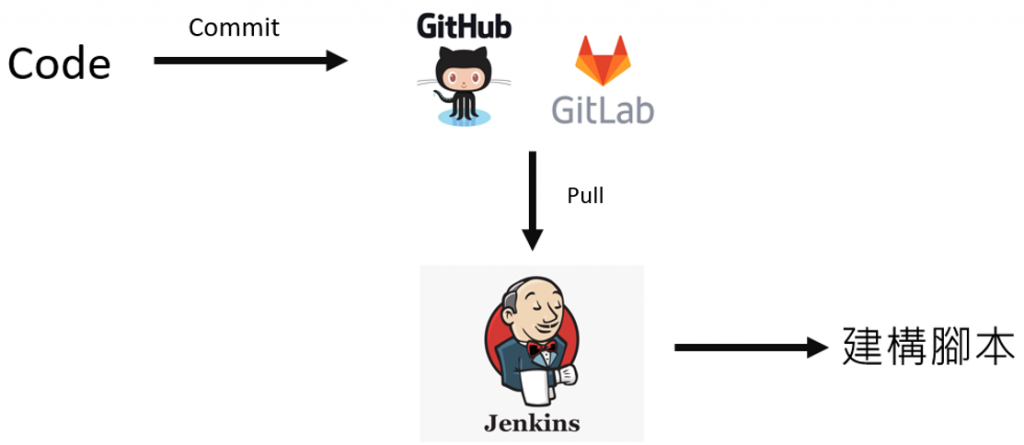
今天來建立一個新的Jenkins任務,Jenkins的標準任務流程如下,我們在本地端寫好code後推上或是merge上Github/GitLab,使得遠端多了新的commit。Jenkins發現了這個新的commit所以透過webhook自遠端抓取更新後開始Jenkins的build流程。
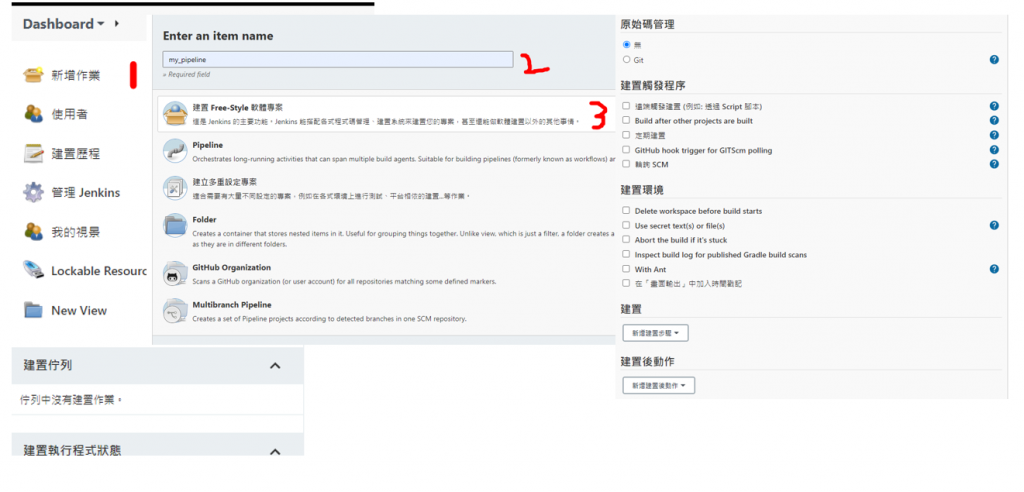
1選擇新任務,2輸入任務名稱,此時有許多種建立任務的方式,這次我們選擇用free-style比較多能調的東西。進入後上面的General暫時先不用填他,比較重要的是下面幾個選項:
我們現在來選擇如本文第一張圖,當Github有新的commit後自動通知Jenkins去build。
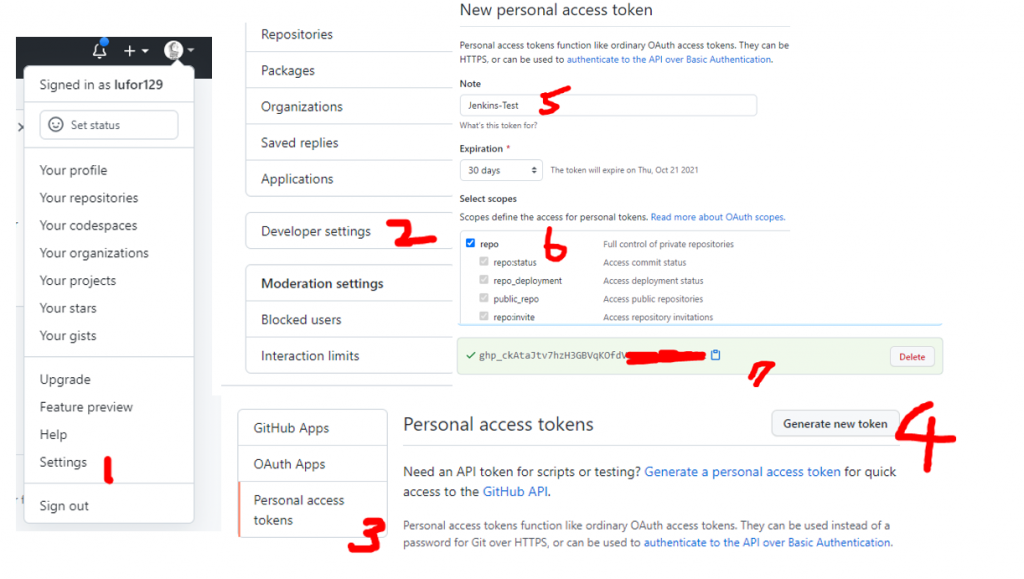
進入你的Github。 1.Personal Setting > 2.Developer setting > 3.Personal access tokens > 4.Generate new token > 5.輸入token名稱 > 6.勾選repo > 7.獲得token。
開啟Jenkins任務,原始碼管理選擇Git,輸入你的Repository URL,但是URL是https://<token>@github.com/.....git,將你的URL前面用上面的token@加在前頭。接著是下面的branch to build,選擇commit後會build的branch。想要所以branch就寫*/*。
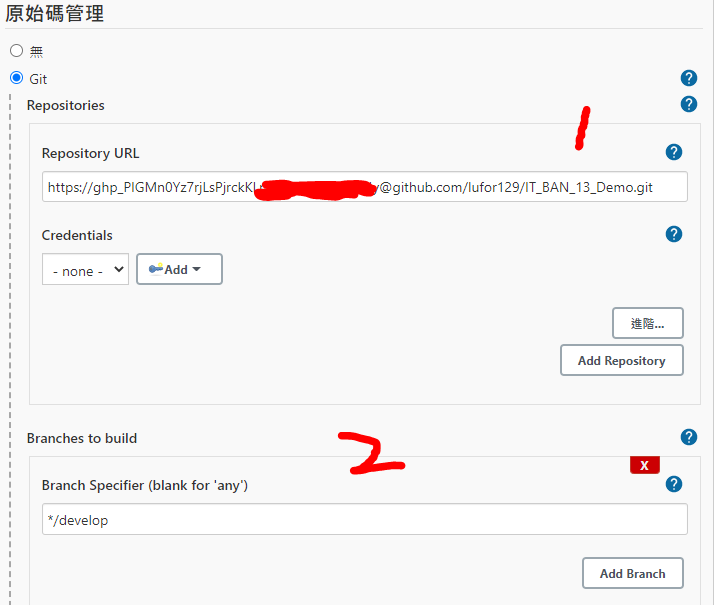
更新,其實只需要原始的git URL不需要將token加在前面也可以trigger。
接著在下面勾選GitHub hook trigger for GITScm polling,建置我們先選擇shell跑跑看,如下圖上shell先印出README。完成後按下apply。

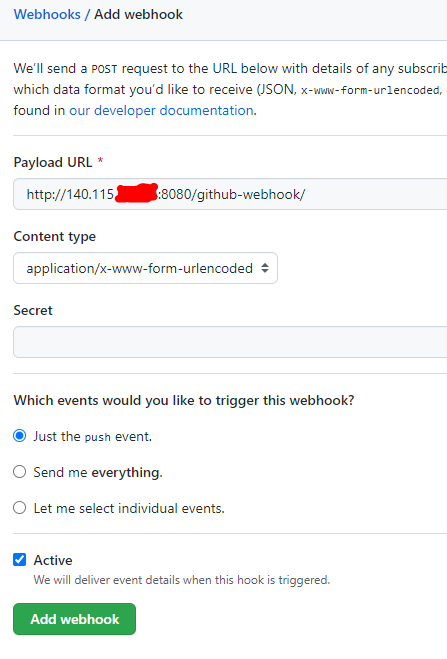
然後我們要讓Github能夠知道Jenkins主機的位置,進入你要連結的repository > setting > webhooks > Add webhook。
輸入Jenkins主機位置/github-webhook/,例如http://140.115.X.X:8080/github-webhook/ 接著add webhook。
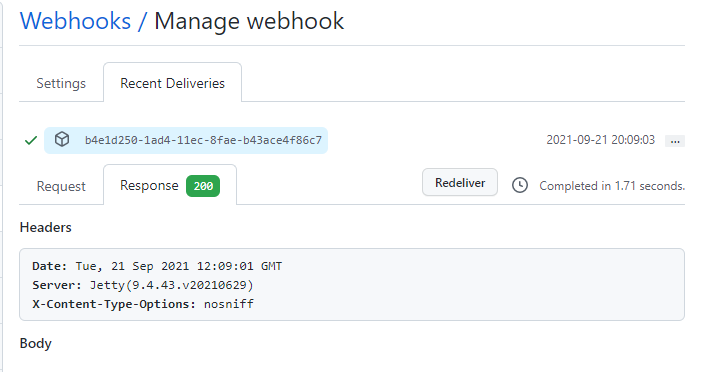
點進入該webhook,假如有打勾勾代表成功連結,沒有的話可以修改後按下Redeliver。
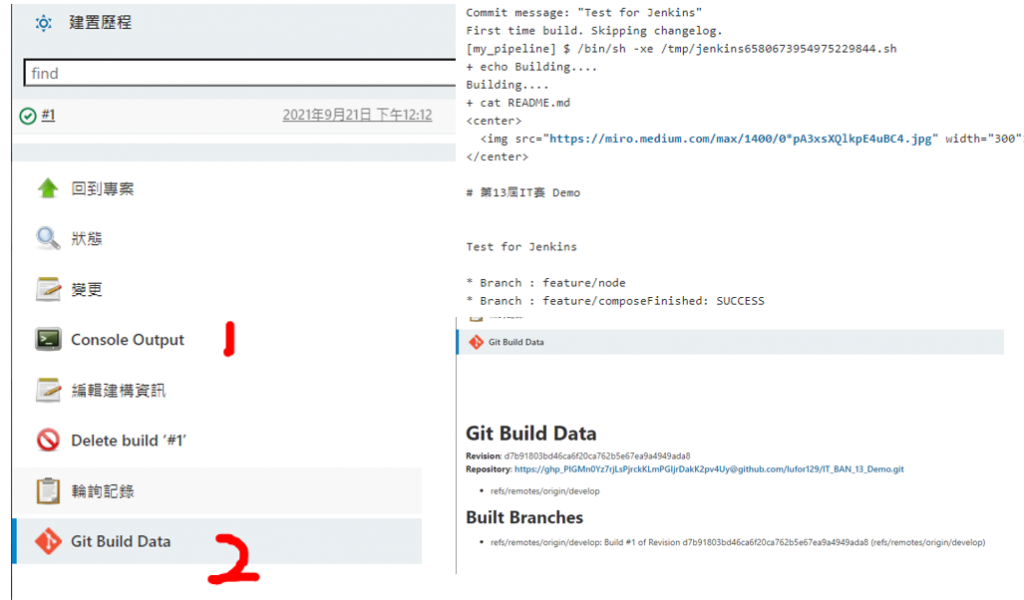
以上步驟全部完成後,就能成功用github自動build Jenkins了。我們以下來試試看。隨便修改一下README並推上develop commit Test for Jenkins。

進入Jenkins可以看到出現一個新的建置歷程,點進去後可以看到我們的Build output與是否真的有抓到Github的資料。
出了403 no valid crumb was included in the request error
Solution:
Jenkins Docker container - 403 no valid crumb was included in the request
Enabling proxy compatibility may help to solve this issue. Go to Settings -> Security -> Enable proxy compatibility in CSRF Protection section
Some HTTP proxies filter out information that the default crumb issuer uses to calculate the nonce value. If an HTTP proxy sits between your browser client and your Jenkins server and you receive a 403 response when submitting a form to Jenkins, checking this option may help. Using this option makes the nonce value easier to forge.