第一天的簡介中, 我們提到會整合training、tracking與serving(如下圖). 現在我們已使用fastai進行MNIST資料集的訓練, 並且產生訓練後的model.

通常訓練不會一次就完成, 經過多次調整參數後再找到最佳參數與模型是資料科學家的日常. 所以如果能將每次訓練的參數(parameter)、metric與模型記錄起來然後再進行比較, 將會有助於記錄訓練過程的相關資料. 而MLFlow的tracking功能這時就能來幫忙.
因此我們就在K8s上安裝MLflow
安裝MLFlow是一件容易的事, 使用pip安裝時只需要一行指令就可以了. 但我們要把MLFlow安裝在K8s上, 所以我們需要先包一個image.
FROM python:3.8-slim-buster
RUN apt-get update -y && apt-get install -y build-essential libpq-dev
RUN pip3 install mlflow==1.18.0 psycopg2
EXPOSE 80
CMD mlflow server --host 0.0.0.0 --port 80
$docker build -t <user name>/mlflow1.18.0:0.0.1
$docker push
我們預計使用這個 helm-mlflow 的方式安裝我們自己的MLFlow Servre, 但會使用我們自己剛剛包好的image.
Add Helm repository
$helm repo add cetic https://cetic.github.io/helm-charts
$helm repo update
Install the chart
請在 image.repository輸入剛剛包好的image name, 而且在image.tag填上剛剛包好的image時的tag name
helm upgrade --set service.port=80 --set image.repository=<your_name>/mlflow1.18.0 --set image.tag=0.0.1 --install orion-mlflow cetic/mlflow
Helm安裝好MLFlow的畫面
照著上圖指令執行, 可以取得連線的網址
或著,你可以使用K8s指令查看一下 orion-mlflow的service資料
$kubectl get sve

NAME                                 TYPE        CLUSTER-IP      EXTERNAL-IP   PORT(S)             AGE
service/orion-mlflow                 NodePort    10.97.248.21    <none>        80:30534/TCP        17d
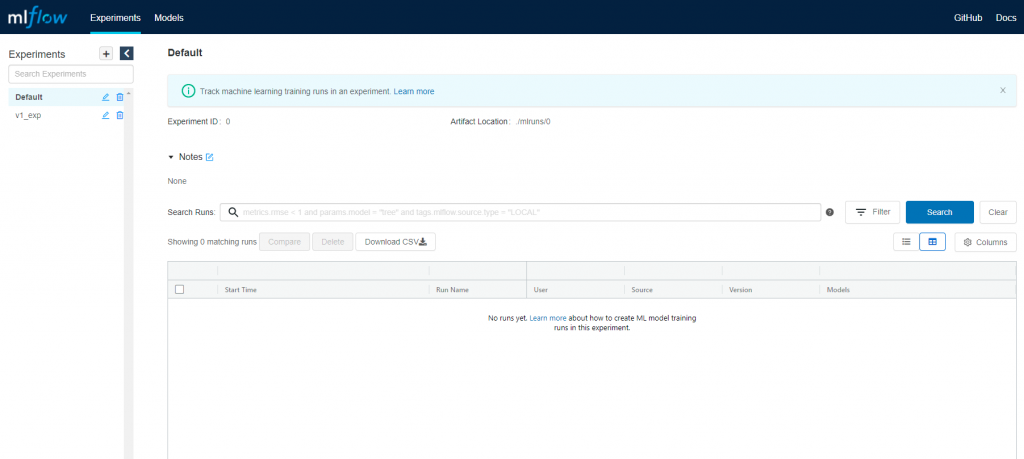
在browser上輸入網址(http://172.23.180.10:30534), 即可看到MLFlow的畫面, 如下圖
到這裡我們安裝好MLFlow, 下一篇我們將在修改notebook內容, 目的是將parameter與metrics記錄在MLFLow之中.
