Webpack 一開始只認識 JavaScript,當引入其他語言(如:css)撰寫的檔案時就會出現無法執行的錯誤,這時候就需要 loader 來解決這個問題,loader 就像是個翻譯員一樣,讓 Webpack 認識不同的檔案類型並且執行打包工作。
webpack.config.js 是 Webpack 環境設定的重要檔案,在 Day14 裡已經學到如何設置 entry(進入點)、output(輸出點)、mode(輸出模式),今天會在學習讓 HTML、CSS 回歸的同時,學會 webpack.config.js 的nodule 和 plugins 設定。
接續 Day14 的練習,Webpack 專案的進入點是 src/index.js,表示 Webpack 只會對 src 資料夾底下的 index.js 做加工處理,如果要加入 css,就需要用 import 的方式進行,步驟如下:
src 資料夾內新增 css 檔案,命名為 all.css(名稱可自行定義),並加入一些簡單的樣式語法。
h1 { color: red;}
index.js 的上方引入 css 檔案。
import './all.css'
完成後執行build會得到錯誤資訊,表示這時候 Webpack 還無法看懂 css,這時候就要設置 loader 了。
You may need an appropriate loader to handle this file type, currently no loaders are configured to process this file.
到 Webpack 官方文件搜尋 css-loader 就能找到相關資訊。
安裝 css-loader 和 style-loader(用來將樣式插入html中)
$ npm i -D css-loader style-loader
編輯 webpack.config.js,加入模組:
module.exports = {
  module: {
    rules: [
      {
        // 用正則表示法來處理副檔名是 .css 的檔案
        test: /\.css$/i,
        use: ["style-loader", "css-loader"],
      },
    ],
  },
};
程式碼插入位置參考圖: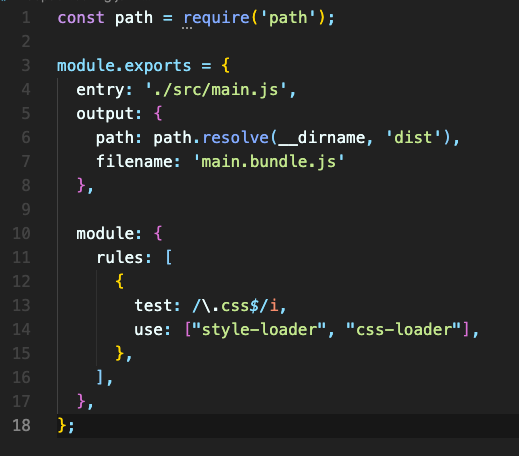
完成上面的設置之後,就能成功執行build。
在上個段落中,雖然讓 Webpack 可以認識 CSS,但是打包後的 css 會被寫在 js 檔案裡面,如果希望將 css 獨立出來就要使用到插件-MiniCssExtractPlugin
安裝 MiniCssExtractPlugin
$ npm i -D mini-css-extract-plugin
建立一個來源的 css 檔(這邊使用上個段落建立的 all.css,可自行更改)
在輸入點的 js 檔引用這個 css 檔(同樣套用上個段落的設定)
編輯 webpack.config.js
// 這行放最上面
const MiniCssExtractPlugin = require("mini-css-extract-plugin");

module.exports = {
  // 加入插件
  plugins: [new MiniCssExtractPlugin()],
  module: {
    rules: [
      {
        test: /\.css$/i,
        // 這邊原本使用的是 style.loader,變更為 MiniCssExtractPlugin.loader
        use: [MiniCssExtractPlugin.loader, "css-loader"],
      },
    ],
  },
};
完成設置後執行build會發現 dist 資料夾內多了 main.css 檔案,和 js 檔案分開了。
完成 css 的設置後,Webpack 並不會生成 html 讓我們檢視樣式效果,這時候可以安裝 HtmlWebpackPlugin 這個插件,在每次 build 後就會生成一個 html 檔案來引入輸出的 js 檔。
安裝 HtmlWebpackPlugin
$ npm i -D html-webpack-plugin
編輯 webpack.config.js,加入插件:
// 這行放在最上方
const HtmlWebpackPlugin = require('html-webpack-plugin');
...
...
module.exports = {
  // 這行放在 module.exports 內
  plugins: [new HtmlWebpackPlugin()],

  // 注意,plugins屬性裡面放的是陣列,如果有在上一個段落加入 mini-css-extract-plugin,撰寫方式會如同下面
  plugins: [
    new HtmlWebpackPlugin(),
    new MiniCssExtractPlugin()
  ],
完成設置後執行build會發現 dist 資料夾內多了 index.html 檔案,並且已經引入了輸出的 js 檔案。
在前個段落的 html 是 HtmlWebpackPlugin 自動生成的,除了引用 js 之外沒有任何內容,我們可以修改 webpack.config.js,把自己撰寫的 HTML 作為樣板:
module.exports = {
  // 在 HtmlWebpackPlugin() 裡面放入物件,並設置 template 屬性為來源檔案路徑
  plugins: [new HtmlWebpackPlugin({
    template: './src/index.html'
  })],
};
build產生的 index.html 就會套用自己撰寫的 html 樣板了。瀏覽器有快取機制來節省流量、加快載入速度,每次打包輸出的檔案都相同,即使部署上線了也會因為快取讓用戶端繼續使用舊的版本,我們可以在每次輸出的檔案添加一串 hash 值,這樣用戶端在讀取網頁時讀到不同的檔名就會下載最新的檔案,不會使用快取。
HTML - 修改 webpack.config.js 的 output(輸出點)
module.exports = {
  output: {
    path: path.resolve(__dirname, 'dist'),
    // 下方這行加入了 [hash]
    filename: 'bundle.[hash].js',
  },
};
CSS - 修改 webpack.config.js 的 html-webpack-plugin 插件設定
plugins: [
  // 小括弧內加入一個物件來設定輸出檔名
  new MiniCssExtractPlugin({
    filename: 'main.[hash].css'
  })
],
再次執行build會發現輸出的檔案多了一串 hash。(這個設定需要搭配插件來幫忙引入新的檔案名稱,沒有使用插件的話每次 build 完要自己改引用路徑,會非常麻煩)
完成上個段落的 hash 設置後,因為每次產生的檔名都不同,就不會有『覆蓋』的行為,多 build 幾次後 dist 資料夾裡面會變得很亂,可以透過 clean-webpack-plugin 這個套件在每次 build 的時候清理 dist 資料夾。
安裝套件
$ npm i -D clean-webpack-plugin
編輯 webpack.config.js
// 插入最上方
const { CleanWebpackPlugin } = require('clean-webpack-plugin');
...
// 插入 plugins
   plugins: [
     new CleanWebpackPlugin(),
   ],
完成設定後就可以測試成果了。
今天的練習,學到了 webpack.config.js 的兩個配置,loader 可以讓 Webpack 讀懂新的檔案格式,plugin 可以讓 Webpack 自動化執行特定的操作。
請問我出現下列錯誤訊息,是可能那邊出錯了?
:
:
cacheable modules 35 bytes
./src/index.js 18 bytes [built] [code generated]
./src/all.css 17 bytes [built] [code generated] [1 error]
ERROR in ./src/all.css 1:3
Module parse failed: Unexpected token (1:3)
You may need an appropriate loader to handle this file type, currently no loaders are configured to process this file. See https://webpack.js.org/concepts#loaders
h1 { color: red;}
@ ./src/index.js 1:0-18
※webpack.config.js如下:
const { CleanWebpackPlugin } = require('clean-webpack-plugin');
const MiniCssExtractPlugin = require("mini-css-extract-plugin");
const HtmlWebpackPlugin = require('html-webpack-plugin');
// 引用 node.js 裡面的路徑(path)模組,在下面會用到
const path = require('path');
module.exports = {
mode: 'development',
// 設定進入點的檔案路徑和檔名
entry: './src/index.js',
// 設定輸出點
output: {
// 設定路徑,這邊使用到剛剛宣告的 path,__dirname 可以取得這個專案資料夾的完整絕對路徑,dist 名稱可以自行更改,也可以空值(''),就會放到專案資料夾第一層(通常不會去改動他)
path: path.resolve(__dirname, 'dist'),
// 設定檔名,常見的輸出檔名為 main.js 或 bundle.js,可以自行更改
// 下方這行加入了 [hash]
filename: 'bundle.[hash].js',
},
module: {
rules: [
{
test: /.css$/i,
// 這邊原本使用的是 style.loader,變更為 MiniCssExtractPlugin.loader
//use: ["style-loader", "css-loader"],
use: [MiniCssExtractPlugin.loader, "css-loader"],
},
],
},
module: {
rules: [
{
test: /.png/,
type: 'asset/resource'
}
]
},
// 注意,plugins屬性裡面放的是陣列,如果有在上一個段落加入 mini-css-extract-plugin,撰寫方式會如同下面
plugins: [
new HtmlWebpackPlugin({
template: './src/index.html'
}),
new MiniCssExtractPlugin({
filename: 'main.[hash].css'
}),
new CleanWebpackPlugin(),
],
devServer: {
static: {
// 'dist'這個資料夾名稱需要和輸出點一致,不然會找不到開啟的網頁
directory: path.join(__dirname, 'dist'),
},
compress: true,
// 使用本地的 XXXXport 來架設伺服器,可以自定為其他 port,要避免與其他程式衝突。
port: 9000,
// 伺服器運行後自動用瀏覽器開啟網頁,可以改 false 取消
open: true,
},
};
您好,可以試試執行 npm i -D css-loader 再裝一次看看,我剛剛測試只要有 mini-css-extract-plugin 和 css-loader 兩個套件,是可以正常打包的,感謝您閱讀我的文章和提問~
還是不行耶…那二個我應該都有安裝了,以下是package.json:
{
"name": "wp_demo",
"version": "1.0.0",
"description": "",
"main": "index.js",
"scripts": {
"test": "echo "Error: no test specified" && exit 1",
"build": "webpack",
"dev": "webpack serve",
"deploy": "webapck --mode production"
},
"keywords": [],
"author": "",
"license": "ISC",
"dependencies": {
"bootstrap": "^5.1.3",
"fontawesome": "^5.6.3"
},
"devDependencies": {
"clean-webpack-plugin": "^4.0.0",
"css-loader": "^6.6.0",
"html-webpack-plugin": "^5.5.0",
"mini-css-extract-plugin": "^2.5.3",
"style-loader": "^3.3.1",
"webpack": "^5.69.1",
"webpack-cli": "^4.9.2",
"webpack-dev-server": "^4.7.4"
}
}
您好,不好意思,我沒辦法確認問題的原因,但是我做了一個 DEMO 放在 GitHub 上,內容是完全參考這篇文章操作,並且測試沒有問題,如果還是沒辦法找出原因,也可以請您上傳自己的專案到 GitHub 上讓我參考,謝謝~
那我再研究一下…太感謝了!


 iThome鐵人賽