生命週期介紹在一開始建立Vue的實體,然後掛載到#app就算是已經在使用元件,而這一連串的建立到被銷毀,都有他的生命週期。
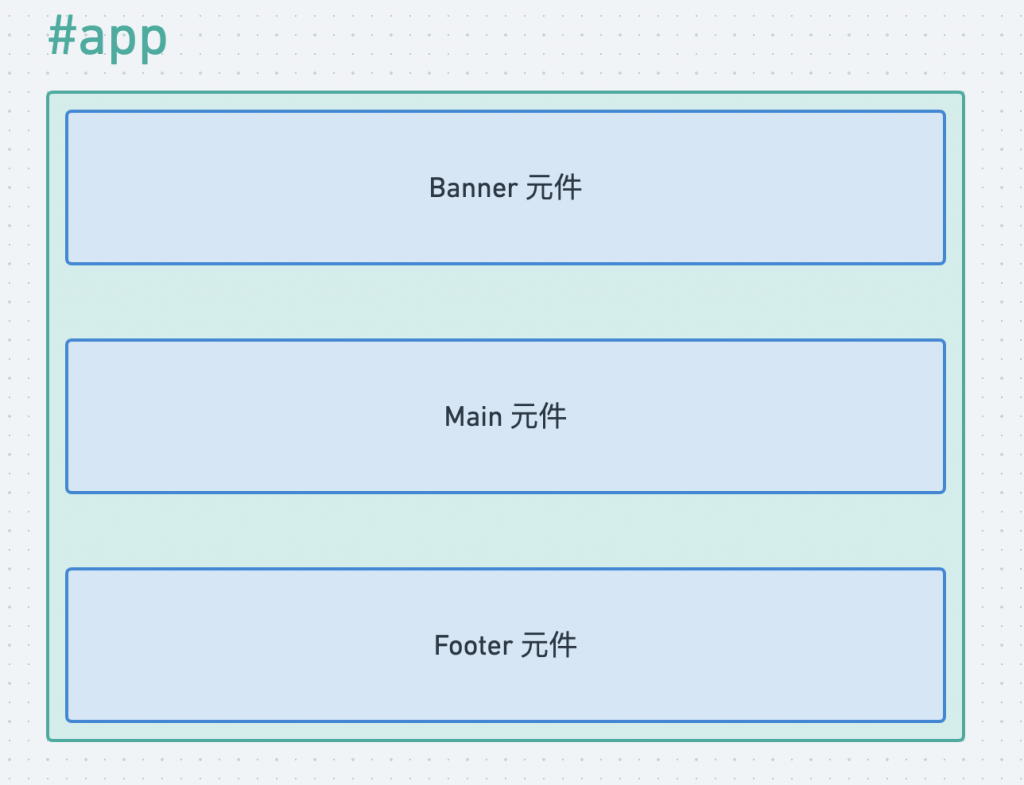
Vue本身就是以很多元件所組成的概念,舉例來說最外層是一個app元件,裡面有Banner、Footer、Main的子元件,當我在首頁切換頁面時,需要切換Main子元件內容,就必須卸載、重新生成,這個過程就會觸發生命週期。
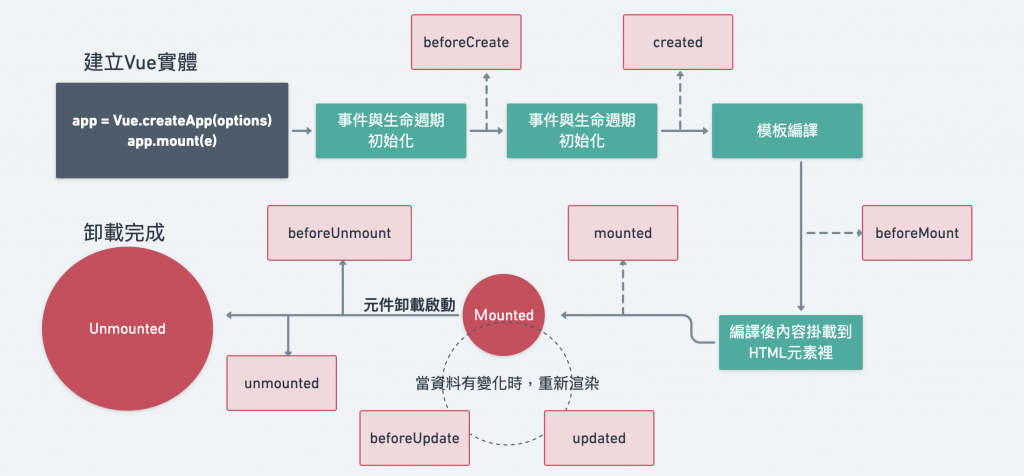
週期圖分為三階段:
實體建立階段beforeCreate:Vue實體建立,狀態事件還沒初始化。created:資料建立完成。beforeMount:HTML結構準備與DOM節點綁定,尚未掛載。mounted:已經將DOM元素掛載到畫面上。
實體更新階段beforeUpdate:當資料有更動,畫面更新前。Update:當資料有更動,畫面更新完成。
銷毀階段beforeUnmount:Vue實體被銷毀前。unmounted:Vue實體被銷毀完成。
<div id="app">
    <button @click="isShowing = !isShowing">
        <span v-if="isShowing">隱藏元件</span>
        <span v-else>顯示元件</span>
    </button>
    <hr>
    <lifecycle v-if="isShowing"></lifecycle>
</div>
const app = Vue.createApp({
    data() {
        return {
        isShowing: false
        }
    }
});
app.component('lifecycle', {
  template: `<div>
    <h4>{{ state }}</h4>
    <input type="text" class="form-control" v-model="state">
  </div>`,
  data() {
    return {
      state: 'Vue data 資料狀態'
    }
  },
  beforeCreate() {
    console.log(`beforeCreate! ${this.state}`);
  },
  created() {
    console.log(`created! ${this.state}`);
    alert(`created! ${this.state}`);
  },
  beforeMount() {
    alert(`beforeMount! ${this.state}`);
  },
  mounted() {
    alert(`mounted! ${this.state}`);
  },
  beforeUpdate() {
    console.log(`beforeUpdate! ${this.state}`);
  },
  updated () {
    console.log(`updated! ${this.state}`);
  },
  beforeUnmount() {
    console.log(`beforeUnmount! ${this.state}`);
  },
  unmounted() {
    console.log(`unmounted! ${this.state}`);
  }
});
app.mount('#app');
這邊使用v-if來做示範,畫面一開始時HTML還未生成:
點擊顯示元件開始生命週期: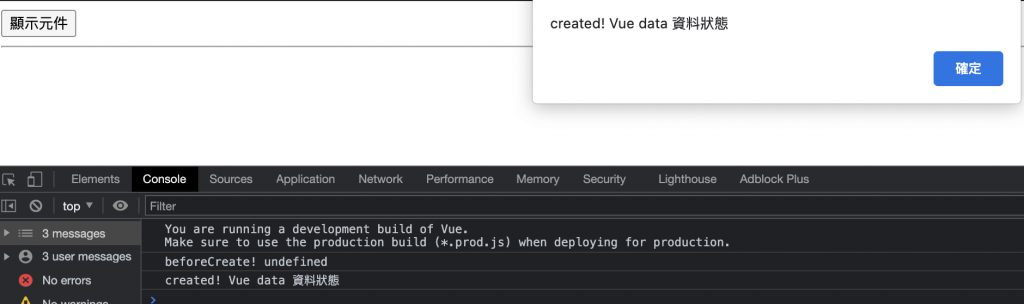
beforeCreate之前還未能取得Data資料,created階段已經能看到data裡面的資料"Vue data 資料狀態"。
點擊確認後,來到mounted階段,DOM元素準備要掛載到HTML: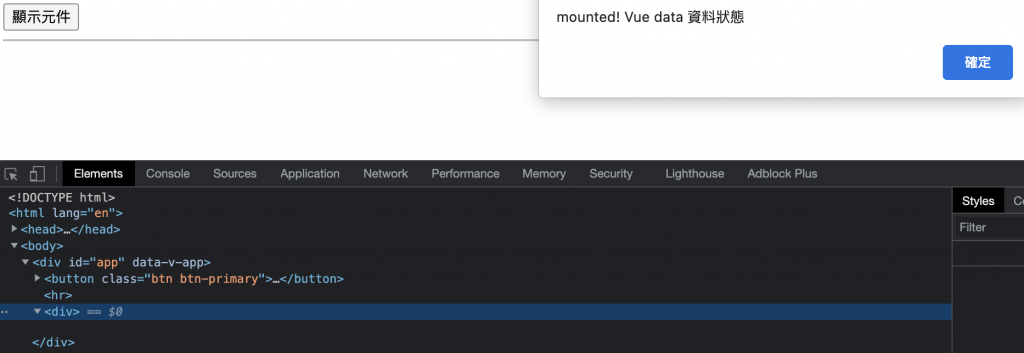
再次點擊確認,HTML已經掛載完畢: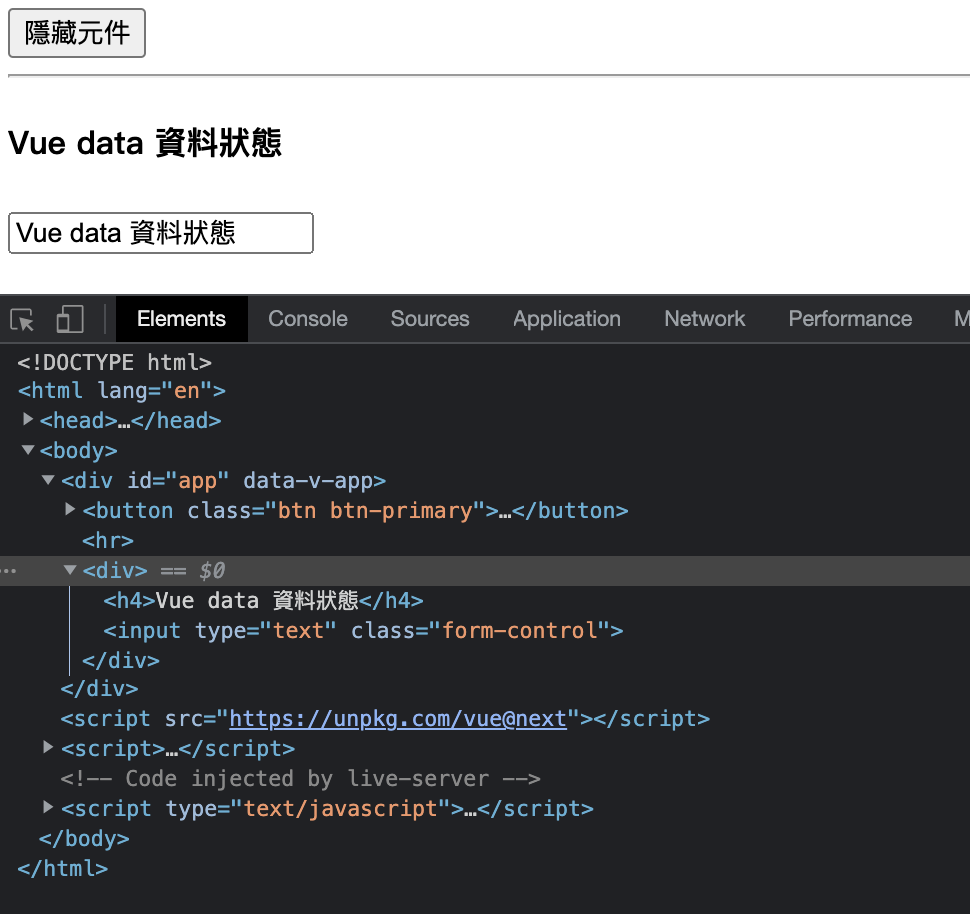
此時我們在更改input裡面的文字,更動data裡的state的值,此階段為beforeUpdate到Update的生命週期: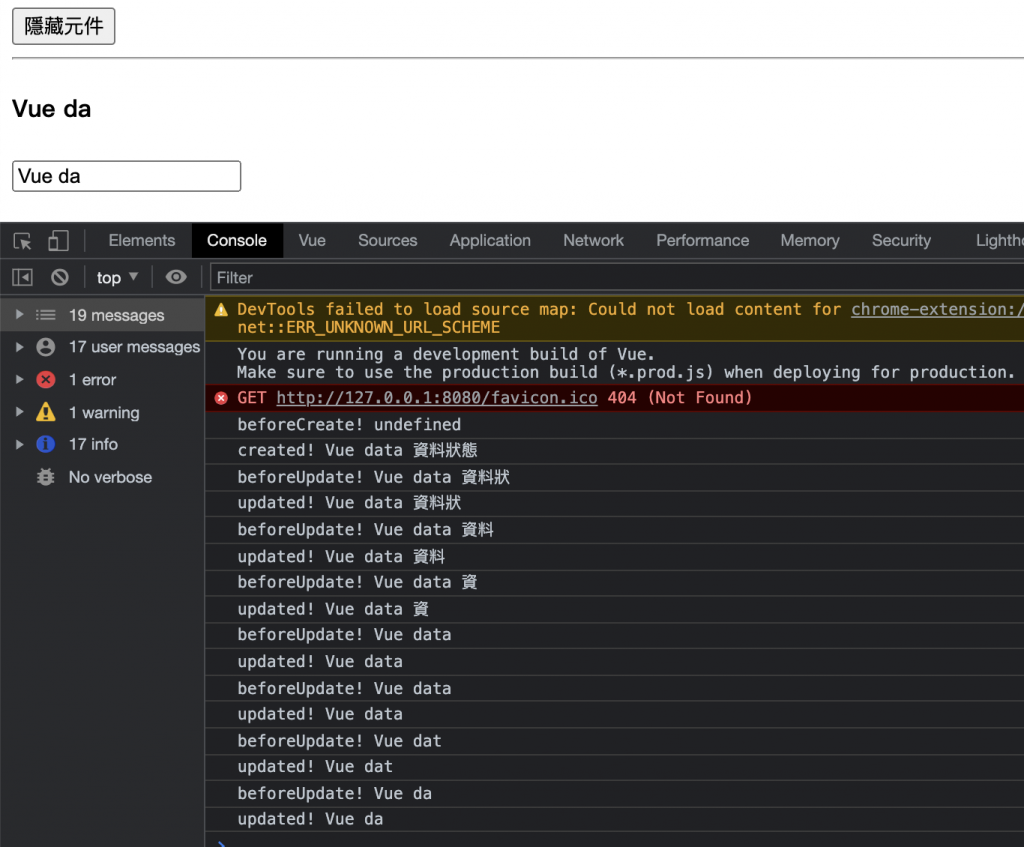
最後銷毀階段beforeUnmount到unmounted,點擊隱藏元件,銷毀v-if: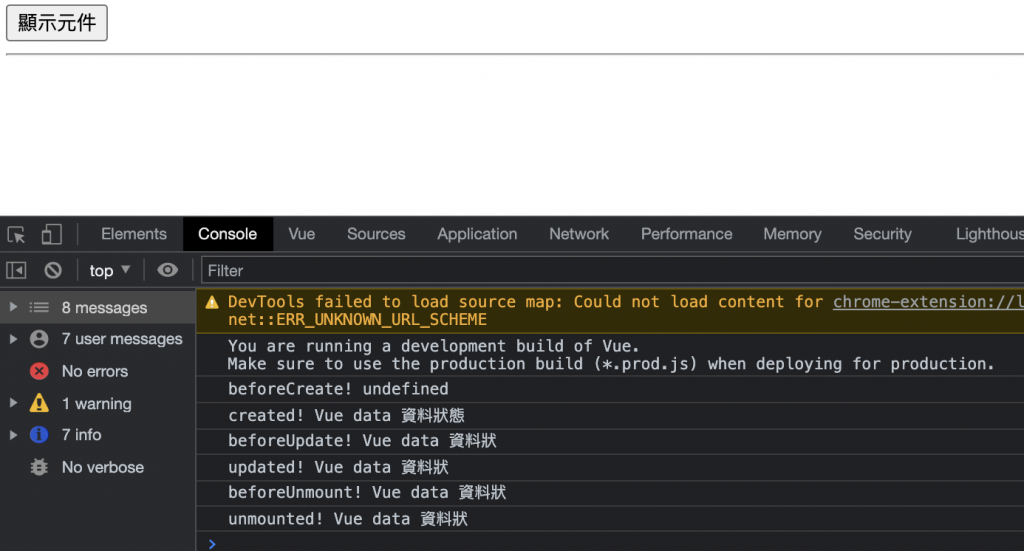
以上這些看完應該是頭昏眼花,剛開始學習如果有要操作DOM的元素,建議使用mounted,如果使用created會產生一些問題。
如有錯誤,歡迎指教。


 iThome鐵人賽