常常看到特效電影幕後花絮,都有請演員在綠幕前在錄動作身上都有點點,在螢幕上變成火材人,姿態估計是使用 ML 模型通過估計身體關鍵關節(關鍵點)的空間位置,從圖像或影片中估計人的姿勢的任務。
來看一下的姿態估計codelab的實作吧
範例提供了兩個 TensorFlow Lite 姿態估計模型的參考實現:
MoveNet:最先進的姿勢估計模型有兩種版本:Lighting 和 Thunder。
PoseNet:2017 年發布的上一代姿態估計模型。

MoveNet 有兩種版本:
MoveNet.Lightning 比 Thunder 版本更小、更快但準確度較低。它可以在現代智能手機上實時運行。
MoveNet.Thunder 是更準確的版本,但也比 Lightning 更大更慢。它對於需要更高準確性的用例很有用。

MoveNet 在各種數據集上的表現都優於 PoseNet,尤其是在帶有健身動作圖像的圖像中。因此,我們建議在 PoseNet 上使用 MoveNet。
將 TensorFlow Lite 模型添加到assets文件夾
 movenet_lightning.tflite
 movenet_thunder.tflite
 posenet.tflite
build.gradle(app)
dependencies {
   implementation 'org.tensorflow:tensorflow-lite:2.5.0'
   implementation 'org.tensorflow:tensorflow-lite-gpu:2.5.0'
   implementation 'org.tensorflow:tensorflow-lite-support:0.2.0'
}
**姿態估計 (Pose estimation) 是顯示在 camrea 的預覽畫面,就看一下camrea + surfaceView 重點部份吧
**
camrea 的 imageReader
imageReader =
   ImageReader.newInstance(PREVIEW_WIDTH, PREVIEW_HEIGHT,ImageFormat.YUV_420_888, 3)
    imageReader?.setOnImageAvailableListener({ reader ->
        val image = reader.acquireLatestImage()
        if (image != null) {
            if (!::imageBitmap.isInitialized) {
                imageBitmap =
                    Bitmap.createBitmap(
                        PREVIEW_WIDTH,
                        PREVIEW_HEIGHT,
                        Bitmap.Config.ARGB_8888
                    )
            }
            yuvConverter.yuvToRgb(image, imageBitmap)
            // Create rotated version for portrait display
            val rotateMatrix = Matrix()
            rotateMatrix.postRotate(90.0f)

            val rotatedBitmap = Bitmap.createBitmap(
                imageBitmap, 0, 0, PREVIEW_WIDTH, PREVIEW_HEIGHT,
                rotateMatrix, false
            )
            processImage(rotatedBitmap)
            image.close()
        }
    }, imageReaderHandler)


// process image
private fun processImage(bitmap: Bitmap) {
    var person: Person? = null
    var classificationResult: List<Pair<String, Float>>? = null

   //姿態估計模組
    synchronized(lock) {
        detector?.estimateSinglePose(bitmap)?.let {
            person = it
            classifier?.run {
                classificationResult = classify(person)
            }
        }
    }
    frameProcessedInOneSecondInterval++
    if (frameProcessedInOneSecondInterval == 1) {
        // send fps to view
        listener?.onFPSListener(framesPerSecond)
    }

    //姿態估計模組結果
    listener?.onDetectedInfo(person?.score, classificationResult)
    person?.let {
        visualize(it, bitmap)
    }
}

//依姿態估計模組結果畫圖
private fun visualize(person: Person, bitmap: Bitmap) {
    var outputBitmap = bitmap

    if (person.score > MIN_CONFIDENCE) {
        outputBitmap = VisualizationUtils.drawBodyKeypoints(bitmap, person)
    }

    val holder = surfaceView.holder
    val surfaceCanvas = holder.lockCanvas()
    surfaceCanvas?.let { canvas ->
        val screenWidth: Int
        val screenHeight: Int
        val left: Int
        val top: Int

        if (canvas.height > canvas.width) {
            val ratio = outputBitmap.height.toFloat() / outputBitmap.width
            screenWidth = canvas.width
            left = 0
            screenHeight = (canvas.width * ratio).toInt()
            top = (canvas.height - screenHeight) / 2
        } else {
            val ratio = outputBitmap.width.toFloat() / outputBitmap.height
            screenHeight = canvas.height
            top = 0
            screenWidth = (canvas.height * ratio).toInt()
            left = (canvas.width - screenWidth) / 2
        }
        val right: Int = left + screenWidth
        val bottom: Int = top + screenHeight

        canvas.drawBitmap(
            outputBitmap, Rect(0, 0, outputBitmap.width, outputBitmap.height),
            Rect(left, top, right, bottom), null
        )
        surfaceView.holder.unlockCanvasAndPost(canvas)
    }
}
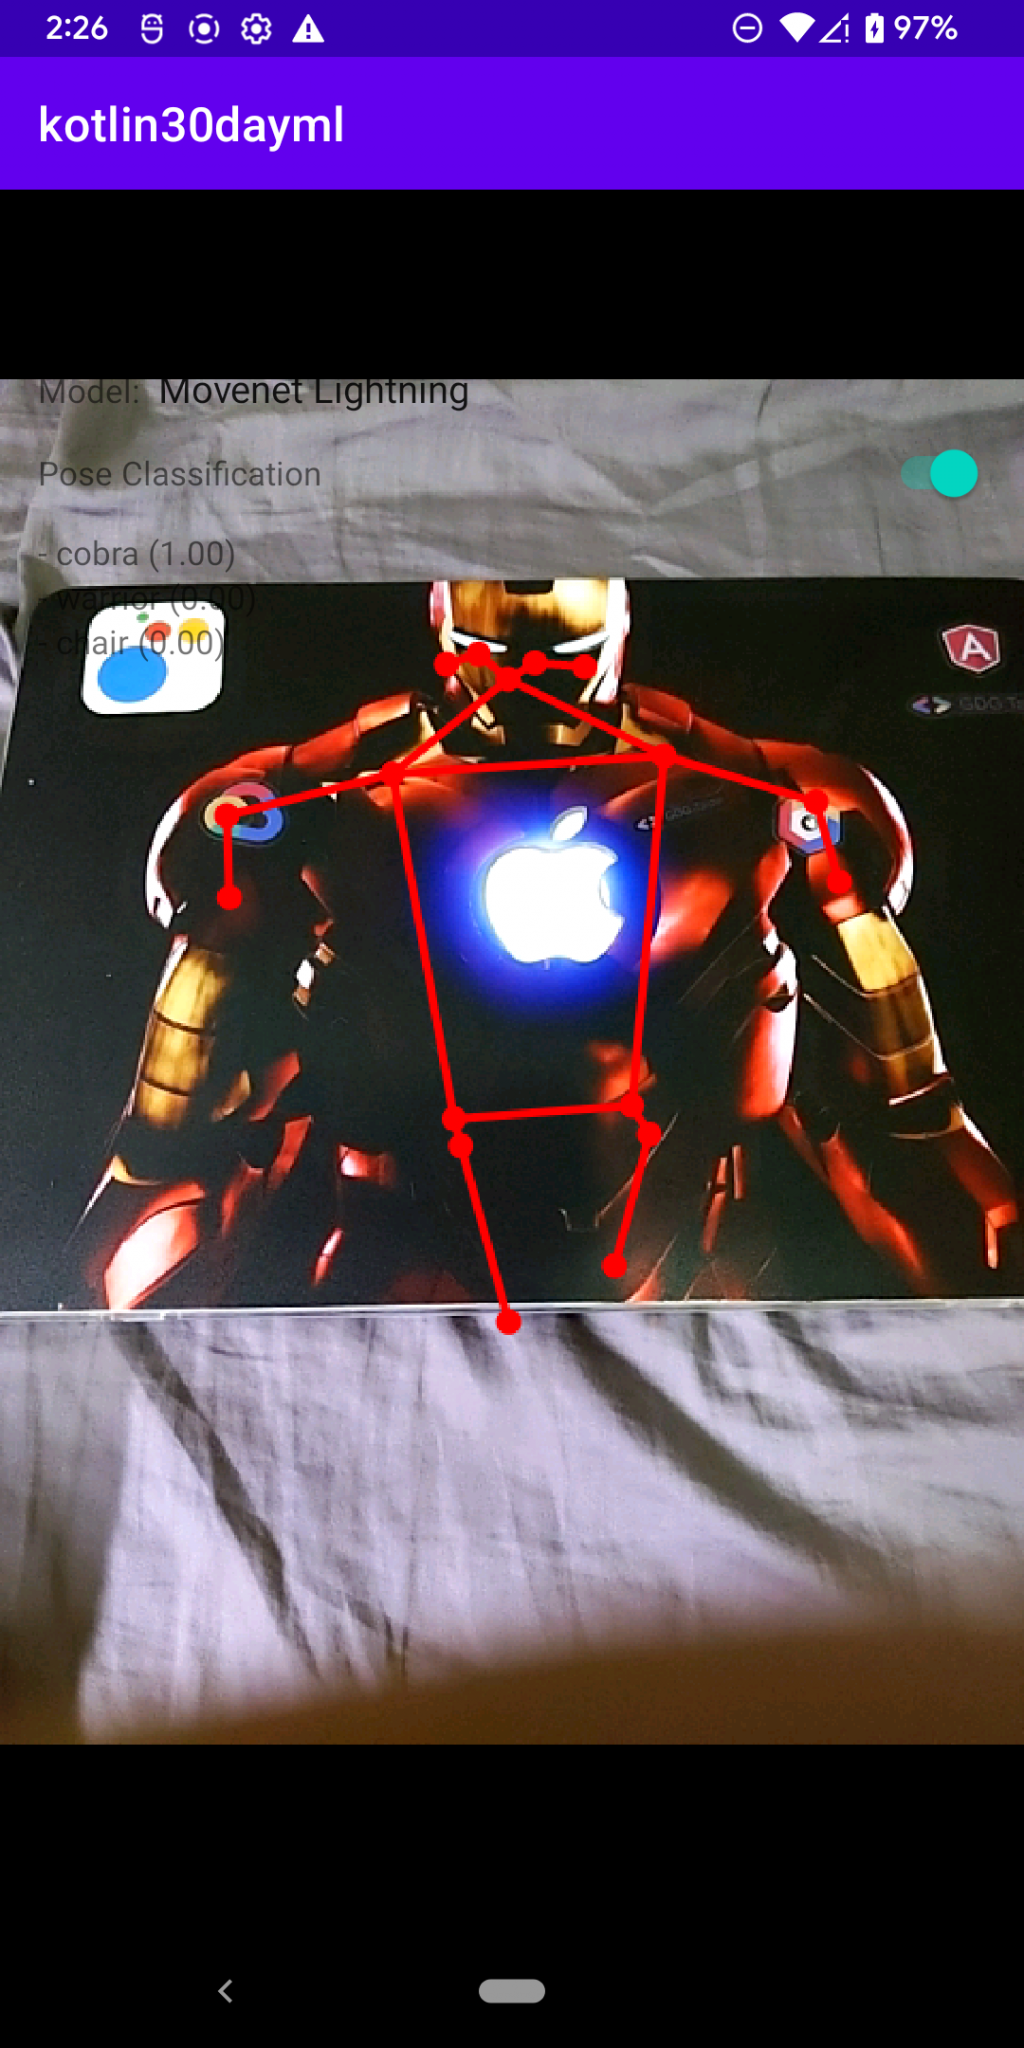
執行結果:
手機上是用CPU 使用Lightning 加 PoseNet 計算時間比較短,效果比較明顯。
https://www.tensorflow.org/lite/examples/pose_estimation/overview
https://github.com/tensorflow/examples/tree/master/lite/examples/pose_estimation/android


 iThome鐵人賽