懸浮視窗的原理其實很簡單,建立一個背景運作的Service,並且透過WindowManager將自定義的Layout顯示出來。
How to Make a Floating Window Application in Android?
<uses-permission android:name="android.permission.SYSTEM_ALERT_WINDOW" />
<uses-permission android:name="android.permission.FOREGROUND_SERVICE" />
分別是懸浮視窗以及Foreground Service需要的權限
為了確保我們的懸浮視窗能在其他App上層,需要讓使用者另外開啟設定
// 檢查是否已開啟。
private fun checkOverlayDisplayPermission(): Boolean =
    Settings.canDrawOverlays(requireContext())

//使用Intent導至設定頁面。
private fun requestOverlayDisplayPermission() {
    AlertDialog.Builder(requireContext())
        .setCancelable(true)
        .setTitle("Screen Overlay Permission Needed")
        .setMessage("Enable 'Display over other apps' from System Settings.")
        .setPositiveButton("Open Settings") { _, _ ->
            val intent = Intent(
                Settings.ACTION_MANAGE_OVERLAY_PERMISSION,
                Uri.parse("package:${requireContext().packageName}")
            )
            launcher.launch(intent)
        }
        .show()
}
Day21加入的popup按鈕的點擊事件
binding.popup.setOnClickListener {
    //TODO save search items.
    val serviceIntent = Intent(requireActivity(), ObserveService::class.java)
    it.context.startForegroundService(serviceIntent)
    requireActivity().finish()
}
基本上就是開啟Service並結束MainActivity,TODO的部分是日後要處理的事情,不會在今天的內容中。
使用startForegroundService啟動的話要在Service中建立Notification並使用對應的startForeground方法,這部分已經更新很久就不另外放程式碼了。
<?xml version="1.0" encoding="utf-8"?>
<androidx.constraintlayout.widget.ConstraintLayout xmlns:android="http://schemas.android.com/apk/res/android"
    xmlns:app="http://schemas.android.com/apk/res-auto"
    android:layout_width="match_parent"
    android:layout_height="match_parent"
    android:background="@color/background">

    <pet.ca.ptttweetsobserver.ControllableRecyclerView
        android:id="@+id/recyclerView"
        android:layout_width="0dp"
        android:layout_height="0dp"
        android:background="@color/transparent"
        android:padding="@dimen/one_grid_unit"
        app:layout_constraintBottom_toBottomOf="parent"
        app:layout_constraintEnd_toEndOf="parent"
        app:layout_constraintStart_toStartOf="parent"
        app:layout_constraintTop_toTopOf="parent" />

    <Button
        android:id="@+id/resumeUpdate"
        android:layout_width="wrap_content"
        android:layout_height="wrap_content"
        android:layout_marginBottom="@dimen/one_grid_unit"
        android:text="自動更新"
        android:translationY="200dp"
        app:layout_constraintBottom_toBottomOf="parent"
        app:layout_constraintEnd_toEndOf="parent"
        app:layout_constraintStart_toStartOf="parent" />

    <ImageView
        android:id="@+id/back"
        android:layout_width="wrap_content"
        android:layout_height="wrap_content"
        android:layout_marginStart="@dimen/one_grid_unit"
        android:layout_marginTop="@dimen/one_grid_unit"
        android:background="@color/text_normal"
        android:clickable="true"
        android:elevation="@dimen/half_grid_unit"
        android:focusable="true"
        android:foreground="?android:attr/selectableItemBackground"
        android:padding="@dimen/one_grid_unit"
        android:src="@drawable/ic_baseline_fullscreen_24"
        app:layout_constraintStart_toStartOf="parent"
        app:layout_constraintTop_toTopOf="parent" />

    <View
        android:id="@+id/divider"
        android:layout_width="1dp"
        android:layout_height="0dp"
        android:background="@color/text_normal"
        app:layout_constraintBottom_toBottomOf="@id/back"
        app:layout_constraintStart_toEndOf="@id/back"
        app:layout_constraintTop_toTopOf="@id/back" />

    <ImageView
        android:id="@+id/move"
        android:layout_width="wrap_content"
        android:layout_height="wrap_content"
        android:layout_marginTop="@dimen/one_grid_unit"
        android:background="@color/text_normal"
        android:clickable="true"
        android:elevation="@dimen/half_grid_unit"
        android:focusable="true"
        android:foreground="?android:attr/selectableItemBackground"
        android:padding="@dimen/one_grid_unit"
        android:src="@drawable/selector_move"
        app:layout_constraintStart_toEndOf="@id/divider"
        app:layout_constraintTop_toTopOf="parent" />

    <View
        android:id="@+id/divider2"
        android:layout_width="1dp"
        android:layout_height="0dp"
        android:background="@color/text_normal"
        app:layout_constraintBottom_toBottomOf="@id/move"
        app:layout_constraintStart_toEndOf="@id/move"
        app:layout_constraintTop_toTopOf="@id/move" />

    <ImageView
        android:id="@+id/resize"
        android:layout_width="wrap_content"
        android:layout_height="wrap_content"
        android:layout_marginTop="@dimen/one_grid_unit"
        android:background="@color/text_normal"
        android:clickable="true"
        android:elevation="@dimen/half_grid_unit"
        android:focusable="true"
        android:foreground="?android:attr/selectableItemBackground"
        android:padding="@dimen/one_grid_unit"
        android:src="@drawable/ic_baseline_pinch_24"
        app:layout_constraintStart_toEndOf="@id/divider2"
        app:layout_constraintTop_toTopOf="parent" />


    <ImageView
        android:id="@+id/close"
        android:layout_width="wrap_content"
        android:layout_height="wrap_content"
        android:layout_marginTop="@dimen/one_grid_unit"
        android:layout_marginEnd="@dimen/one_grid_unit"
        android:background="@color/text_normal"
        android:clickable="true"
        android:elevation="@dimen/half_grid_unit"
        android:focusable="true"
        android:foreground="?android:attr/selectableItemBackground"
        android:padding="@dimen/one_grid_unit"
        android:src="@drawable/ic_round_close_24"
        app:layout_constraintEnd_toEndOf="parent"
        app:layout_constraintTop_toTopOf="parent" />


</androidx.constraintlayout.widget.ConstraintLayout>
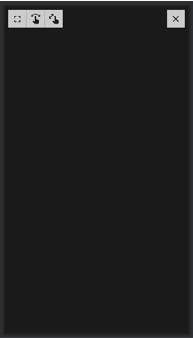
預覽畫面
跟Day02的草圖有些差異,目前這邊基本只保留調整外框大小跟位置的按鈕了。
private fun createFloatingWindow() {
    val metrics = application.resources.displayMetrics
    val width = metrics.widthPixels
    val height = metrics.heightPixels

    windowManager = getSystemService(WINDOW_SERVICE) as WindowManager

    val inflater = getSystemService(LAYOUT_INFLATER_SERVICE) as LayoutInflater
    _binding = LayoutObserverBinding.inflate(inflater)

    val frameLayoutParams = WindowManager.LayoutParams(
        (width * 0.55f).toInt(),
        (height * 0.58f).toInt(),
        layoutType,
        WindowManager.LayoutParams.FLAG_NOT_FOCUSABLE,
        PixelFormat.TRANSLUCENT
    )
    frameLayoutParams.gravity = Gravity.CENTER
    frameLayoutParams.x = 0
    frameLayoutParams.y = 0

    windowManager.addView(binding.root, frameLayoutParams)
}
其實這段沒什麼好說明的,addView後畫面就會顯示出來了。
這部分的內容與Day17、Day19、Day20基本一致,差別只在於目前已經在文章內了,不需要多做進入文章並置底的前置動作。
今天除了建立懸浮視窗,也一併把移動和關閉的功能加入了,退回和修改大小因為我目前想起來比較難一些,預計會放在接下來幾天的內容。
移動按鈕的點擊事件很單純:
binding.move.setOnClickListener {
    if (it.isSelected) {
        binding.root.setOnTouchListener(null)
    } else {
        binding.root.setOnTouchListener(onFrameTouchListener)
    }
    binding.recyclerView.touchable = it.isSelected
    it.isSelected = !it.isSelected
}
使用isSelected狀態來判斷目前要切換成哪種模式,在移動模式中加入onFrameTouchListener來處理後續觸控事件。此外由於我們的Layout內有使用RecyclerView,為了避免事件被攔截需要做另外的處理。
自定義一個新的RecyclerView並override dispatchTouchEvent。
class ControllableRecyclerView @JvmOverloads constructor(
    context: Context,
    attrs: AttributeSet? = null,
    defStyleAttr: Int = 0
) : RecyclerView(context, attrs, defStyleAttr) {

    var touchable = true

    override fun dispatchTouchEvent(ev: MotionEvent?): Boolean {
        return (touchable && super.dispatchTouchEvent(ev))
    }
}
透過另外設定的touchable變數來判斷是否要在RecyclerView繼續分發事件,return記得一定要包含super.dispatchTouchEvent(ev),否則就算為true也不會將事件繼續分發。
懸浮視窗的移動事件:
private val onFrameTouchListener = View.OnTouchListener { _, motionEvent ->
    val params = binding.root.layoutParams as WindowManager.LayoutParams
    when (motionEvent.action) {
        MotionEvent.ACTION_DOWN -> {
            return@OnTouchListener true
        }
        MotionEvent.ACTION_MOVE -> {
            if (motionEvent.historySize < 2) return@OnTouchListener true
            val dx = motionEvent.getHistoricalX(1) - motionEvent.getHistoricalX(0)
            val dy = motionEvent.getHistoricalY(1) - motionEvent.getHistoricalY(0)
            params.x = (params.x + dx).toInt()
            params.y = (params.y + dy).toInt()

            windowManager.updateViewLayout(binding.root, params)
            return@OnTouchListener true
        }
    }

    return@OnTouchListener false
}
透過Move event的HistoricalX及HistoricalY來判斷移動的距離,並更新目前的LayoutParams即可。
目前在模擬器裡面測試起來感覺有點誤差,這部分後日再看看怎麼處理。
binding.close.setOnClickListener {
    stopSelf()
    PttClient.getInstance().end()
}
首先是使用stopSelf關閉Service,關閉Service會進入onDestroy,在這邊把其他物件給釋放掉。
override fun onDestroy() {
    super.onDestroy()
    updateHandler.removeCallbacks(updateRunnable)
    removeFloatingWindow()
    stopForeground(true)
}
接著要記得把PttClient也關掉,關閉連線、stream並釋放singleton的reference。
class PttClient private constructor(serverUri: URI, header: MutableMap<String, String>) :
    WebSocketClient(serverUri, Draft_6455(), header) {
    // ...
    public fun end() {
        close()
        pipedOutputStream.close()
        pipedInputStream.close()
        instance = null
    }
    // ...
}


 iThome鐵人賽