接下來就是常見的圖像辨識,TensorFlow有提供一組小圖示包含10種衣服配件類型的圖庫,如下圖所示以及下表所列,包含6000筆的訓練資料以及1000筆的測試資料,每張圖是28x28像素,256灰階。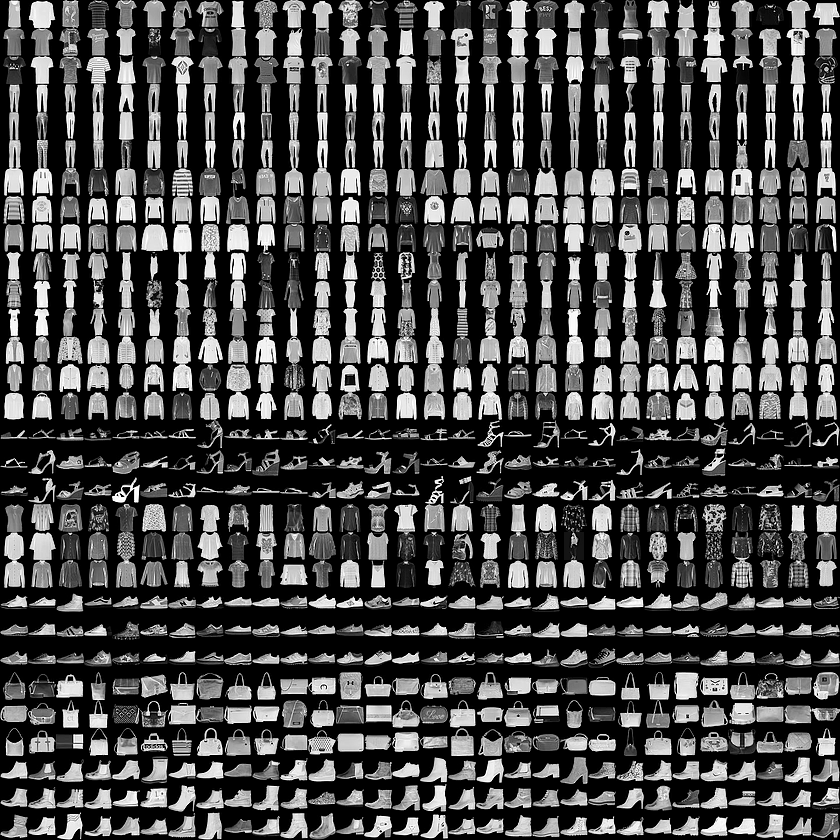
10種類型分別為:
索引 名稱
0 T-shirt/top
1 Trouser
2 Pullover
3 Dress
4 Coat
5 Sandal
6 Shirt
7 Sneaker
8 Bag
9 Ankle boot
我們先將圖庫load進來,並用print和matplotlib看是長怎樣:
import tensorflow as tf

# Load the Fashion MNIST dataset
fmnist = tf.keras.datasets.fashion_mnist

# Load the training and test split of the Fashion MNIST dataset
(training_images, training_labels), (test_images, test_labels) = fmnist.load_data()

import numpy as np
import matplotlib.pyplot as plt

# You can put between 0 to 59999 here
index = 0

# Set number of characters per row when printing
np.set_printoptions(linewidth=320)

# Print the label and image
print(f'LABEL: {training_labels[index]}')
print(f'\nIMAGE PIXEL ARRAY:\n {training_images[index]}')

# Visualize the image
plt.imshow(training_images[index], cmap='gray_r', vmin=0, vmax=255)
可以看到其中training data中,index為0的圖,而它的類型為9,是"Ankle boot":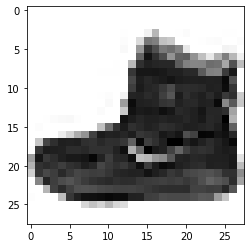
然後就是一樣設定模型和跑training,先將資料normalize除256階,在model部分,前後的layer分別對應到輸入的28x28筆資料展開和輸出的10種類型,中間多了所謂的hidden layer,另外由於有測試資料,所以可用model.evaluate跑看準確度:
# Normalize the pixel values of the train and test images
training_images  = training_images / 255.0
test_images = test_images / 255.0

hidden_layer_num = 128
epochs_num = 5

# Build the classification model
model = tf.keras.models.Sequential([tf.keras.layers.Flatten(),
                                    tf.keras.layers.Dense(hidden_layer_num, activation=tf.nn.relu),
                                    tf.keras.layers.Dense(10, activation=tf.nn.softmax)])

#Sequential: That defines a sequence of layers in the neural network.
#Flatten: Flatten just takes that square and turns it into a 1-dimensional array.
#Dense: Adds a layer of neurons
#ReLU effectively means: if x > 0: return x; else: return 0;
#Softmax takes a list of values and scales these so the sum of all elements will be equal to 1.

model.compile(optimizer = tf.optimizers.Adam(),
              loss = 'sparse_categorical_crossentropy',
              metrics=['accuracy'])

fit_history = model.fit(training_images, training_labels, epochs=epochs_num)
print(fit_history.history)

# Evaluate the model on unseen data
eva_history = model.evaluate(test_images, test_labels)
print(eva_history)
我做了張epochs次數在不同hidden layer層數時,對應的訓練模型的loss以及測試的accuracy圖,結果趨勢雖然如同預期,次數或層數越多,loss越低,accuracy越高,但epochs次數越多,或是hidden layer層數越高,訓練的時間也越長,在這例子layer層數為512和1024的loss和accuracy已經沒有顯著地分別了。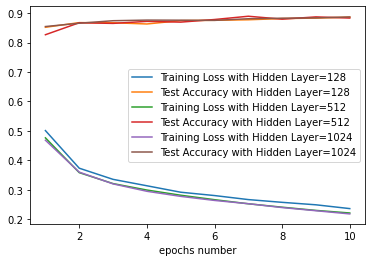
另外我們可以掛上一個callback,讓它在訓練到loss低於目標值就停,然後在原本的model.fit加上這個callback:
class myCallback(tf.keras.callbacks.Callback):
  def __init__(self, loss_threshold):
      self.loss_threshold = loss_threshold

  def on_epoch_end(self, epoch, logs={}):
    # Check accuracy
    if(logs.get('loss') < self.loss_threshold):

      # Stop if threshold is met
      print("\nLoss is lower than", self.loss_threshold , "so cancelling training!")
      self.model.stop_training = True

# Instantiate class
callbacks = myCallback(0.2)

# Train the model with a callback
model.fit(x_train, y_train, epochs=20, callbacks=[callbacks])
跑到第13次loss已經小於設定的0.2,就自動停了:
Epoch 13/20
1867/1875 [============================>.] - ETA: 0s - loss: 0.1965 - accuracy: 0.9257
Loss is lower than 0.2 so cancelling training!
最後我們可以用predict的方式,看單張圖怎麼運作。結果如下,我們會得到一個10筆數值的list,其中9筆都接近於0,1筆接近於1,這筆的索引就對應到它的類型編號:
classifications = model.predict(test_images)
print(classifications[0])
[4.3171408e-08 8.3716550e-08 8.7536189e-10 8.0485379e-10 1.6189805e-08 2.5948887e-03 4.0446093e-08 8.8888472e-03 1.3672738e-08 9.8851609e-01]
print(test_labels[0])
9


 iThome鐵人賽