#Jetpack Compose 基本概念:
使用xml的時候,可以用拉的方式和撰寫code的方式,來產生Layout,那Compose UI當然只能寫Layout嘍。
那就看一下如何寫出Layout 和 寫的方法吧。
@Composable
fun Greeting(name: String) {
    Text(text = "Hello $name!")
	//新增加的文字
    Text(text = "This is $name!")
}
結果顯示出來的是~~~你儂我儂交疊在一起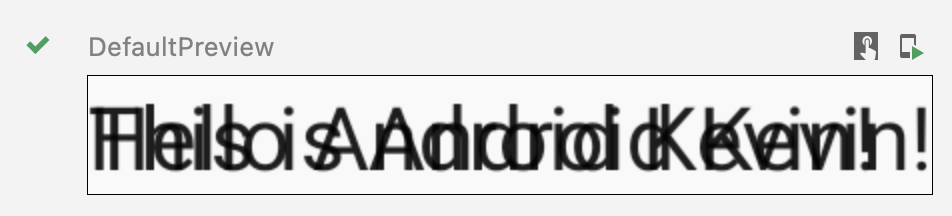
@Composable
fun Greeting(name: String) {
    //新增 Column 列
    Column {
        Text(text = "Hello $name!")
		//新增加的文字
        Text(text = "This is $name!")
    }
}
結果顯示出來的 分開了,回到單身狗,是正常回到單一行顯示啦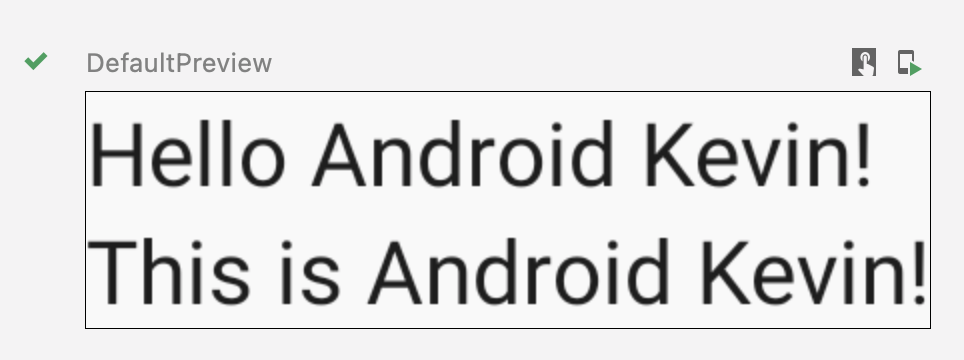
如果是xml的方式的話是這樣的
	<LinearLayout
        android:layout_width="match_parent"
        android:layout_height="match_parent"
        android:orientation="vertical">

        <TextView
            android:id="@+id/textView5"
            android:layout_width="match_parent"
            android:layout_height="wrap_content"
            android:text="TextView" />

        <TextView
            android:id="@+id/textView6"
            android:layout_width="match_parent"
            android:layout_height="wrap_content"
            android:text="TextView" />
    </LinearLayout>
@Composable
fun Greeting(name: String) {
    //新增 Row 行
    Row {
        //新增 Image 圖片
        Image(
            painter = painterResource(R.drawable.compose_logo),
            contentDescription = "Contact profile picture",
        )
        //新增 Column 列
        Column {
            Text(text = "Hello $name!")
            //新增加的文字
            Text(text = "This is $name!")
        }
    }
}
結果顯示出來的醜醜的排版
如果是xml的方式的話是這樣的
<LinearLayout
        android:layout_width="match_parent"
        android:layout_height="match_parent"
        android:orientation="horizontal">

        <ImageView
            android:id="@+id/imageView2"
            android:layout_width="100dp"
            android:layout_height="100dp"
            android:layout_weight="1"
            app:srcCompat="@drawable/logo" />

        <LinearLayout
            android:layout_width="wrap_content"
            android:layout_height="wrap_content"
            android:layout_weight="9"
            android:orientation="vertical">

            <TextView
                android:id="@+id/textView5"
                android:layout_width="match_parent"
                android:layout_height="wrap_content"
                android:text="TextView" />

            <TextView
                android:id="@+id/textView6"
                android:layout_width="match_parent"
                android:layout_height="wrap_content"
                android:text="TextView" />
        </LinearLayout>

    </LinearLayout>
@Composable
fun Greeting(name: String) {
    //新增 Row 行
    // Add padding around our message
    Row(modifier = Modifier.padding(all = 8.dp)) {
        //新增 Image 圖片
        Image(
            painter = painterResource(R.drawable.compose_logo),
            contentDescription = "Contact profile picture",
            modifier = Modifier
                // Set image size to 40 dp
                .size(40.dp)
                // Clip image to be shaped as a circle
                .clip(CircleShape)
        )
        // Add a horizontal space between the image and the column
        Spacer(modifier = Modifier.width(8.dp))
        //新增 Column 列
        Column {
            Text(text = "Hello $name!")
            // Add a vertical space between the author and message texts
            Spacer(modifier = Modifier.height(4.dp))
            //新增加的文字
            Text(text = "This is $name!")
        }
    }
}
結果顯示出來是不是好看多了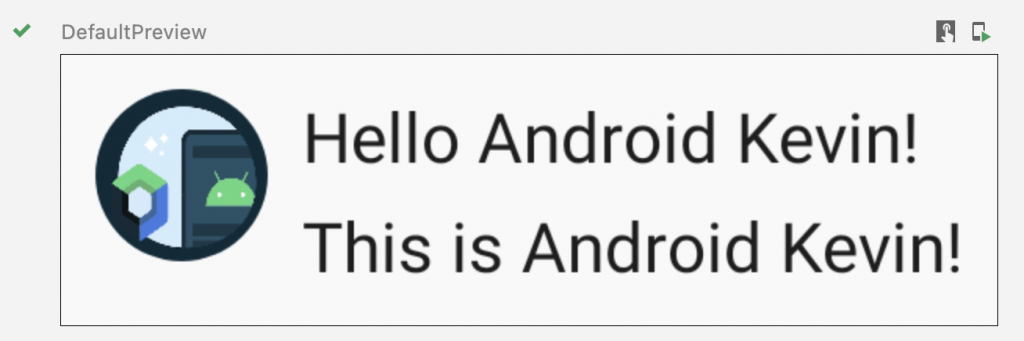
https://developer.android.com/jetpack/compose/tutorial