優化版面配置有以下幾種方式:
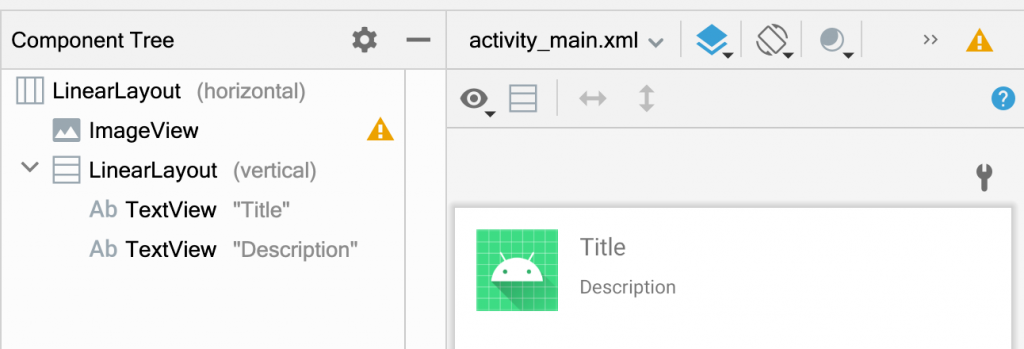
例如我們要做出下方的畫面。其中一種方式就是使用 LinearLayout 來編排,因為同時有水平方向與垂直方式的排序,所以至少就需要有 2 層的 LinearLayout。階層越多效能就越差。
下圖改成用 ConstraintLayout,Layout 的階層就會少了 1 階,效能也就更好。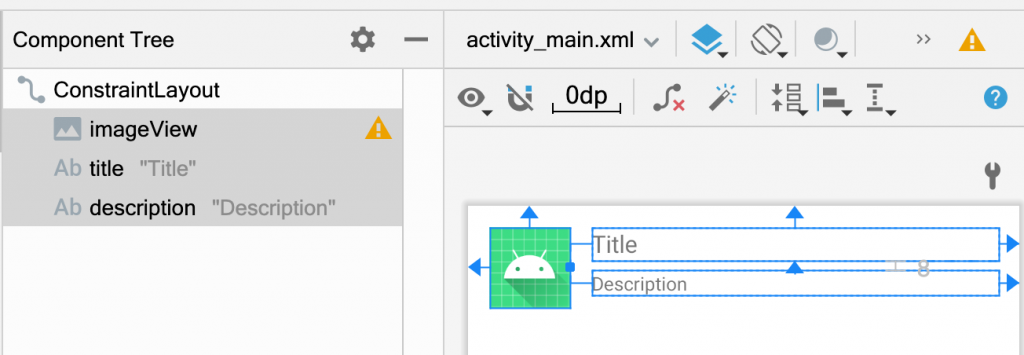
當有可以重覆使用的 UI ,就使用 include 來達到重用(Reuse)。這可以降低 Layout 的複雜度,日後也好維護,有改動時只需要修改一個地方就好。
步驟1:將可重用的地方提出到一個新的 layout
layout_title.xml
<FrameLayout xmlns:android="http://schemas.android.com/apk/res/android"
    xmlns:tools="http://schemas.android.com/tools"
    android:layout_width="match_parent"
    android:layout_height="wrap_content"
    android:background="@color/colorAccent"
    tools:showIn="@layout/activity_main">

    <ImageView
        android:id="@+id/imageView"
        android:layout_width="60dp"
        android:layout_height="60dp"
        android:src="@drawable/ic_launcher_foreground" />
</FrameLayout>
步驟2:使用 <include> 直接引用 layout_title.xml 檔案。
<LinearLayout xmlns:android="http://schemas.android.com/apk/res/android"
    xmlns:app="http://schemas.android.com/apk/res-auto"
    xmlns:tools="http://schemas.android.com/tools"
    android:layout_width="match_parent"
    android:orientation="vertical"
    android:layout_height="match_parent"
    tools:context=".MainActivity">

    <include
        layout="@layout/layout_title_bar"
        android:layout_width="match_parent"
        android:layout_height="wrap_content"/>
</LinearLayout>
同樣是用 include 來載入 一個 layout。下方程式碼在 LinearLayout 裡 include 一個layout_function。
<LinearLayout
    android:layout_width="match_parent"
    android:layout_height="wrap_content"
    android:layout_marginTop="20dp"
    android:gravity="center"
    android:orientation="horizontal">

    <include layout="@layout/layout_function" />
</LinearLayout>
因為在被 include 的地方已經有 LinearLayout,這裡就不需要再把 Button 放到父容器裡,直接使用<merge> 即可。
<merge xmlns:android="http://schemas.android.com/apk/res/android">
    <Button
        android:layout_width="wrap_content"
        android:layout_height="wrap_content"
        android:text="Button1" />

    <Button
        android:layout_width="wrap_content"
        android:layout_height="wrap_content"
        android:text="Button2" />
</merge>
我們經常會在 App 去控制某些元件的顯示或隱藏。一般會直接去設定visibility = View.VISIBLE。如果改成使用 ViewStub 來延遲載入,就可在有需要的使用才載入並繪制,而不是一開始就先繪制好再隱藏。
下例有一個 Imageview、Textview,依不同情況顯示 Imageview 或 Textview。一般的做法會把 2 個元件都放在 layout 裡,再去判斷哪個要顯示跟隱藏。這樣做的缺點是我們不一定兩個元件都會用到,卻都先繪製了。
<Imageview
    android:id="@+id/imageView"
    android:layout_marginTop="20dp"
    android:layout_width="wrap_content"
    android:layout_height="wrap_content"
    android:layout="@layout/layout_viewstub_image" />
<Textview
    android:id="@+id/textView"
    android:layout_marginTop="20dp"
    android:layout_width="wrap_content"
    android:layout_height="wrap_content"
    android:layout="@layout/layout_viewstub_textview" />
為了解決這個問題,改成用 ViewStub 去載入 layout。ViewStub 一開始是看不到的,大小是 0。
	<ViewStub
        android:id="@+id/stubImage"
        android:layout_marginTop="20dp"
        android:layout_width="wrap_content"
        android:layout_height="wrap_content"
        android:layout="@layout/layout_viewstub_image" />

	<ViewStub
        android:id="@+id/stubText"
        android:layout_marginTop="20dp"
        android:layout_width="wrap_content"
        android:layout_height="wrap_content"
        android:layout="@layout/layout_viewstub_textview" />
layout_viewstub_image.xml
<FrameLayout xmlns:android="http://schemas.android.com/apk/res/android"
    xmlns:tools="http://schemas.android.com/tools"
    android:layout_width="match_parent"
    android:layout_height="wrap_content">

    <ImageView
        android:id="@+id/imageView"
        android:layout_width="wrap_content"
        android:layout_height="wrap_content"
        android:src="@drawable/ic_launcher_foreground" />
</FrameLayout>
layout_viewstub_textview.xml
<FrameLayout xmlns:android="http://schemas.android.com/apk/res/android"
    xmlns:tools="http://schemas.android.com/tools"
    android:layout_width="match_parent"
    android:layout_height="wrap_content"
    android:background="@color/colorAccent"
    tools:showIn="@layout/activity_main">

    <TextView
        android:layout_width="wrap_content"
        android:layout_height="wrap_content"
        android:text="aaa">

    </TextView>
</FrameLayout>
再依照不同的條件去呼叫 inflate(),也就是有需要時才載入。就不需先繪製再隱藏,這樣就能提升效能。
if ( conditition ){
	stubImage.inflate()
}else{
	stubText.inflate()
}
以上就是幾種透過減少 View 的階層來達到提升效能的方式。但只從 Layout 的編排看 UI 階層狀況可能還不夠,下一篇將接著介紹使用 Layout Inpsect 工具來查看執行中的 App 的 UI 階層。
參考:
https://developer.android.com/topic/performance/rendering/optimizing-view-hierarchies


 iThome鐵人賽