昨天我們成功安裝了Dependency Track,今天就讓我們學習如何使用它吧!
首先登入到Dependency Track中。登錄後應該會看到Dashboard的畫面,由於現在我們未做過任何檢測,因此應該整個版面都會空空如也。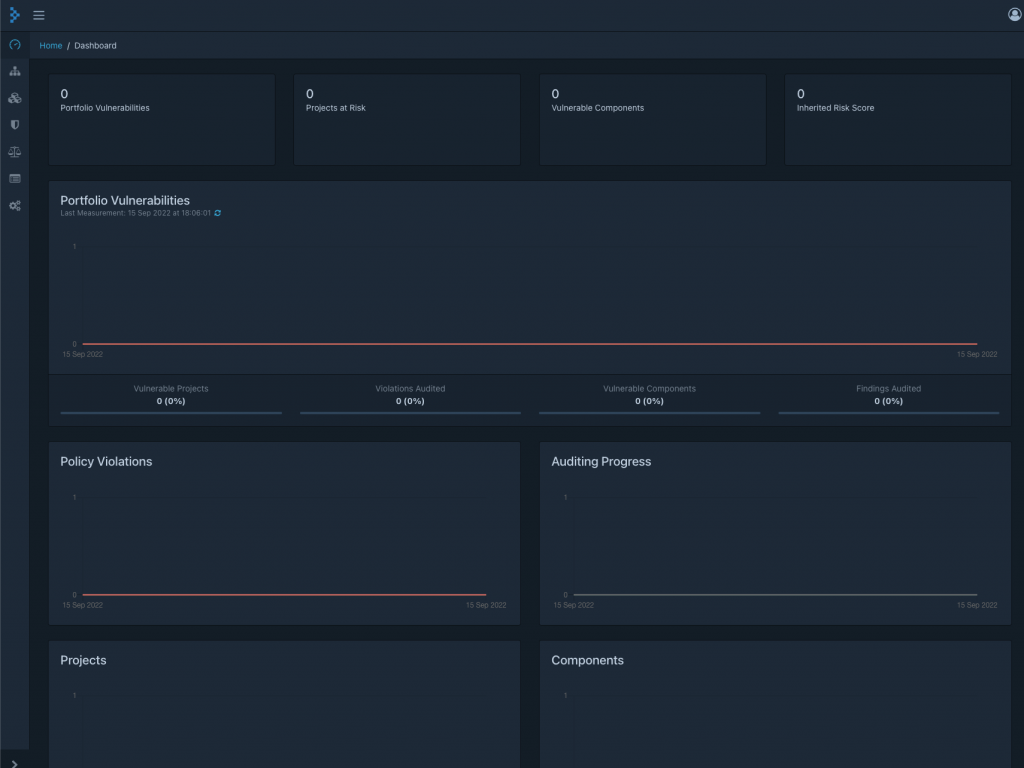
接著我們在左方的選單中按下Projects的按鈕。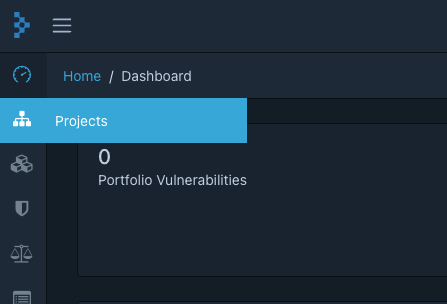
進入頁面後,按下Create Project的按鈕,去設定一個新的專案。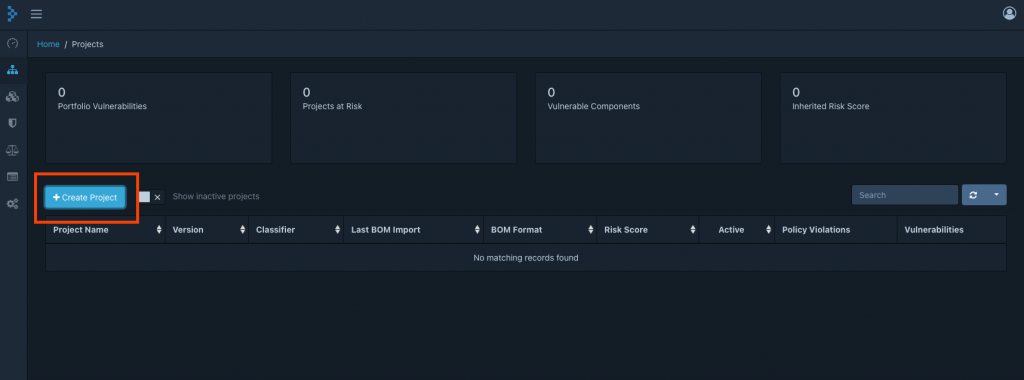
在彈出的頁面中輸入專案名稱,Classifier則選擇Application,然後按下Create。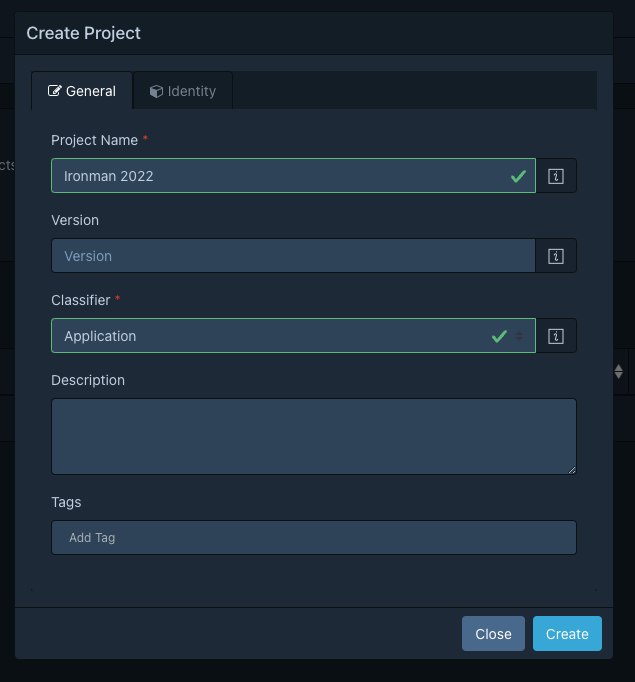
然後就會看到新見的專案。按下專案的名稱連結。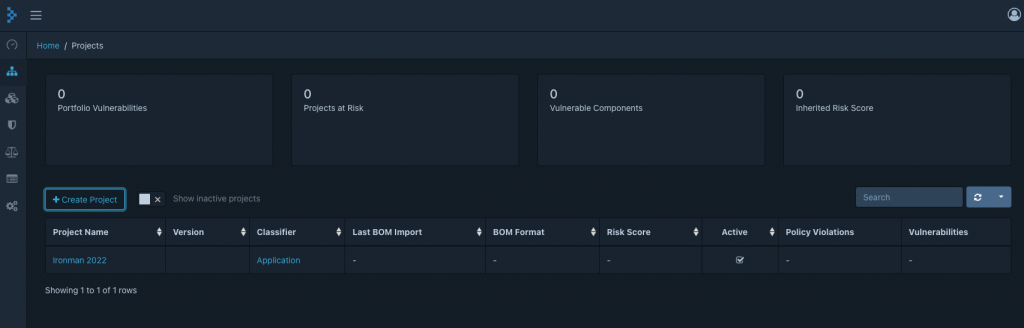
進到專案的版面,由於還没有檢測,所以也是空空如也。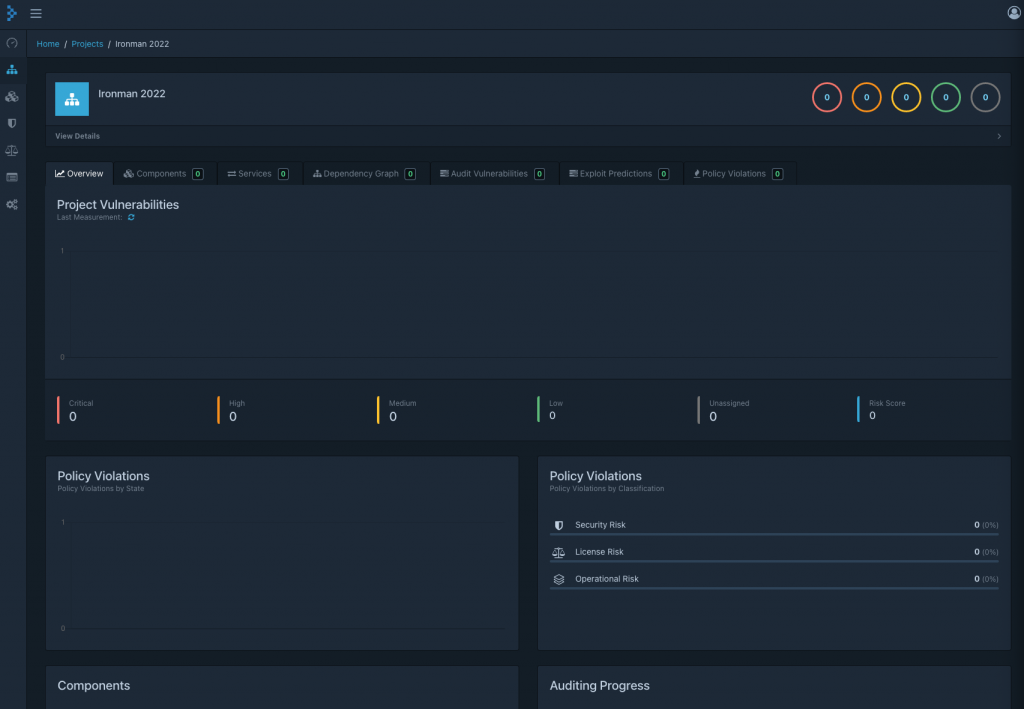
按下Components的分頁。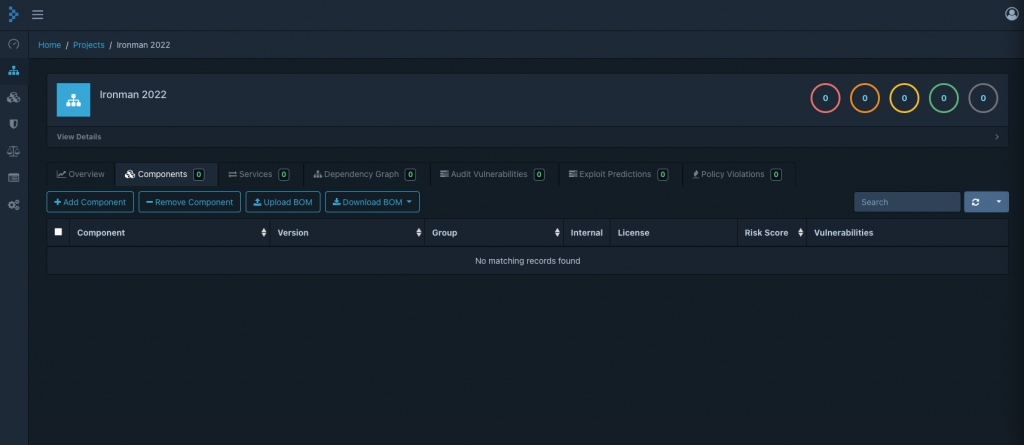
這個頁面就是用來列出我們的軟體物料清單(Software Bill of Materials,簡稱SBOM)。下一步我們就要試著生成我們項目的SBOM。
要生成讓Dependency Track能夠讀取的SBOM的檔案,我們需要附合OWASP CycloneDX的標準。而CycloneDX提供了不少的輔助工具可供使用,可參考https://cyclonedx.org/tool-center/。
由於我們的範例是使用NodeJS,我們可以使用https://www.npmjs.com/package/%40cyclonedx/bom這個工具生成我們需要的SBOM檔案。
先回到我們在SonarQube掃描時使用過的範例專案。在Terminal中運行以下指令。
npm install -g @cyclonedx/bom
運行完成後,先使用以下指令,下載專案所需的套件。
npm install
然後使用以下指令產生SBOM檔案。
cyclonedx-node
運行完成後,應該會看見一個新的bom.xml的檔案。
我們回到Dependency Track的Component的分頁中,然後上傳SBOM檔案。按下Upload BOM,然後選擇剛剛生成的bom.xml。
然後刷新一下瀏覽器,如果引用的開源套件有問題的話,應該會如下圖中在列表中得到顯示。列表中會列出有問題的套件,然後亦會提供該套件的風險指數及相關的漏洞數量。
一般來說,只要把套件的版本更新到最新版本,問題就會得到解決。但某一些新公布的漏洞,可能未有那麼快有更新。這時候,可能就需要進入套件的漏洞頁面,查看相關的漏洞資料,然後作下一步處理。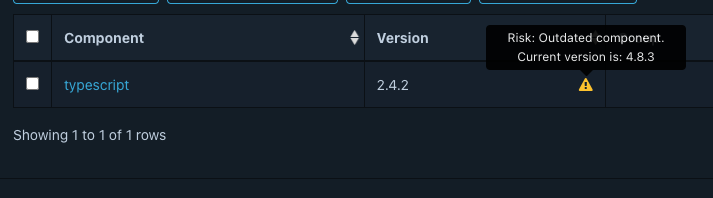
首先,進入Jenkins的Plugin Manager,然後在Available的分頁中搜尋Dependency-Track。然後勾選,再按下Install。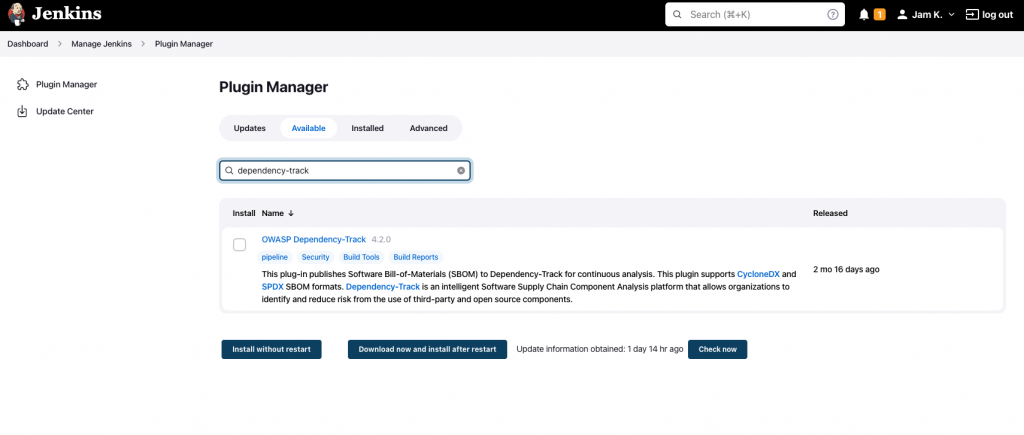
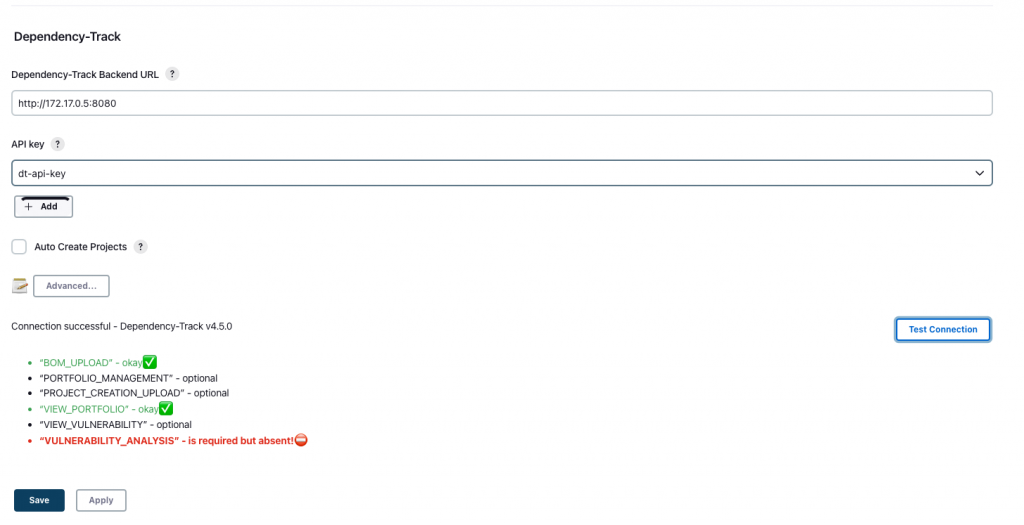
然後進入Manager Jenkins,再進入Configure System,找到Dependency-Track的部份。然後輸入Dependency Track的API Server位址。如同SonarQube一樣,可以用以下指令取得API Server的IP位址。
docker inspect {Dependency Track API Server Container Name} | grep "IPAddress"
然後我們要加入Dependency Track的API作為認證。進入Dependency Track,然後在選單中找到Administration。進入Access Management的分頁後再進入Teams的部份,使用Automation的身份,然後找到其對應的API Key。順道為Automation加入以下權限。
PORTFOLIO_MANAGEMENT
PROJECT_CREATION_UPLOAD
VIEW_PORTFOLIO
VIEW_VULNERABILITY
VULNERABILITY_ANALYSIS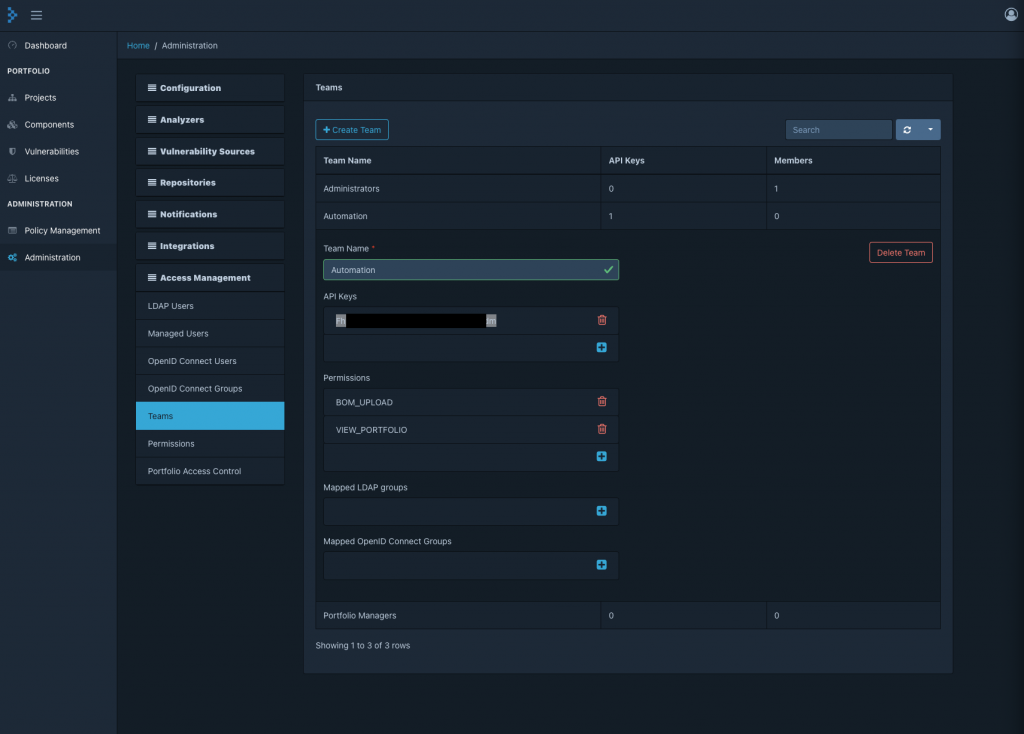
接著在Jenkins中加入Automation身份的API Key,然後ID部份輸入dt-api-key。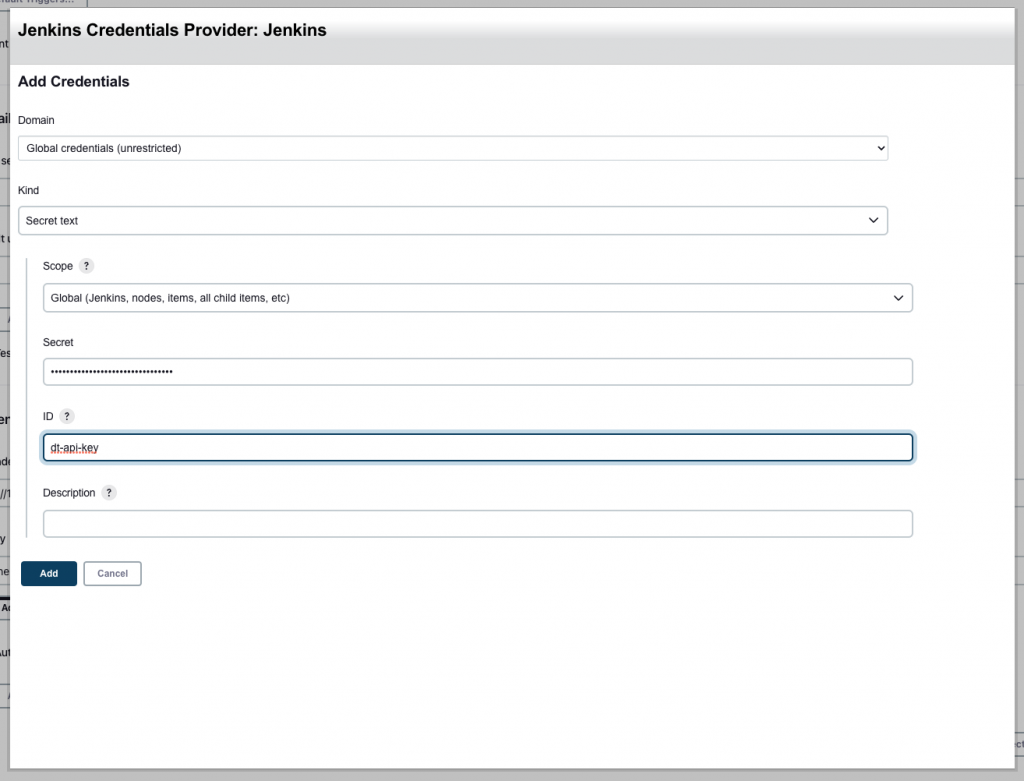
按下Save。
我們為Jenkinsfile加入一個新的Stage,然後輸入以下程式碼。(完整的Jenkinsfile可參考附表)
        stage('Dependency Track Publisher') {
            steps {
                nodejs(nodeJSInstallationName: 'NodeJS') {
					echo "Install Cyclonedx Plugin"
                    sh "npm install -g @cyclonedx/bom"
					echo "Build Application"
                    sh "npm install"
					echo "Generate bom.xml"
                    sh "cyclonedx-node"
                }
                withCredentials([string(credentialsId: 'dt-api-key', variable: 'API_KEY')]) {
					echo "Publish SBOM"
                    dependencyTrackPublisher artifact: 'bom.xml', projectId: '7d3be162-1e60-4bb0-b008-b8380e2283bc', synchronous: true
                }
            }
        }
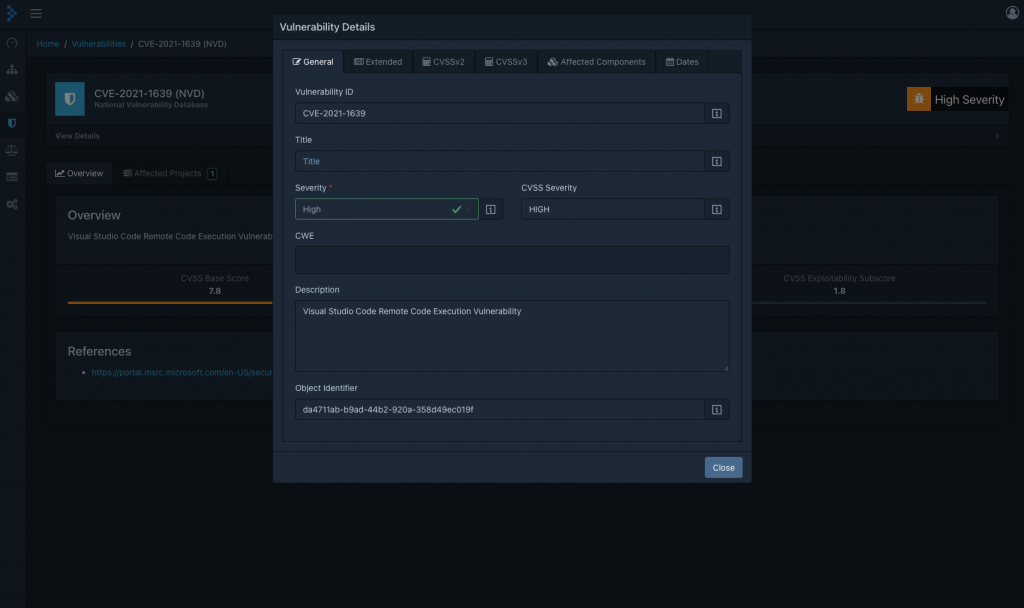
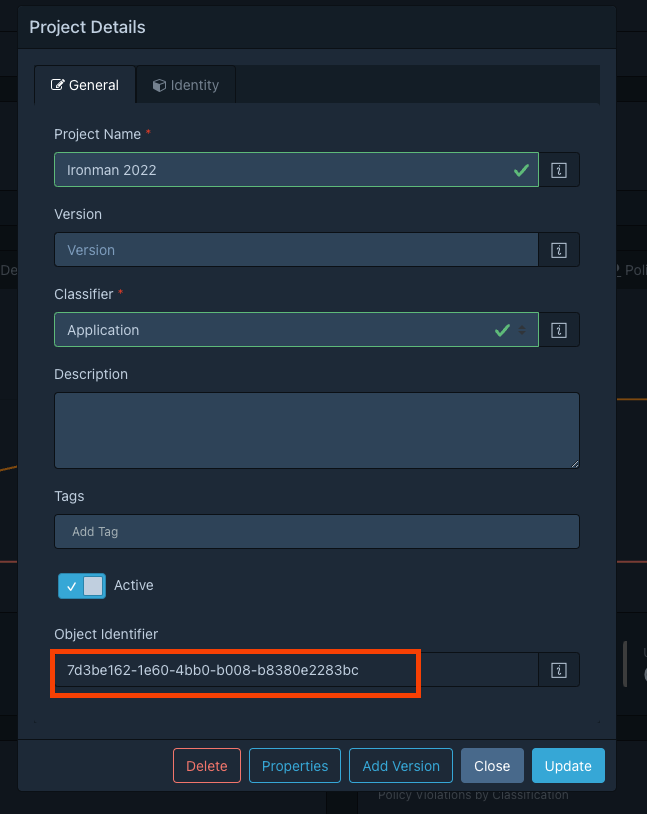
stage('Dependency Track Publisher') {…}: 在Jenkins中顯示的Stage nodejs(nodeJSInstallationName: 'NodeJS') {…}: 這個Block內要運行NodeJS sh "npm install -g @cyclonedx/bom": 安裝Cyclonedx的工具 sh "npm install": 運行一次NodeJS的Build sh "cyclonedx-node": 產生SBOM檔案 withCredentials([string(credentialsId: 'dt-api-key', variable: 'API_KEY')]) {…}: 在這個Block中要處理Dependency Track的連接,因為要使用指定的Credential dependencyTrackPublisher artifact: 'bom.xml', projectId: '7d3be162-1e60-4bb0-b008-b8380e2283bc', synchronous: true: 把bom.xml發佈到Project 7d3be162-1e60-4bb0-b008-b8380e2283bc中,專案ID可在專案中按下View Details得到(見下圖)
把修改後的Jenkinsfile commit到GitLab後,回到Jenkins,按下Build Now。
運行完成後,右邊會多了一個圖表,顯示是次掃描的結果。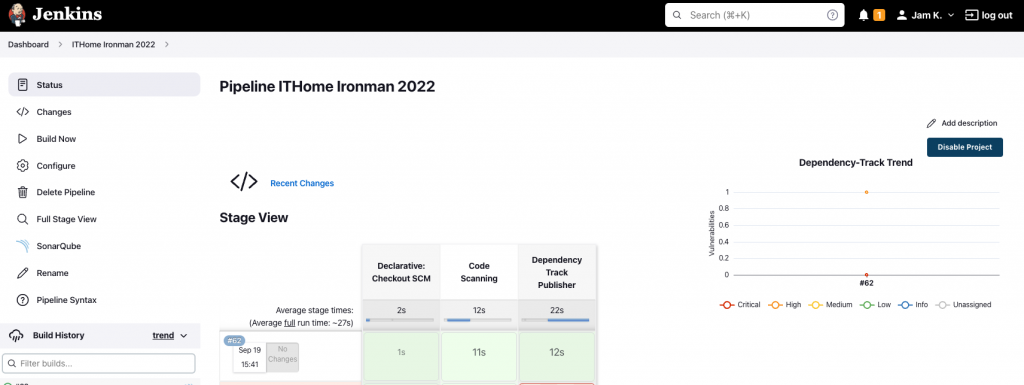
進入是次運行詳細報告,在左邊按下Dependency-Track Report可以顯示跟Dependency Track介面相同的資訊。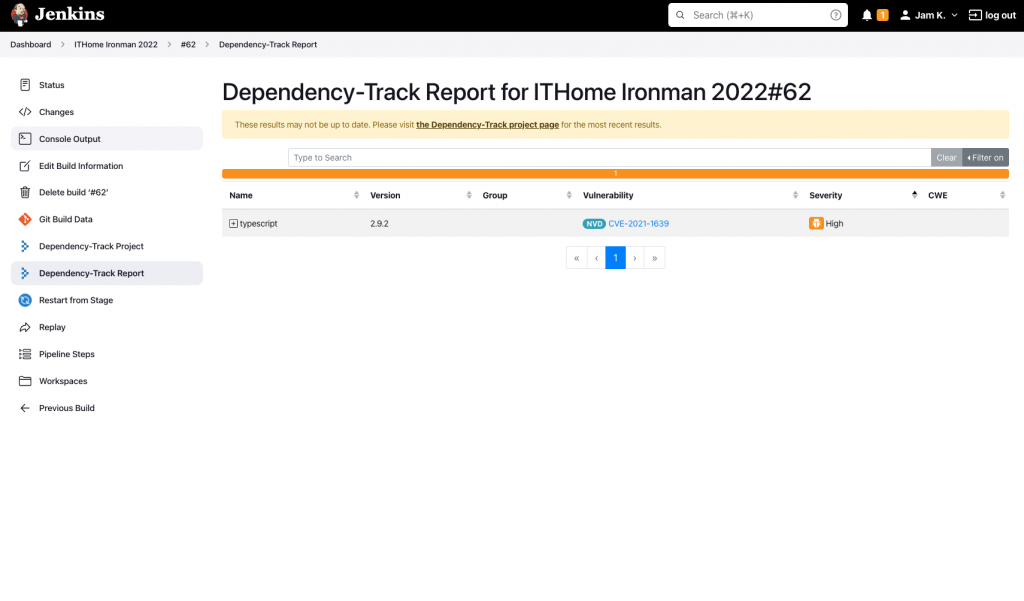
pipeline {
    agent any

    stages {
        stage('Code Scanning') {
            environment {
                scannerHome = tool 'CliScanner'
            }
            steps {
                withSonarQubeEnv('Local'){
                    nodejs(nodeJSInstallationName: 'NodeJS') {
                        echo "Start Scanning..."
                        sh "${scannerHome}/bin/sonar-scanner"
                    }
                }
            }
        }
        stage('Dependency Track Publisher') {
            steps {
                nodejs(nodeJSInstallationName: 'NodeJS') {
					echo "Install Cyclonedx Plugin"
                    sh "npm install -g @cyclonedx/bom"
					echo "Build Application"
                    sh "npm install"
					echo "Generate bom.xml"
                    sh "cyclonedx-node"
                }
                withCredentials([string(credentialsId: 'dt-api-key', variable: 'API_KEY')]) {
					echo "Publish SBOM"
                    dependencyTrackPublisher artifact: 'bom.xml', projectId: '7d3be162-1e60-4bb0-b008-b8380e2283bc', synchronous: true
                }
            }
        }

    }
}
是次Dependency Track的介紹礙於篇幅的關係,只能到此為止了。更深入的使用方法,只能留待大家自己去仔細研究了。
現在,我們除了有程式碼掃描,還加入了開源套件供應鏈的安全性保證。接下來,我們可以嘗試為程式發佈做準備了。接下來,我們要安裝一些成品倉庫的軟體了!
其他語言的掃描過程基本上大同小異,如果操作的時候有疑問的朋友,歡迎提出哦!