今天我會介紹該如何用image_picker套件,讓手機照片能上傳到APP內
輸入下方指令下載套件
flutter pub add image_picker
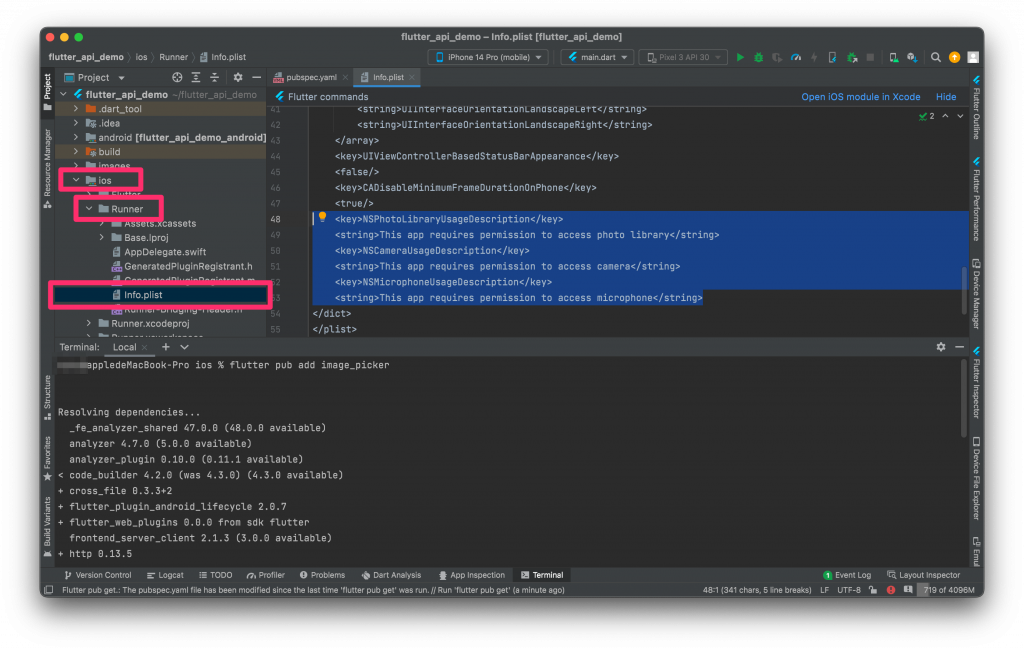
到ios>Runner>info.plist,設定照片相關的取得使用者權限設定
    <key>NSPhotoLibraryUsageDescription</key>
    <string>This app requires permission to access photo library</string>
    <key>NSCameraUsageDescription</key>
    <string>This app requires permission to access camera</string>
    <key>NSMicrophoneUsageDescription</key>
    <string>This app requires permission to access microphone</string>
新增一個upload_image_widget.dart檔案,來製作拍攝相機或選擇照片的彈跳視窗
import 'package:flutter/material.dart';
import 'package:image_picker/image_picker.dart';

class UploadImageWidget extends StatelessWidget {
  final void Function(String) onImagePicked;
  final Widget child;

  const UploadImageWidget({Key? key, required this.child, required this.onImagePicked}) : super(key: key);

  @override
  Widget build(BuildContext context) {
    return GestureDetector(
      onTap: () {
        _showOptions(context);
      },
      child: child,
    );
  }

  void _showOptions(BuildContext context) {
    showModalBottomSheet(
        context: context,
        builder: (context) {
          return SizedBox(
              height: 150,
              child: Column(children: <Widget>[
                ListTile(
                    onTap: () async {
                      Navigator.pop(context);
                      var path = await _showCameraLibrary();
                      onImagePicked(path);
                    },
                    leading: const Icon(Icons.photo_camera),
                    title: const Text("拍攝照片")),
                ListTile(
                    onTap: () async {
                      Navigator.pop(context);
                      var path = await _showPhotoLibrary();
                      onImagePicked(path);
                    },
                    leading: const Icon(Icons.photo_library),
                    title: const Text("選擇照片"))
              ]));
        });
  }

  Future<String> _showCameraLibrary() async {
    ImagePicker picker = ImagePicker();
    XFile? image = await picker.pickImage(source: ImageSource.camera);

    return image!.path;
  }

  Future<String> _showPhotoLibrary() async {
    ImagePicker picker = ImagePicker();
    XFile? image = await picker.pickImage(source: ImageSource.gallery);

    return image!.path;
  }
}
在使用的StatefulWidget輸入下方語法
String _path = "";
UploadImageWidget(
              onImagePicked: (path) {
                setState(() {
                  _path = path;
                });
              },
              child: _path == ""
                  ? Container(
                      height: 100,
                      width: 100,
                      decoration: BoxDecoration(
                        borderRadius: BorderRadius.circular(13),
                        color: const Color(0xFFCCCCCC),
                      ),
                      child: Icon(Icons.collections_outlined),
                    )
                  : SizedBox(
                      height: 100,
                      width: 100,
                      child: ClipRRect(
                        borderRadius: BorderRadius.circular(13),
                        child: Image.file(
                          File(_path),
                          fit: BoxFit.cover,
                        ),
                      ),
                    ),
            ),

若還沒有學會製作api的朋友可以參考下方三篇文章
Flutter Package — 串接api(一)
Flutter Package — 串接api(二)
Flutter Package — 串接api(三)
新增add_photo_response.dart檔案,來接收api回傳的資料
import 'package:json_annotation/json_annotation.dart';

part 'add_photo_response.g.dart';

@JsonSerializable()
class AddPhotoResponse {
  bool success;
  AddPhotoResponse({
    required this.success,
  });
  factory AddPhotoResponse.fromJson(Map<String, dynamic> json) => _$AddPhotoResponseFromJson(json);
}
在api.dart檔案下輸入
@POST("photo")
@MultiPart()
Future<AddPhotoResponse> addPhoto(@Part() File photo);
在app_repository.dart檔案下輸入
Future<AddPhotoResponse> addPhoto(File photo) async {
    return await _client.addPhoto(photo);
}
在剛才的StatefulWidget新增一個按鈕,點擊後上傳照片至api
    ElevatedButton(
              onPressed: () async {
                if (_path != "") {
                  final photoInfo = await RepositoryProvider.of<AppRepository>(context).addPhoto(File(_path));
                  ScaffoldMessenger.of(context).showSnackBar(SnackBar(
                    content: Text(photoInfo.success),
                  ));
                }
              },
              child: const Text("Post Button"),
            )
api上傳照片範例(因沒找到可以上傳的免費api因此無法提供實作成果)


 iThome鐵人賽