今天介紹的是AlertDialog這是個非常實用的工具,當你需要彈跳視窗像是下圖,你就可以使用這個套件,接下來就來講解基本用法!!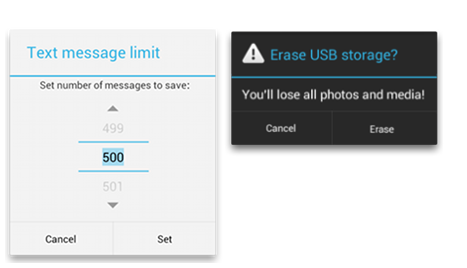
//new出實例
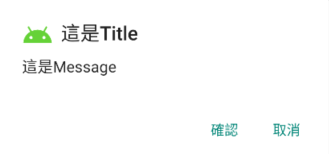
AlertDialog.Builder builder=new AlertDialog.Builder(MainActivity.this);
//標題
builder.setTitle("這是Title");
//訊息
builder.setMessage("這是Message");
//標題前圖示
builder.setIcon(R.drawable.ic_android_black_24dp);
//在對話方塊中加入取消的按鈕,並設定監聽
builder.setNegativeButton("確認", new DialogInterface.OnClickListener() {
@Override
public void onClick(DialogInterface dialogInterface, int i) {
}
});
//在對話方塊中加入取消的按鈕,並設定監聽
builder.setPositiveButton("取消", new DialogInterface.OnClickListener() {
@Override
public void onClick(DialogInterface dialogInterface, int i) {
}
});
//一定要show才能顯示(我常忘記)
builder.show();
//new出實例
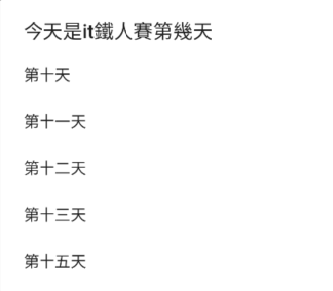
AlertDialog.Builder builder = new AlertDialog.Builder(MainActivity.this);
//標題
builder.setTitle("今天是it鐵人賽第幾天");
//只要你在onClick處理事件內,使用i參數,就可以知道按下陣列裡的哪一個了
builder.setItems(string, new DialogInterface.OnClickListener() {
@Override
public void onClick(DialogInterface dialogInterface, int i) {
}
});
//當你按下手機除了AlertDialog外地方也可以關掉試窗
builder.setCancelable(true);
builder.show();
首先我們要先準備好一個xml,可以到res裡的layout新增。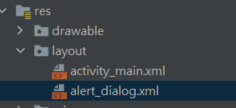
這裡我就簡單放一個輸入框。
<?xml version="1.0" encoding="utf-8"?>
<androidx.constraintlayout.widget.ConstraintLayout xmlns:android="http://schemas.android.com/apk/res/android"
    xmlns:app="http://schemas.android.com/apk/res-auto"
    xmlns:tools="http://schemas.android.com/tools"
    android:layout_width="match_parent"
    android:layout_height="match_parent">
    <EditText
        android:id="@+id/editTextTextPersonName"
        android:layout_width="wrap_content"
        android:layout_height="wrap_content"
        android:layout_marginTop="28dp"
        android:ems="10"
        android:inputType="textPersonName"
        app:layout_constraintEnd_toEndOf="parent"
        app:layout_constraintHorizontal_bias="0.497"
        app:layout_constraintStart_toStartOf="parent"
        app:layout_constraintTop_toTopOf="parent" />
</androidx.constraintlayout.widget.ConstraintLayout>
之後就可以到主程式來設定。
//inflate目的是把自己設計xml的Layout轉成View
LayoutInflater inflater = LayoutInflater.from(MainActivity.this);
//載入的介面,當被載入Activity後才可以用findViewById來獲得其中界面的元素
final View v = inflater.inflate(R.layout.alert_dialog, null);
AlertDialog.Builder builder = new AlertDialog.Builder(MainActivity.this);
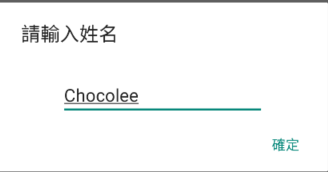
builder.setCancelable(true);
builder.setTitle("請輸入姓名");
//多了這一行,用來新增你要的畫面進來。
builder.setView(v);
builder.setPositiveButton("確定", new DialogInterface.OnClickListener() {
@Override
public void onClick(DialogInterface dialog, int which) {
//綁訂元件(注意後面)v.findViewById的v是你設定匯入layout的變數。
EditText editText = (EditText) (v.findViewById(R.id.editTextTextPersonName));
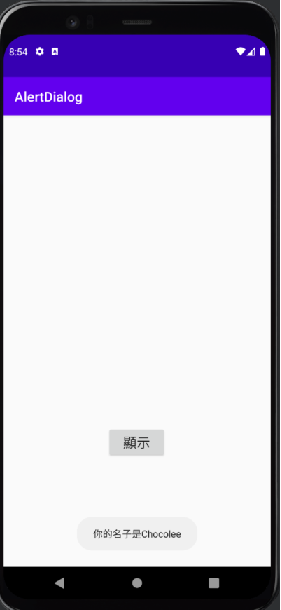
//Toast顯示訊息。
Toast.makeText(getApplicationContext()
,"你的名子是" + editText.getText().toString()
,Toast.LENGTH_SHORT).show();
}
});
builder.show();
 按下確定
按下確定


 iThome鐵人賽