動態主機設定協定(Dynamic Host Configuration Protocol, DHCP)是一個區域網路的網路協定。
當公司電腦從數台變成數百台時,這個時候我們就需要配置DHCP伺服器,它主要可以省去我們手動設定用戶IP的動作。
DHCP安裝配置步驟:
Step1.開啟伺服器管理員>新增角色及功能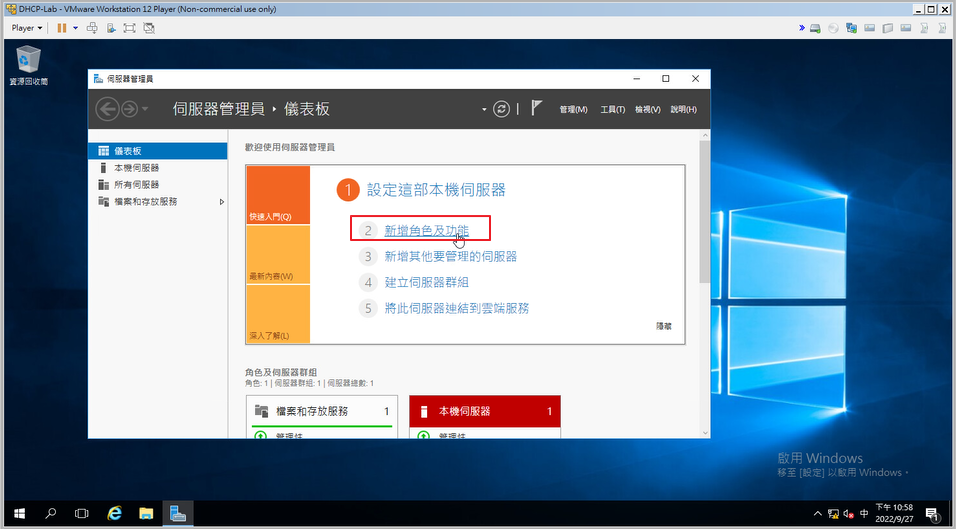
Step2.下一步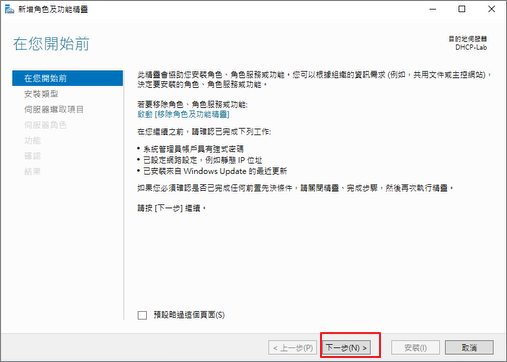
Step3.下一步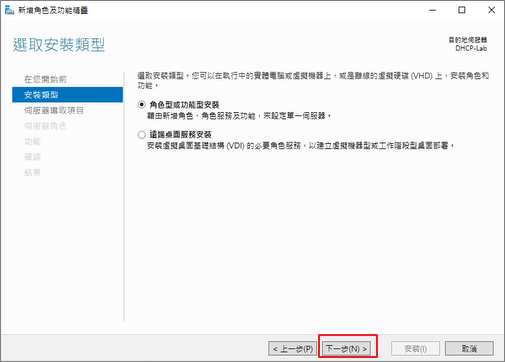
Step4.選擇該伺服器 >下一步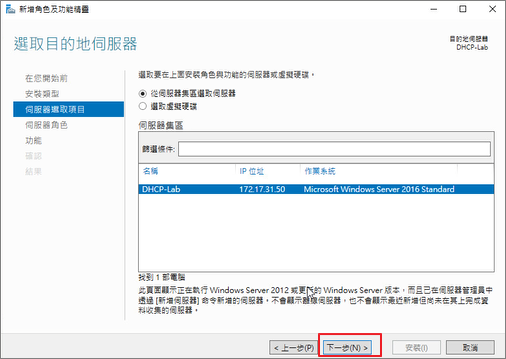
Step5.選擇DHCP伺服器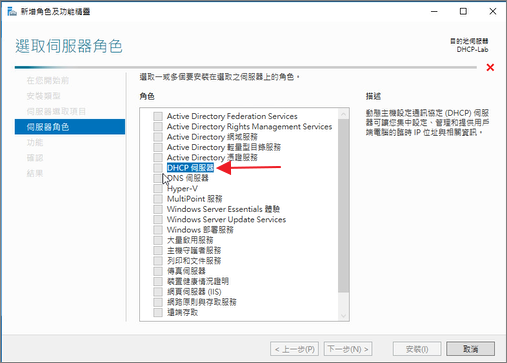
Step6.點選>新增功能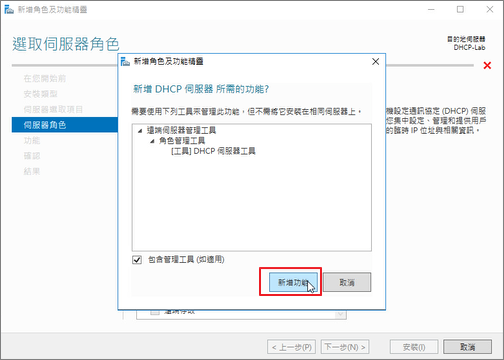
Step7.下一步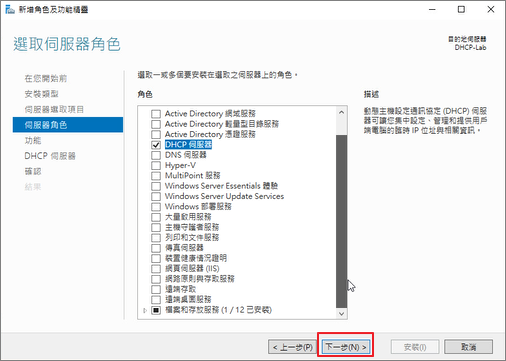
Step8.下一步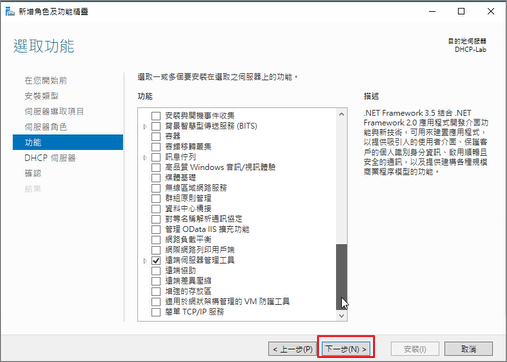
Step9.下一步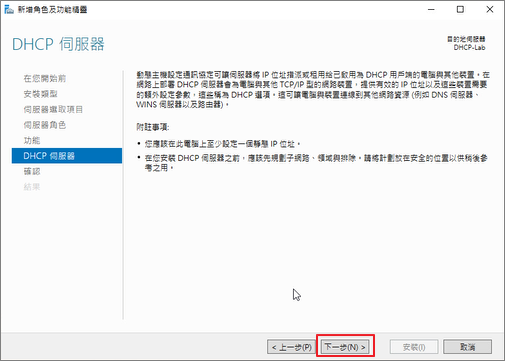
Step10.勾選「必要時自動重新啟動目的地伺服器」>Yes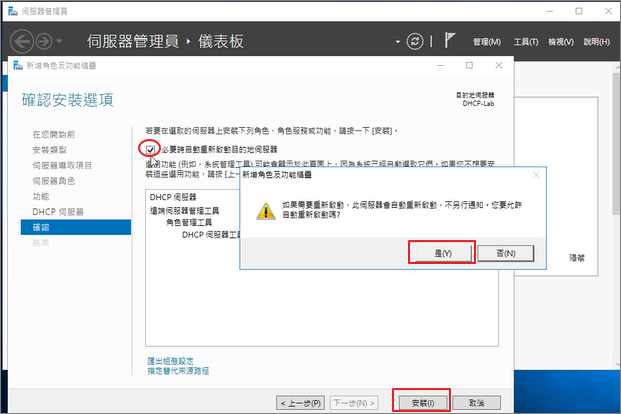
Step11.點選>安裝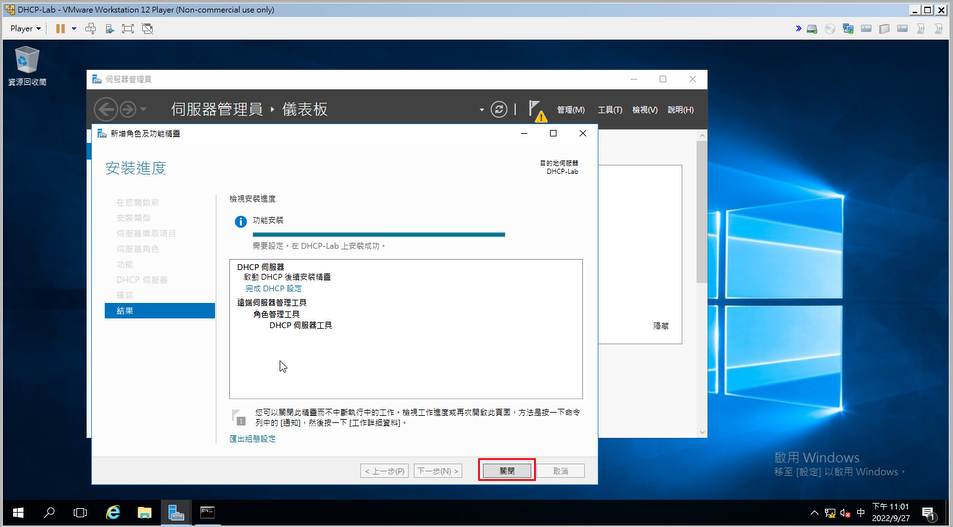
Step12.安裝完成後>點選「其他」進行設定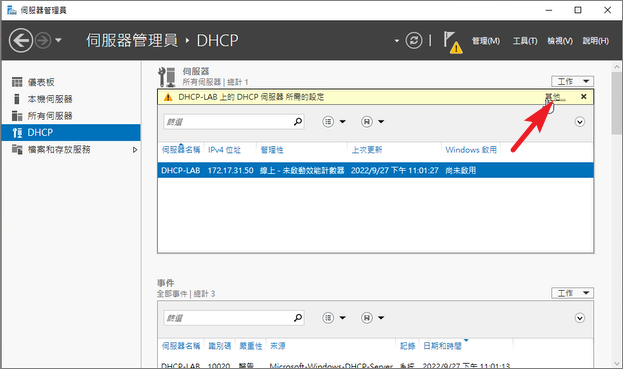
Step13.點選>完成DHCP設定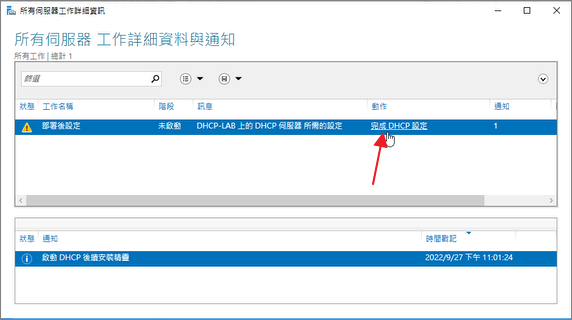
Step14.點選>認可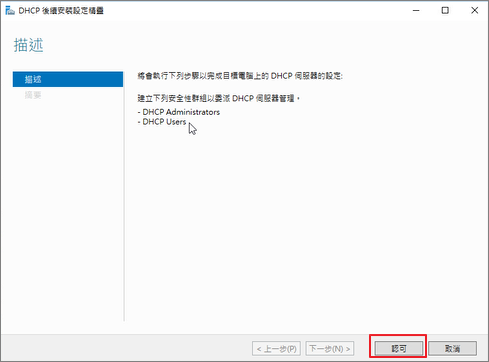
Step15.安裝後>關閉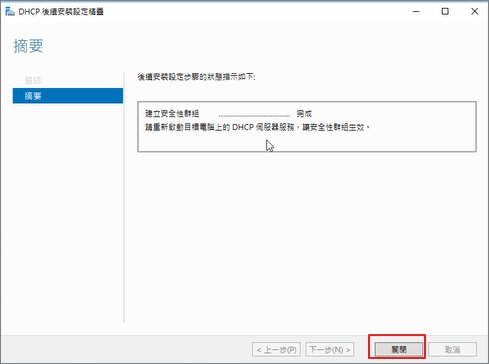
Step16.將DHCP伺服器重新啟動
Step17.開啟DHCP控制台後>至IPv4>伺服器選項>設定選項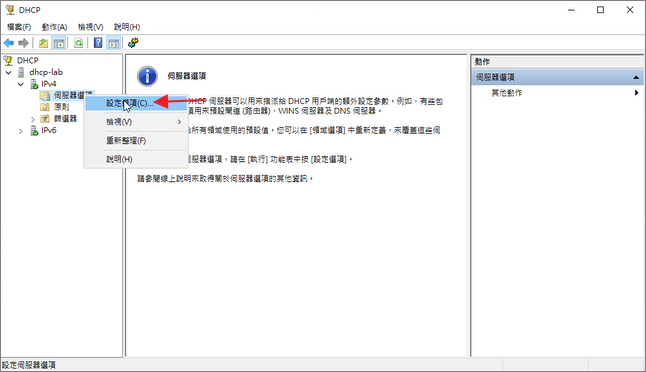
Step18.到006 DNS伺服器設定DNS IP,此處可指派當用戶自DHCP取得IP時,所得到的DNS設置。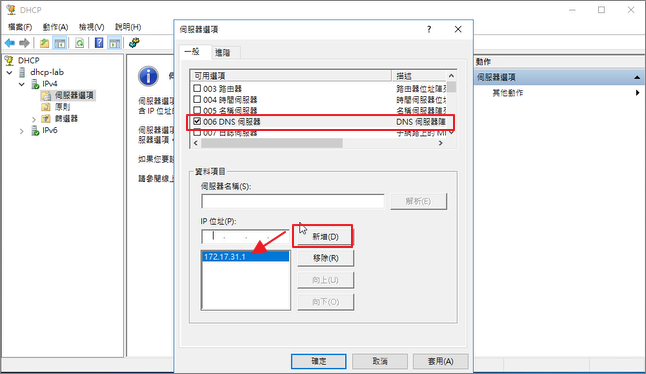
Step19.到015 DNS網域名稱設定網域 >確定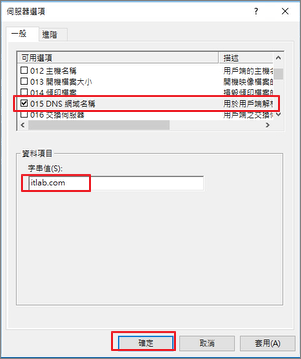
Step20.完成基本設定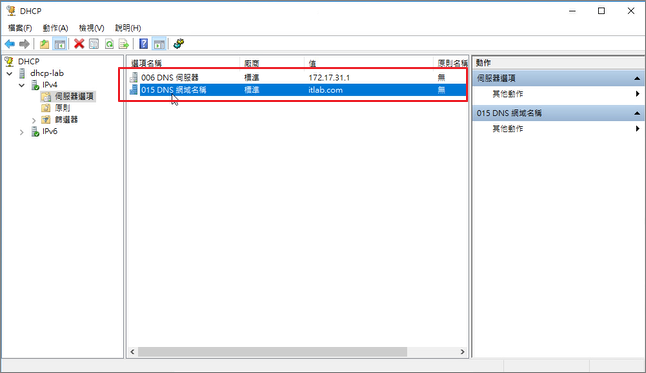
Step21.新增一個領域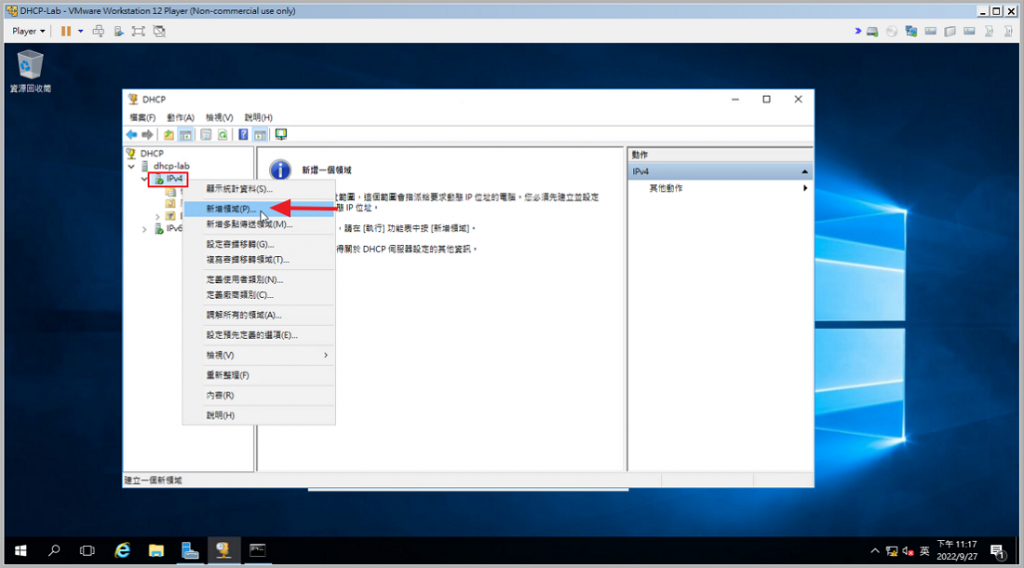
下一步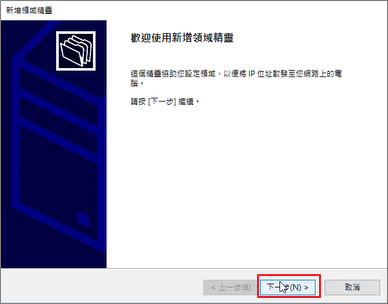
Step22.輸入領域名稱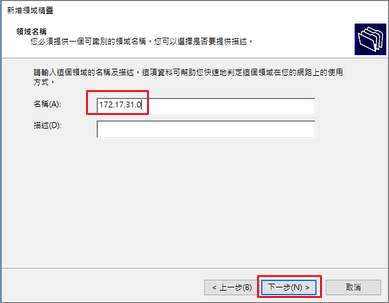
Step23.輸入IP範圍、遮罩長度 >下一步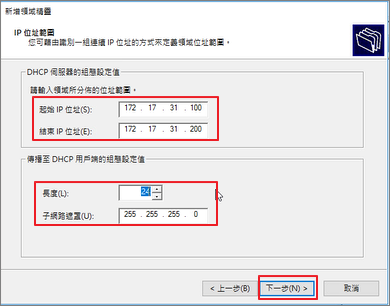
Step24.可自訂是否設定IP排除範圍 >下一步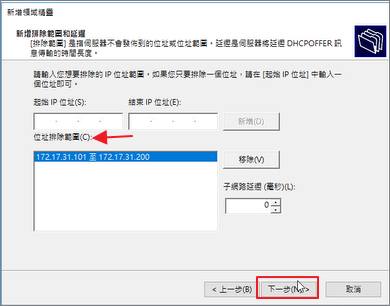
Step25.下一步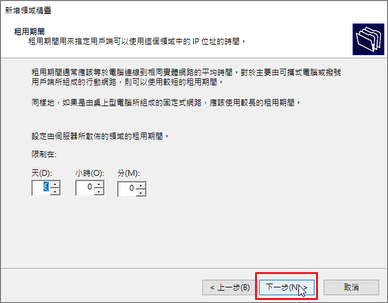
Step26.下一步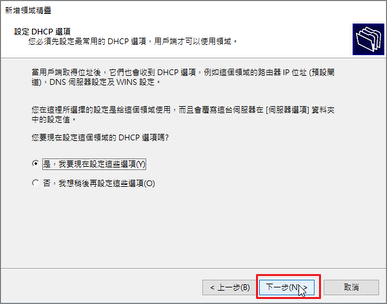
Step27.輸入default gateway>下一步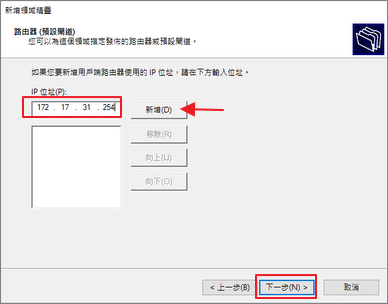
Step28.輸入域名>下一步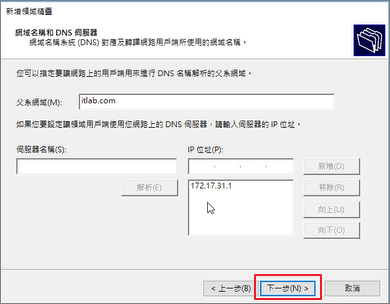
Step29.選擇是否輸入WINS >下一步
Step30.選擇立即啟動該領域 >下一步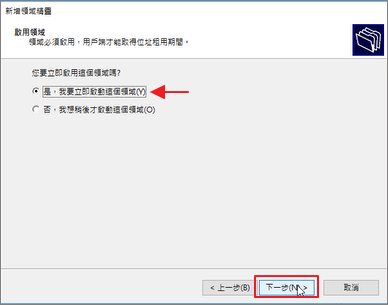
Step31.完成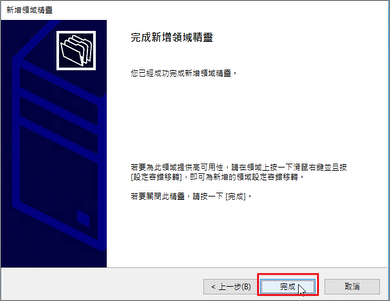
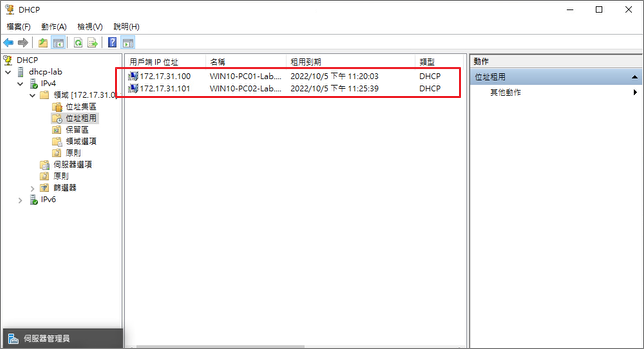
Step32.確認已有相關Client抓到DHCP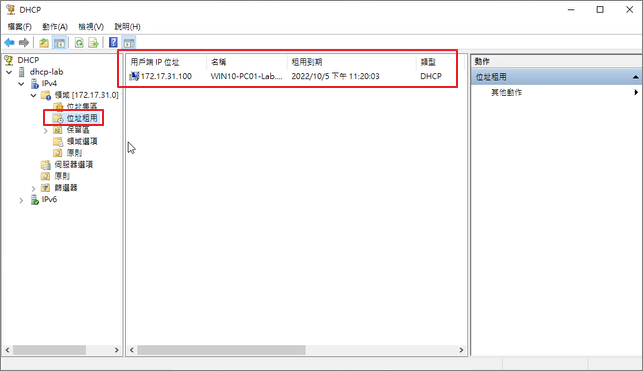
Step33.因為前面誤設到排除範圍,我們先將它刪除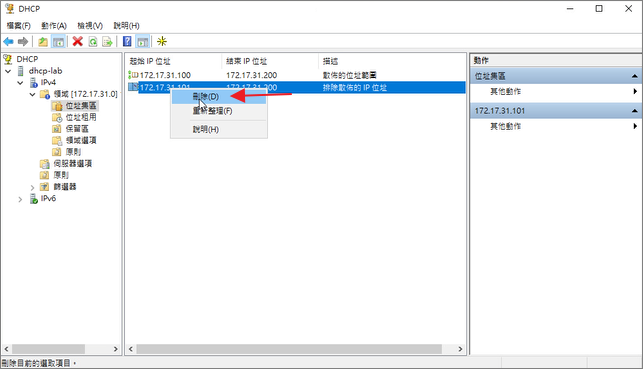
Step34.到Client端確認抓到的DHCP設定是否符合預期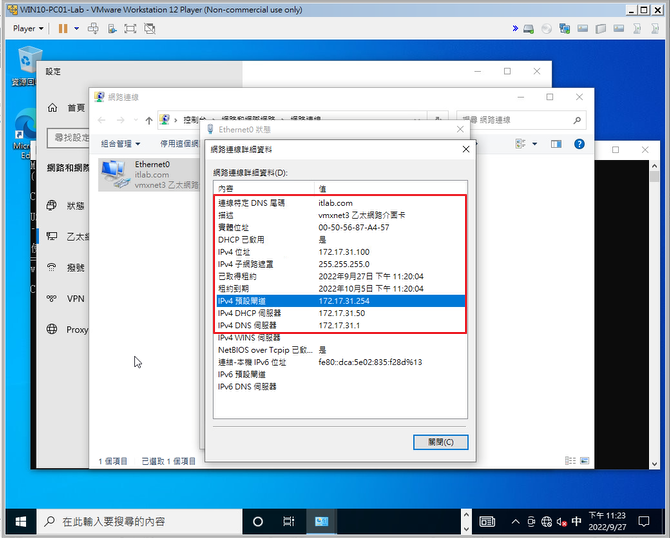
Step35.確認DHCP可正常運作。