在flutter的預設程式碼中,展示了setState如何使用
import 'package:flutter/material.dart';

void main() => runApp(MyApp());

class MyApp extends StatelessWidget {
  @override
  Widget build(BuildContext context) {
    return MaterialApp(
      title: 'Flutter Device Calendar',
      theme: ThemeData(
        primarySwatch: Colors.blue,
      ),
      home: MyHomePage(),
    );
  }
}
class MyHomePage extends StatefulWidget {
  MyHomePage({Key key, this.title}) : super(key: key);

  final String title;

  @override
  _MyHomePageState createState() => new _MyHomePageState();
}

class _MyHomePageState extends State<MyHomePage> {
  int _counter = 0;

  // Here
  void _incrementCounter() {
    setState(() {
      _counter++;
    });
  }

  @override
  Widget build(BuildContext context) {
    return Scaffold(
      appBar: AppBar(
        title: Text(widget.title),
      ),
      body: Center(
        child: Column(
          mainAxisAlignment: MainAxisAlignment.center,
          children: <Widget>[
            Text(
              'You have pushed the button this many times:',
            ),
            Text(
              '$_counter',
              style: Theme.of(context).textTheme.display1,
            ),
          ],
        ),
      ),
      floatingActionButton: FloatingActionButton(
        onPressed: _incrementCounter,
        tooltip: 'Increment',
        child: Icon(Icons.add),
      ),
    );
  }
}
當user與widget進行交互,並且widget發生變化,那麼它就是Stateful State,並且無狀態的 widget 自身無法改變。
並且前面提到過一個具Stateful的widget,他的狀態保存在一個State對像中,它和 widget的顯示分離。當widget狀態改變時,State對象調用setState(),告訴框架(聲明式)去重繪我們的widget
那麼,setState是如何實現更widget的呢?
我們看到flutter\lib\src\widgets\framework.dart裡的State類裡的setState()方法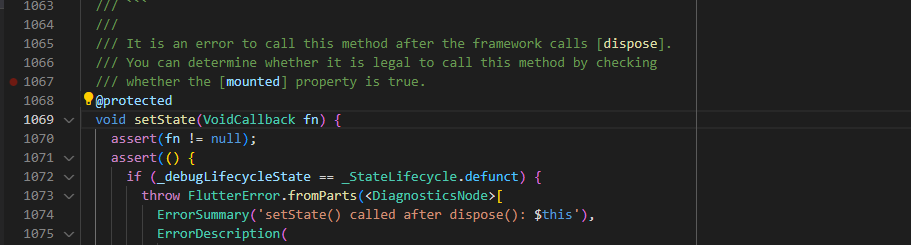
  ...

  @protected
  void setState(VoidCallback fn) {

	  ...

	  final Object? result = fn() as dynamic;

	  ...

	// 將element標記為dirty並將其添加到小部件的global list中,並在下一frame中重建
	  _element!.markNeedsBuild();
  }

  ...
我們來看一下markNeedsBuild方法,
  void markNeedsBuild() {
    assert(_lifecycleState != _ElementLifecycle.defunct);
    if (_lifecycleState != _ElementLifecycle.active)
      return;

	  ...

    if (dirty)
      return;
    _dirty = true;
    owner!.scheduleBuildFor(this);
  }
將Element的_dirty設為true。當該變量為true,在下一次Vsync來到時Element才會被重新build。並同時將該Element加入到owner中,
owner: 此Element的父Element(一個Element可能有多個子控件組成)
接著我們看到scheduleBuildFor
  /// Adds an element to the dirty elements list so that it will be rebuilt
  /// when [WidgetsBinding.drawFrame] calls [buildScope].
  void scheduleBuildFor(Element element) {

      if (element._inDirtyList) {

	    ...

      _dirtyElementsNeedsResorting = true;
      return;
    }
    if (!_scheduledFlushDirtyElements && onBuildScheduled != null) {
      _scheduledFlushDirtyElements = true;
      onBuildScheduled!();
    }
    _dirtyElements.add(element);
    element._inDirtyList = true;

	  ...
	}
在父Element中將此Element標記為dirty,並且由於調用build是從父控件到子控件逐層調用的,每一個父控件藉由
BuildOwner來管理它的子控件,接下來再調用onBuildScheduled()
setState()流程
總結思路一下,簡單的了解setState()的工作流程:
1.呼叫setState()
2.當前Widget標記為可以刷新(dirty)
3.遍歷子widget標記為可以刷新
4.等待下一個Vsync刷新信號
5.呼叫此widget及其子widget的build進行刷新
簡單的介紹一下工作原理後,現在我們知道setState為什麼能重繪widget,那麼該如何使用?
盡量保持widget小: 因為我們知道當她rebuild時,會讓他的子代也跟著被重建,所以使用時,最好不要讓太多的widget進行重建
使用注意[Source Link]:
我們今天簡單的了解setState如何運作後,明天我們來介紹InheritedWidget


 iThome鐵人賽