小提醒:如果想跟著操作此篇,請先去以下網址進行安裝喔!
Day 11 : 實作篇 - Kali Linux VM虛擬機安裝教學
Day 12 : 實作篇 - Metasploitable2、OWASPBWA 靶機安裝教學
大家好,今天是開始實作的第五篇
那今天要來和大家介紹 Burp Suite 這個好工具!
它是一個能攔截封包、對 web 進行滲透測試的好工具,透過中間人的方式,對使用 http 和 https 協定的封包進行操作(如暫停、查看、分析、修改等),以發現潛在的「意外問題」及「崩潰的錯誤訊息」。它集結了許多的滲透測試工具,並使用 Java 編寫,提供 GUI 介面方便你操作
這裡附上它的 Logo 給大家參考參考
那我們就開始操作吧!
這裡我們先來說等等要做什麼,我們要使用owb靶機裡的OWASP Mutillidae II靶場進行攻擊。它提供了OWASP TOP10裡的漏洞,並分成三種安全等級,讓我們初學者可以循序漸進進行攻防練習
這裡我們要用的是SQL Injection(2013:A1) 的Bypass Authentication/Login攻擊,並使用 Burp Suite Proxy 進行封包攔截,再使用 Intruder 進行字典檔遍歷,找出可以登入的帳號密碼
既然說明完了,那我們就正式開始操作!
首先,開啟你的kali VM,按左上角的「kali icon」,搜尋Burp Suite並開啟它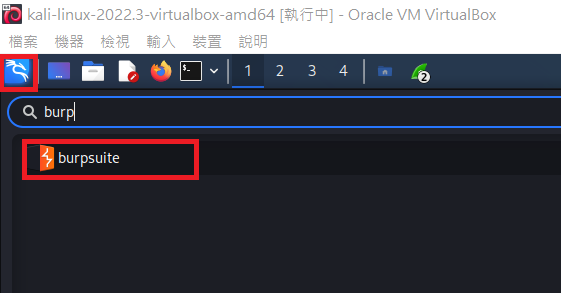
因為我們只是練習,不用儲存結果,所以選「temporary project」即可,再按「Next」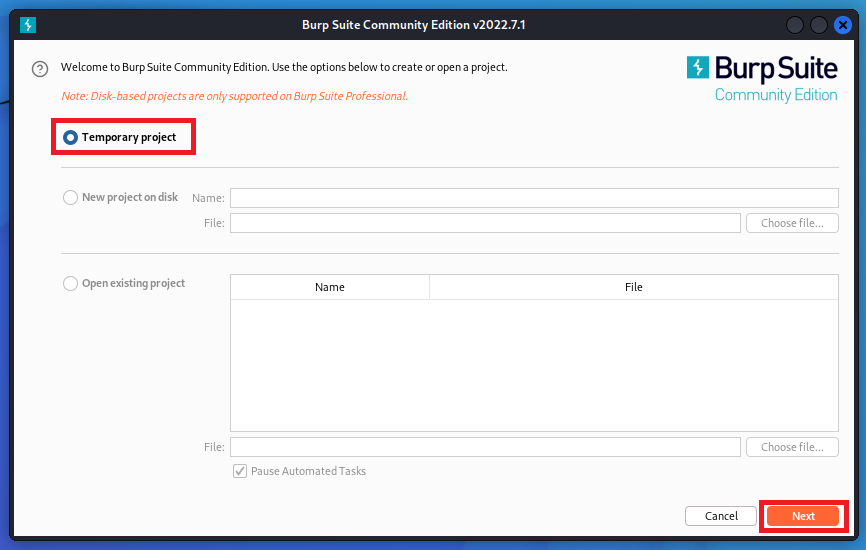
選擇「Use Burp defaults」,再按「Start Burp」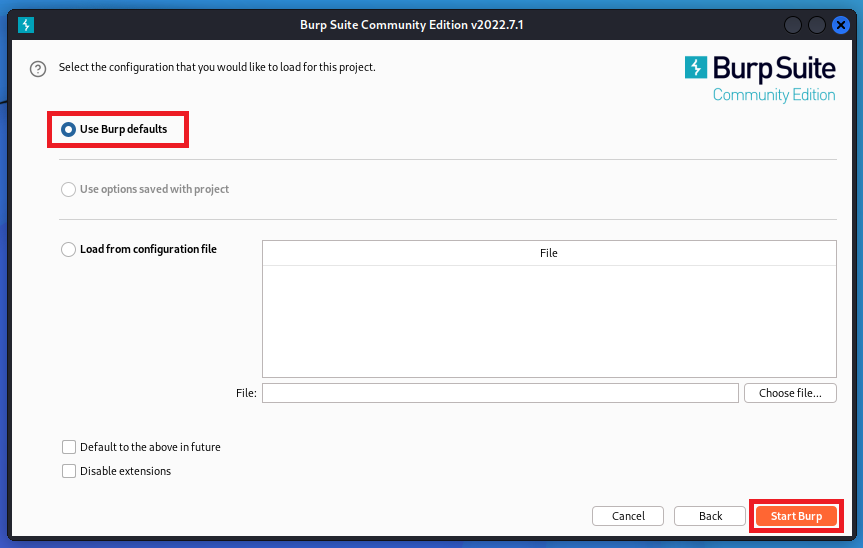
然後就會看到 Burp Suite 的主畫面!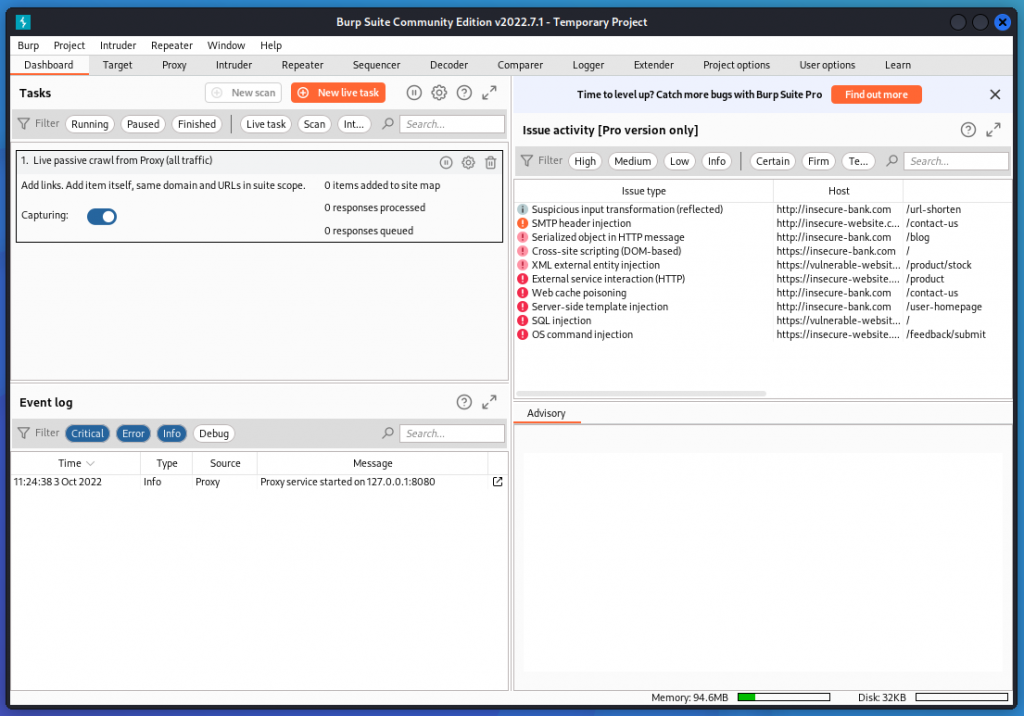
再到VirtualBox的 VM 列表,開啟我們的OWASPBWA靶機,登入後輸入ifconfig,確認它的 IP 位址為何(這裡每個人的 IP 位址皆不同,後續操作照你機器的 IP 即可)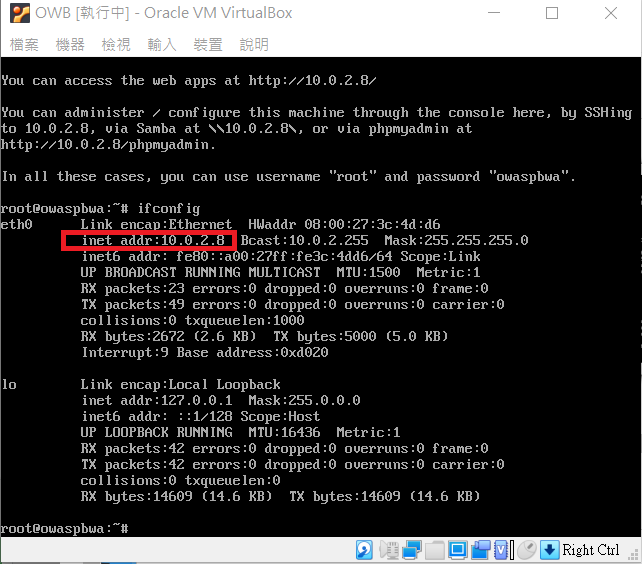
這時回到我們的Kali VM,按左上角的「Firefox icon」,開啟 Firefox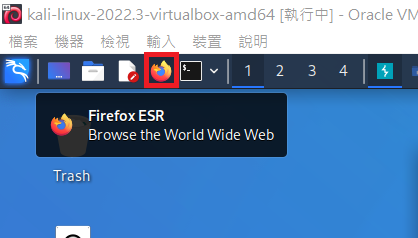
在網址列的地方打上<你owb靶機的IP位址>,這裡我的 IP 位址為10.0.2.8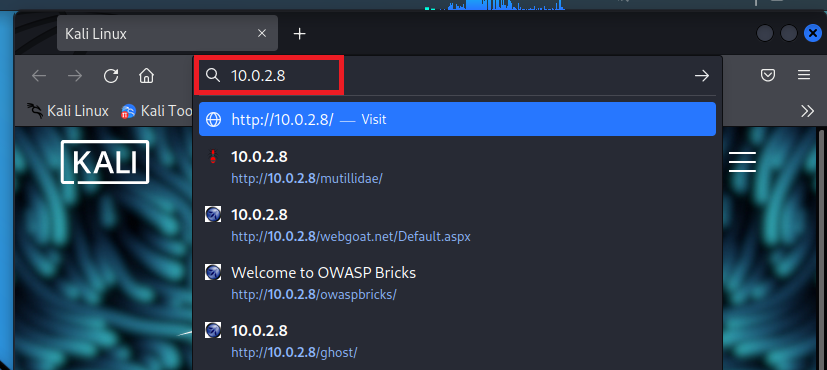
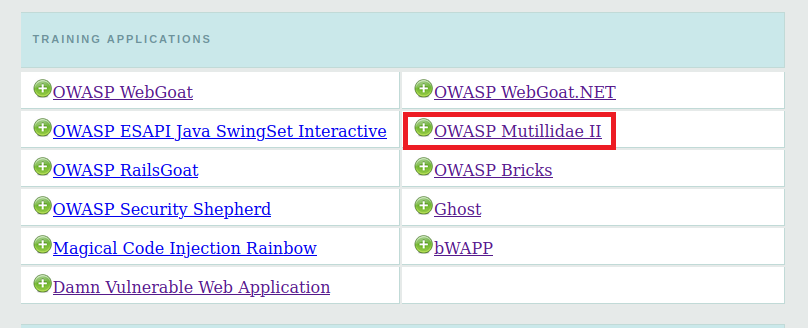
到 owaspbwa 的畫面,點擊「OWASP Mutillidae II」,上面有稍微提到它是什麼東西
它提供了OWASP TOP10裡的漏洞,並分成三種安全等級,讓我們初學者可以循序漸進進行攻防練習
再點擊OWASP 2013 > A1 - Injection(SQL) > SQLi - Bypass Authentication > Login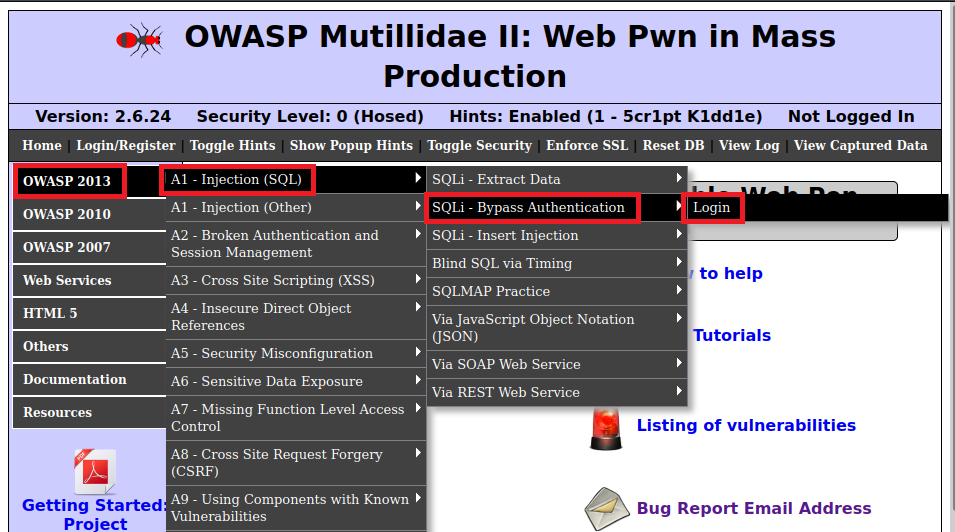
因為 Burp Suite proxy 預設的連接端口為127.0.0.1:8080,所以我們要在 Firefox 設定一個 proxy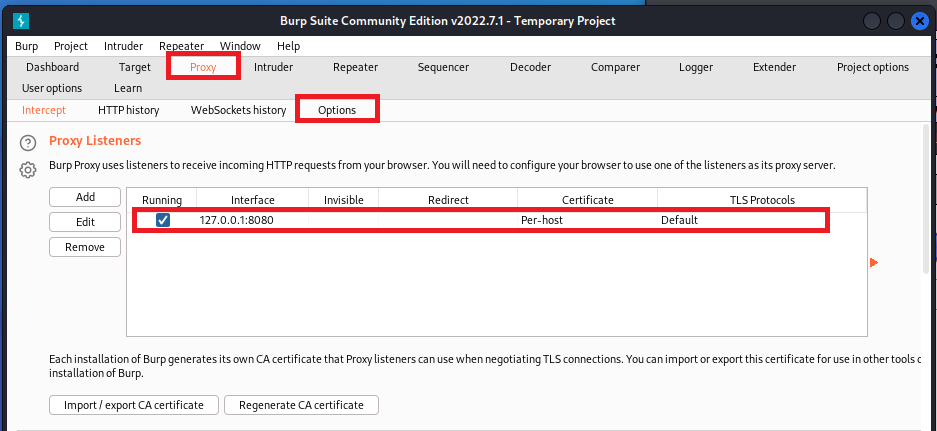
按右上角的「工具列 icon」,選擇「Settings(設定)」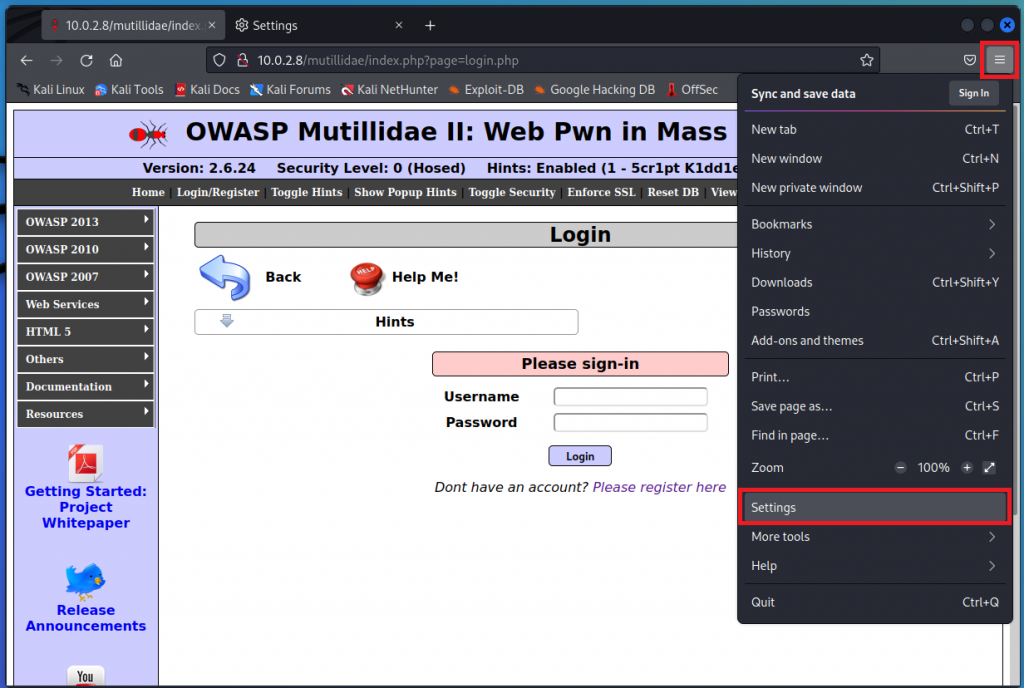
滑到最下面,看到「Network Settings」,點擊「Settings...」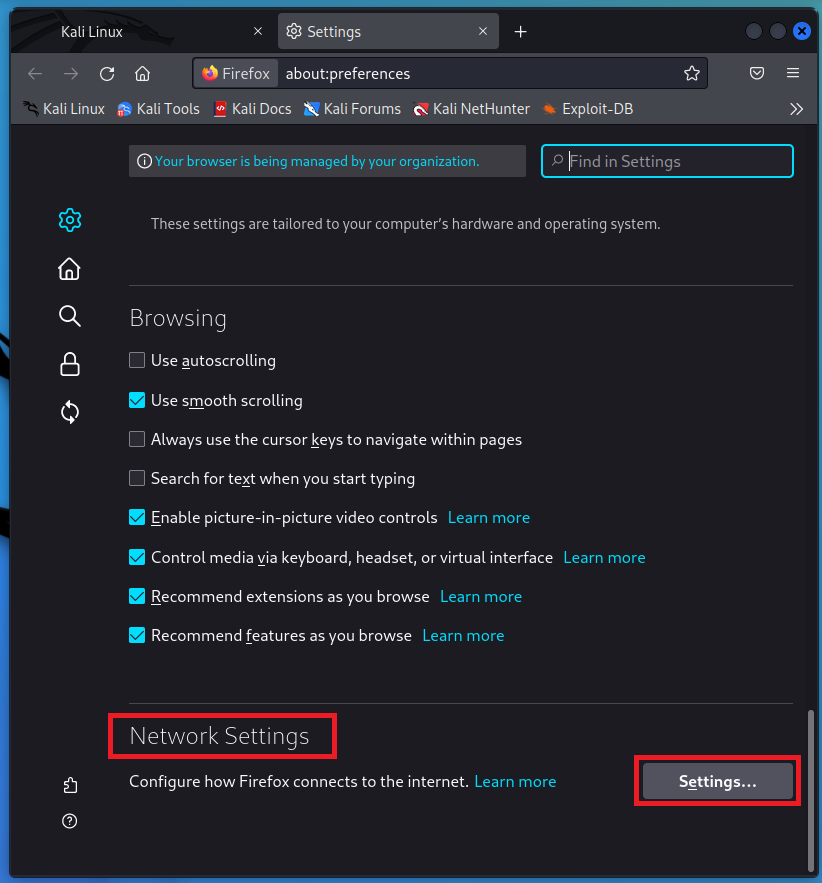
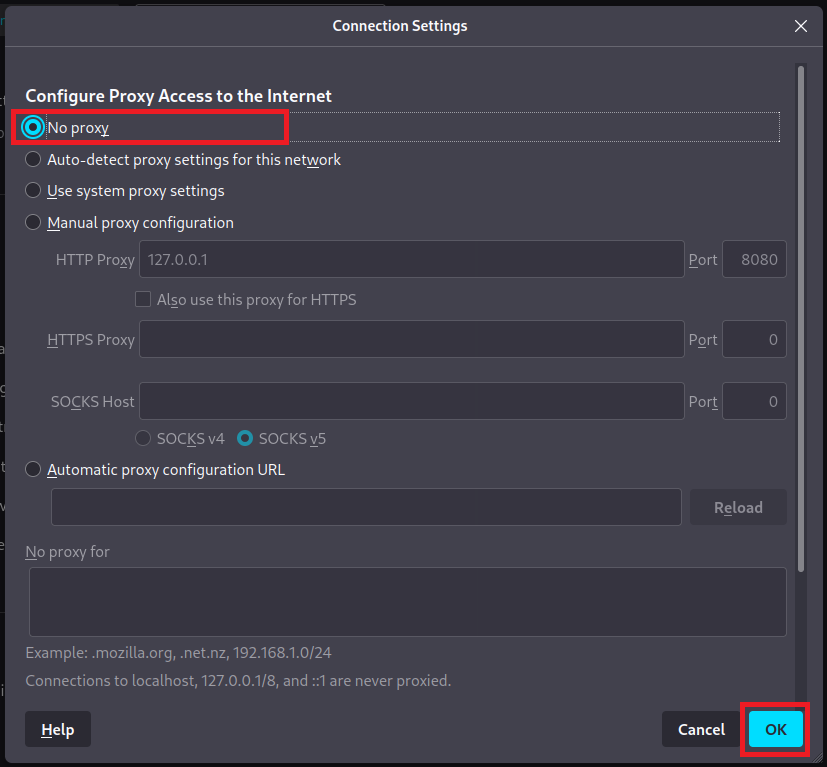
勾選「Manual proxy configuration」,並在 HTTP Proxy 的地方輸入 127.0.0.1,port 號為8080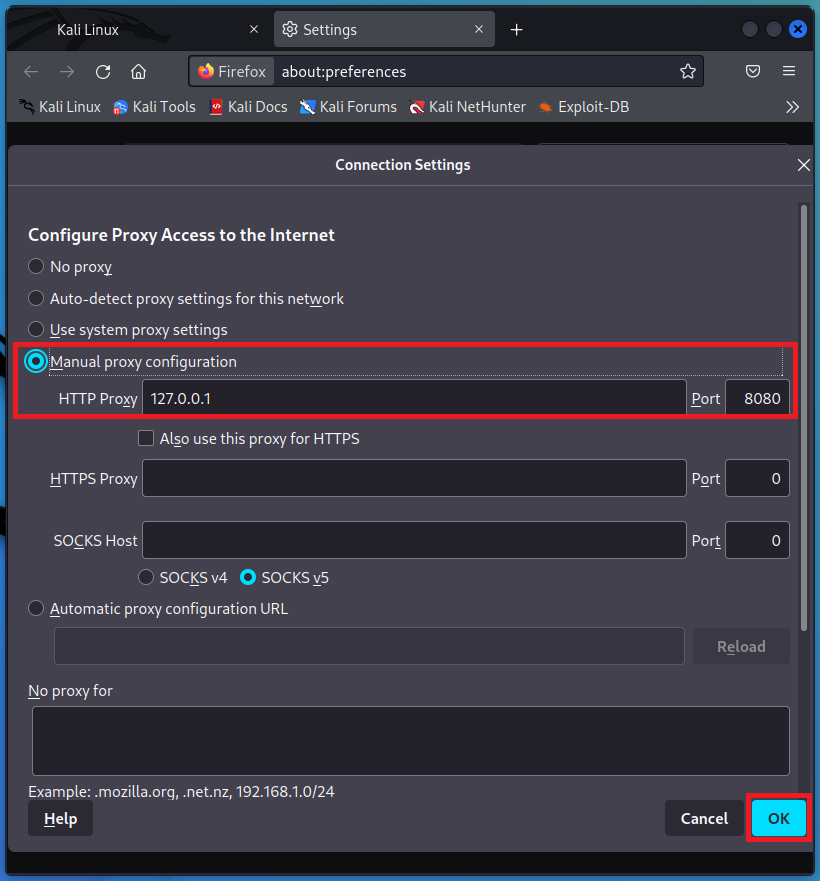
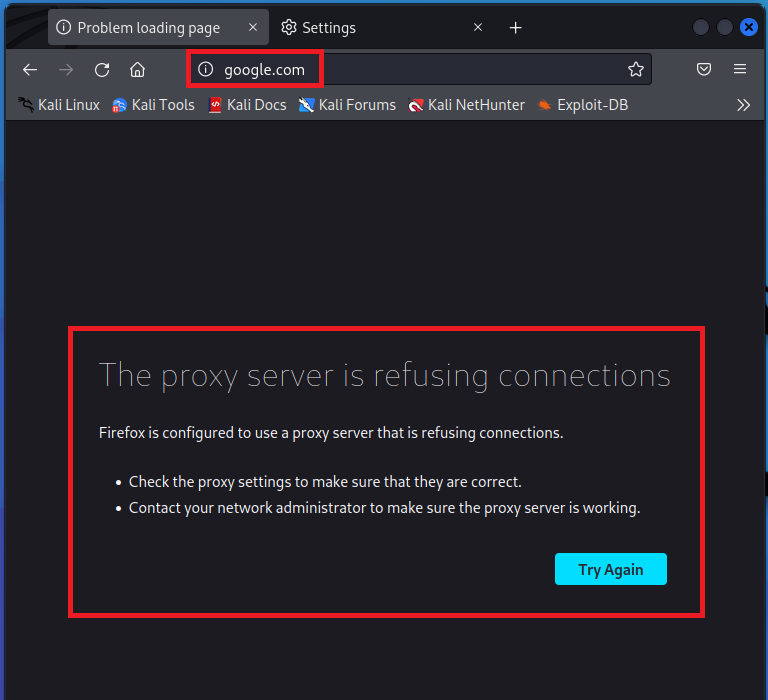
注意:如果你開啟 proxy 後,出現以下畫面,就回到剛剛設定 proxy 的畫面,將 proxy 關閉即可(在連接外網時一定要關閉 proxy,否則你會一直看到這個畫面),但在進行攔截的時候記得要再打開
Firefox 的 Proxy 設定完成後,回到 Burp Suite 的畫面,將 proxy 的「Intercept is on」打開,進行封包攔截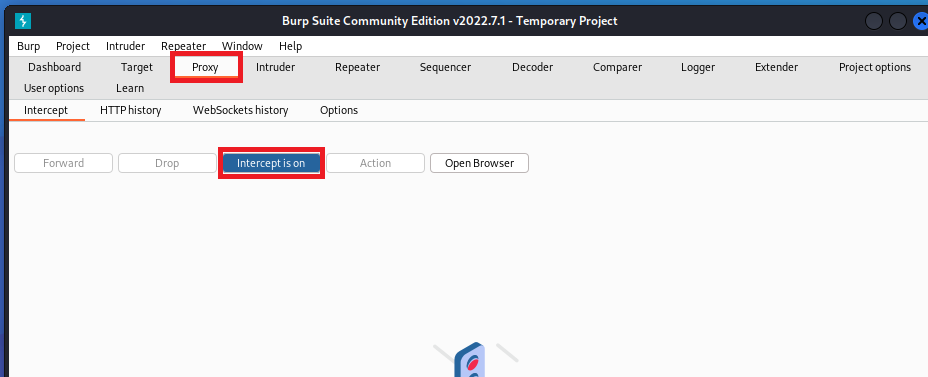
再回到剛剛的 Login 畫面,並將 username 和 password 輸入任意值(這邊我輸入的是a/b),輸入完按下「Login」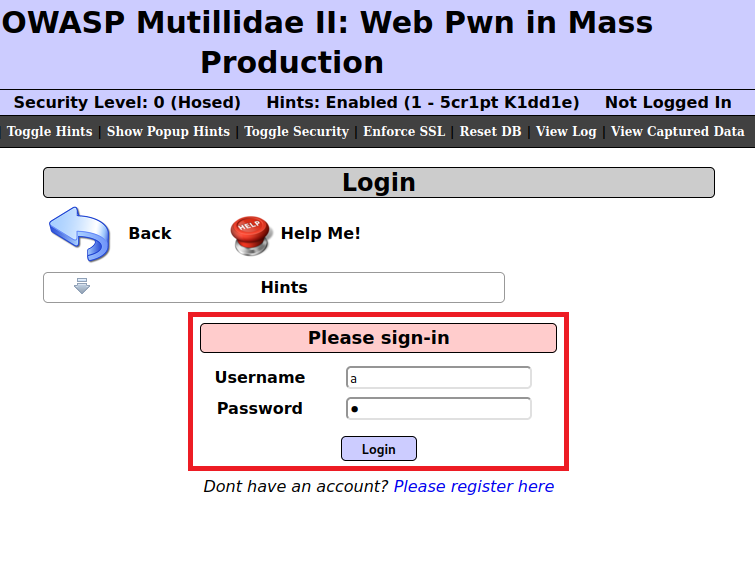
這時 Burp Suite 會收到剛剛按下 Login 的封包,而瀏覽器的部分不會跳轉,會一直在「等待這個封包」
此時再對這個封包畫面按右鍵,點擊「Send to Intruder」,將封包資訊傳到Intruder值行動作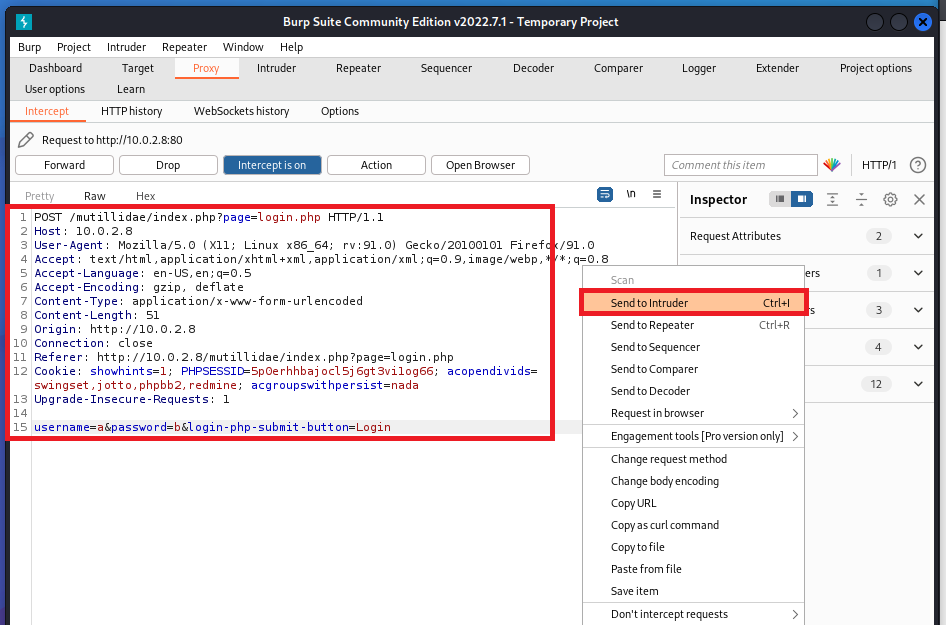
這時到Intruder > positions,就會看到剛剛的封包資訊。這裡先按「clear §」,取消所有被§標記的地方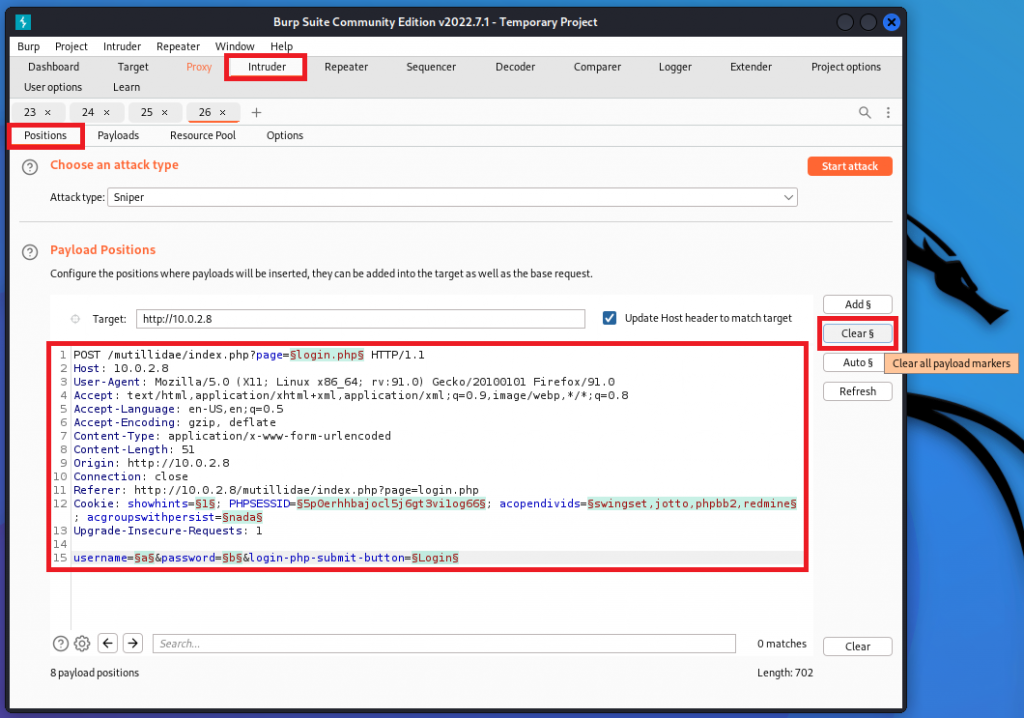
再使用「add §」,將我們剛剛輸入的a/b用§標記起來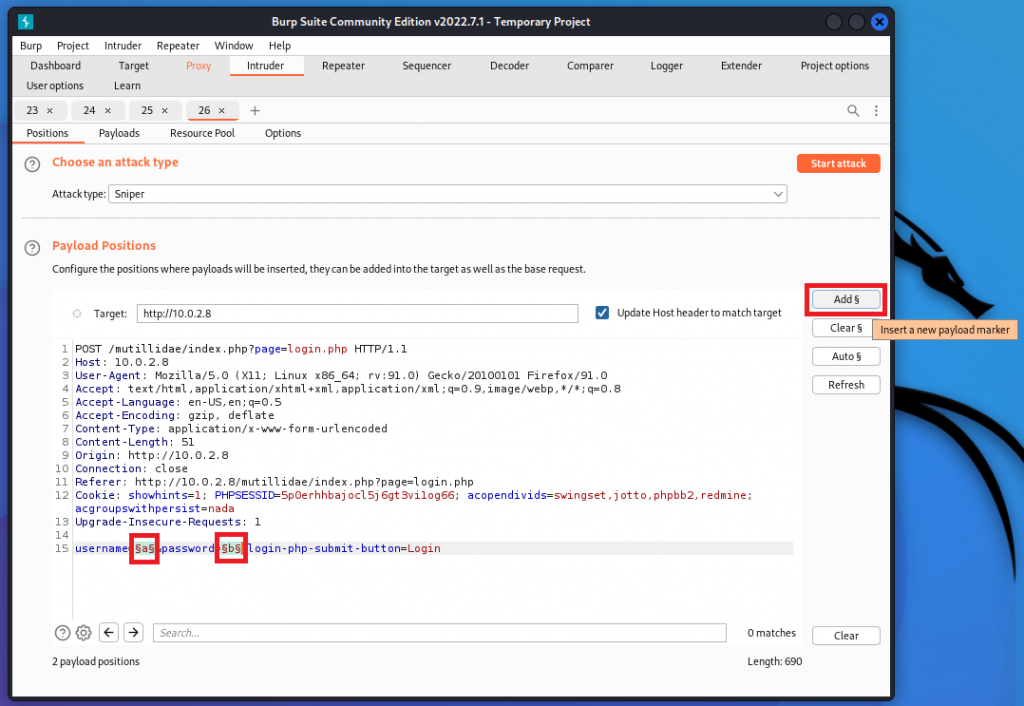
到上方的 Attack type,選擇「cluster bomb」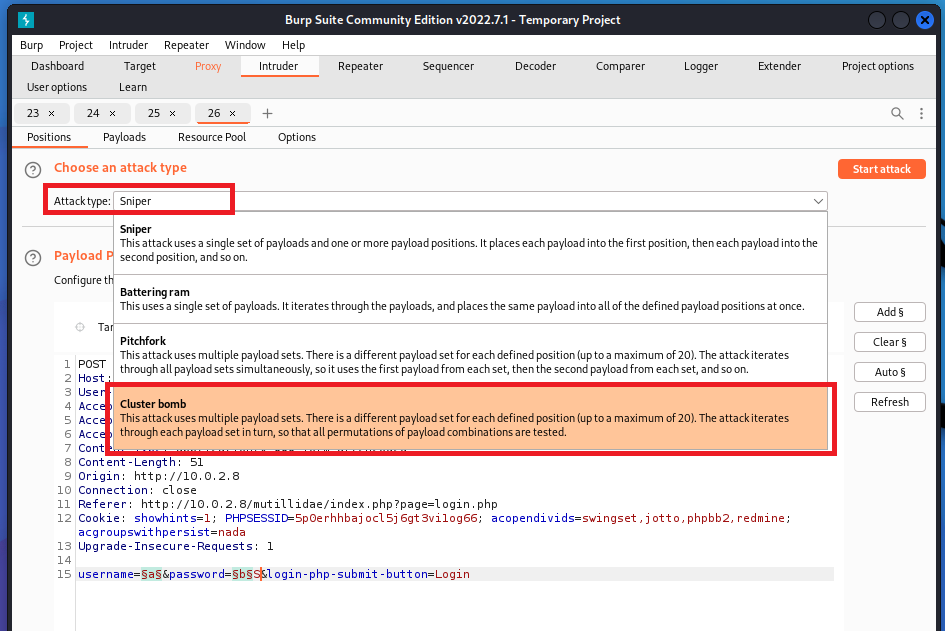
再點進「Payloads」裡,將 Payload Sets 設為 1,這邊的 1 是指 username,也就是剛剛的§a§
並在 Payload Options 使用 add 新增可能是 username 的值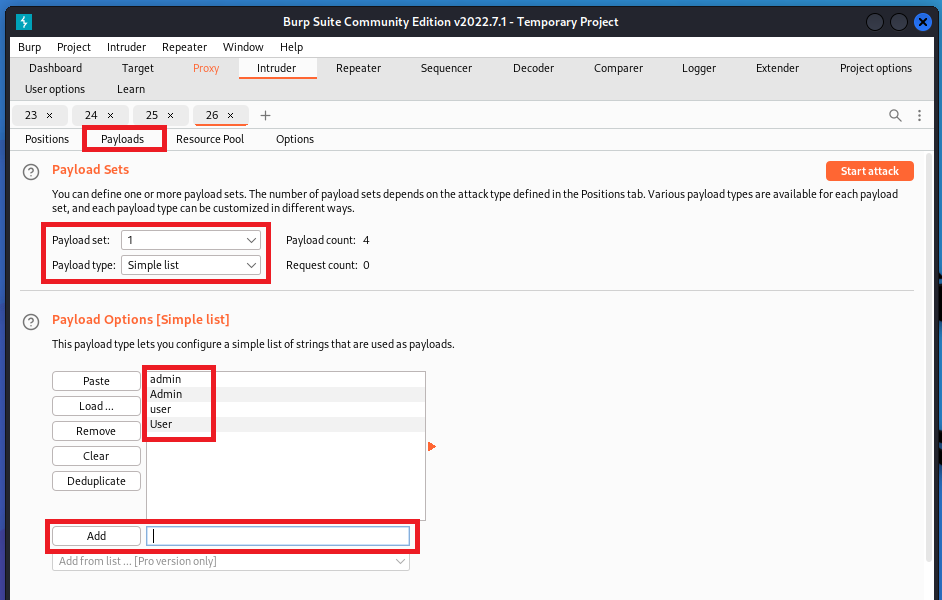
再將 Payload set 設為 2,這邊的 2 指的是 password,也就是§b§
一樣在 Payload Options 裡新增可能是 password 的值。確認無誤後,點擊 Start attack,開始進行攻擊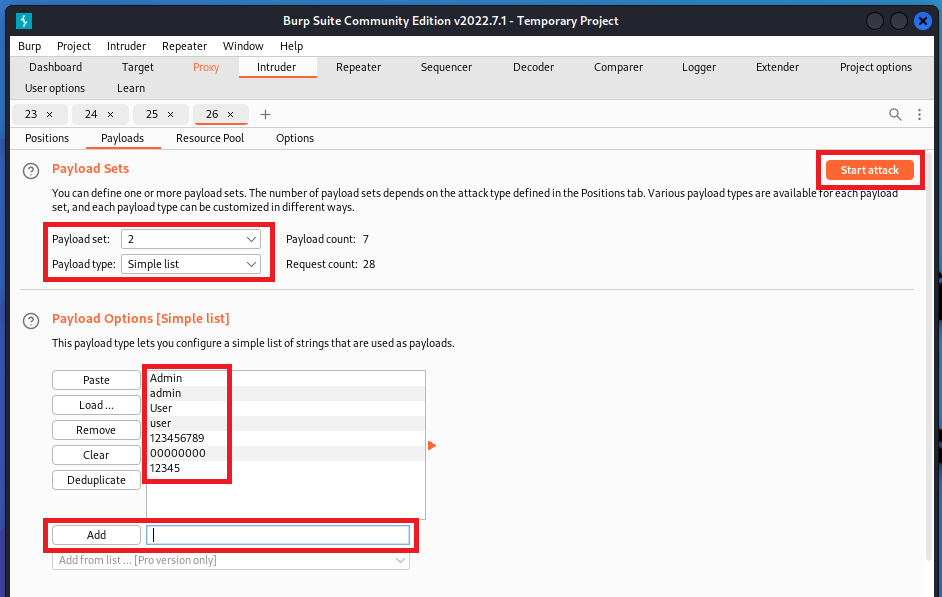
如果不知道手動輸入要輸入什麼值,可以點擊旁邊的「Load...」,匯入可能是帳號密碼的字典檔,但這樣進行破解會很費時,所以這邊不做示範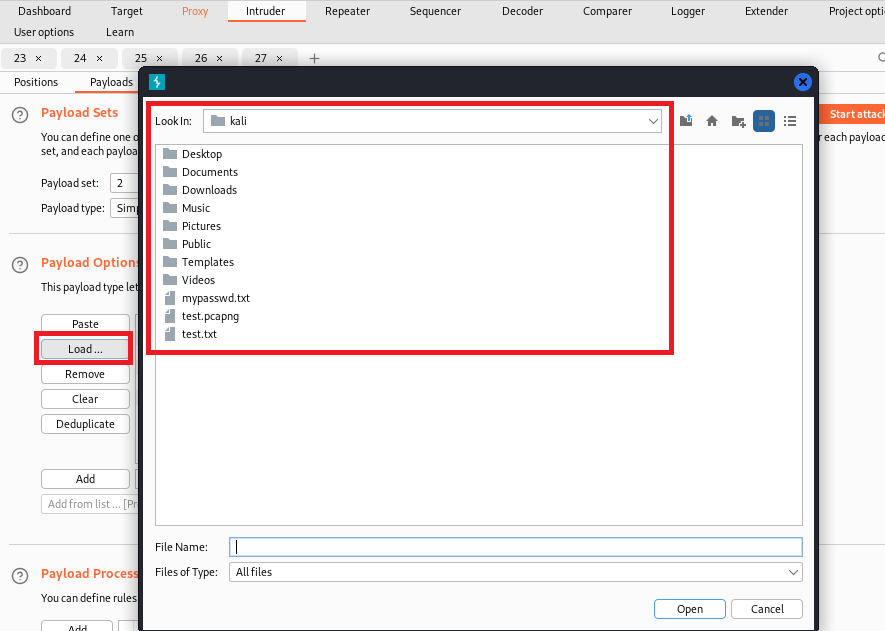
跑完後,Status 為 302 的皆是可以成功 Login 的帳號,你可以點擊任意一個看他的 Response,並和 Status 為 200 的 Response 進行比較,看有哪裡不一樣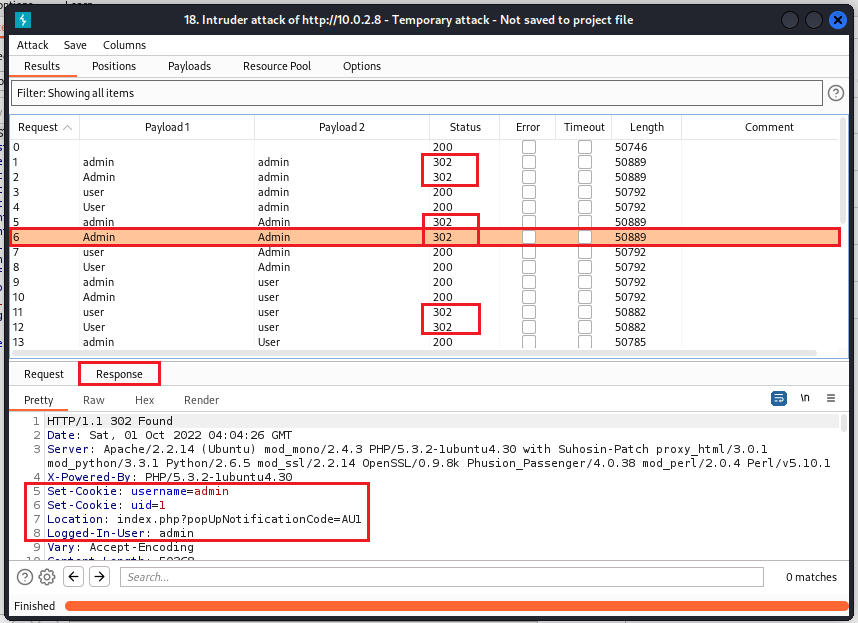
再回到 Proxy,點擊「Forward」進行封包傳送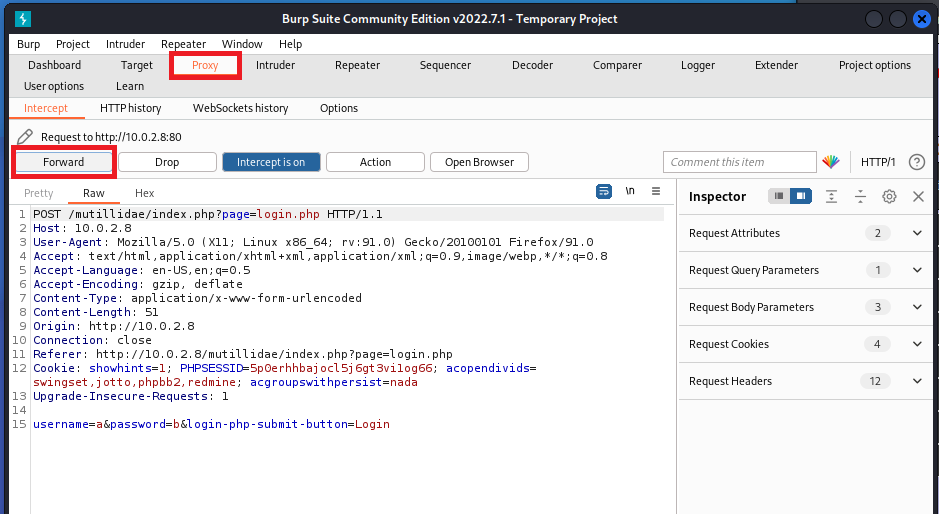
回到瀏覽器,就能看到你已經用user的身分登入囉!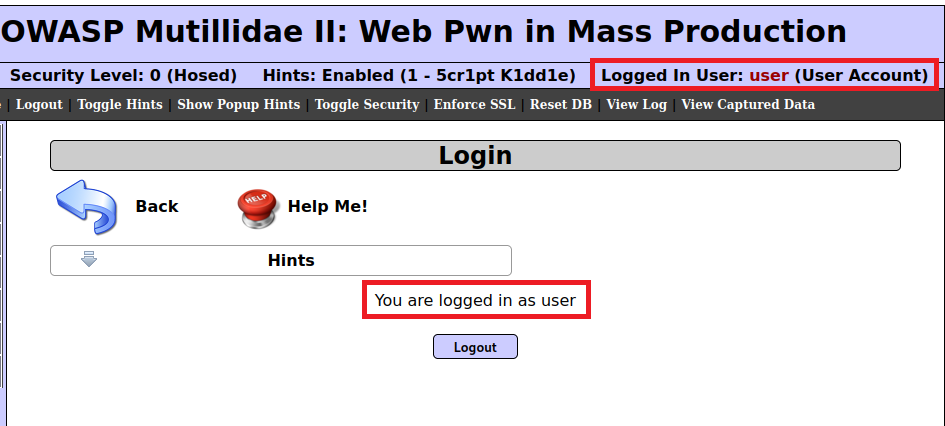
以上就是今天的介紹
希望大家看完能對 Burp Suite 更加了解