
🔥【Vue.js → Nuxt 入門推薦!🌟 新書即將上市 🌟】
📘《想要 SSR 嗎?就使用 Nuxt 吧!Nuxt 讓 Vue.js 更好處理 SEO 搜尋引擎最佳化》
👀 Nuxt v4 內容與範例也可以參考並購買本系列文筆著所著書籍
📦 預計於:2025/08/14 出版,目前天瓏書局預購有 7️⃣8️⃣ 折優惠
👉 點此前往購買:https://pse.is/7yulm5
注意:Nuxt 4 已於 2025/07/16 釋出,本文部分內容或範例可能和最新版本有所不同
跟隨著本系列學習 Nuxt 3 的夥伴們,應該對 Nuxt 3 有一點熟悉了,接下來會分享如何建立一個簡易的部落格網站,再結合 Nuxt 3 提供可以針對搜尋引擎最佳化的配置函數來為部落格加強 SEO。這篇要介紹網站的會員系統常會使用到第三方登入,將以 Google OAuth 為例來實際於 Nuxt 3 中做串接。
首先,我們需要有一組 Google OAuth 使用的 Client ID,你可以到 Google Console 新增一個「OAuth 2.0 用戶端 ID」,這裡我就不再贅述網頁應用程式用的申請過程。
這邊小提醒一下,在建立 OAuth Client ID 時,已授權的 JavaScript 來源,記得填寫上您的正式環境或開發環境的 Domain,且建議使用 HTTPS。
完成後,記得保管好用戶端密碼,用戶端 ID (Client ID) 是我們稍後會需要的,用戶端編號格式大概如:
168152363730-b37gnijdpa2rdvvbq0qc29cjh4082t3b.apps.googleusercontent.com
我們將這組 Client ID,放置在 Nuxt 的 Runtime Config 之中。調整 ./nuxt.config.ts 內容,在 runtimeConfig.public 添加 googleClientId。
export default defineNuxtConfig({
  runtimeConfig: {
    public: {
      googleClientId: '這邊放上你的 Google Client ID'
    }
  }
})
接下來,安裝 Vue 的 Google OAuth 插件,這邊使用的是 vue3-google-login,也有詳細的說明文件可以參考。
使用 NPM 安裝 vue3-google-login。
npm install -D vue3-google-login
建立 Nuxt 3 插件來使用 vue3-google-login,新增 ./plugins/vue3-goolge-login.client.js,內容如下:
import vue3GoogleLogin from 'vue3-google-login'

export default defineNuxtPlugin((nuxtApp) => {
  const runtimeConfig = useRuntimeConfig()
  const { googleClientId: GOOGLE_CLIENT_ID } = runtimeConfig.public

  nuxtApp.vueApp.use(vue3GoogleLogin, {
    clientId: GOOGLE_CLIENT_ID
  })
})
接著我們在元件中可以直接使用 <GoogleLogin> 元件,並添加一個 callback 屬性;此外,我使用了 Nuxt 3 提供的 <ClientOnly> 元件,將 <GoogleLogin> 包裹起來,以確保該元件僅在客戶端做渲染,以免登入按鈕在初始化發生問題。
<template>
  <div>
    <ClientOnly>
      <GoogleLogin :callback="callback" />
    </ClientOnly>
  </div>
</template>

<script setup>
const callback = (response) => {
  console.log(response)
}
</script>
接著我們啟動 Nuxt 伺服器,這邊我會習慣使用 npm run dev -- --https 來啟用 HTTPS 做測試,就能發現使用 Google 帳號登入成功後,所返回的 Credential。
你可以在 <GoogleLogin> 元件添加 prompt 屬性並設為 true,這樣就能同時啟用 Google 一鍵登入 (One Tap prompt) 的功能囉!
<GoogleLogin :callback="callback" prompt />
或者也可以在 onMounted 中呼叫 vue3-google-login 的 googleOneTap() 方法,來單獨使用 One Tap prompt。
<script setup>
import { googleOneTap } from 'vue3-google-login'

onMounted(() => {
  googleOneTap()
    .then((response) => {
      console.log(response)
    })
    .catch((error) => {
      console.error(error)
    })
})

</script>
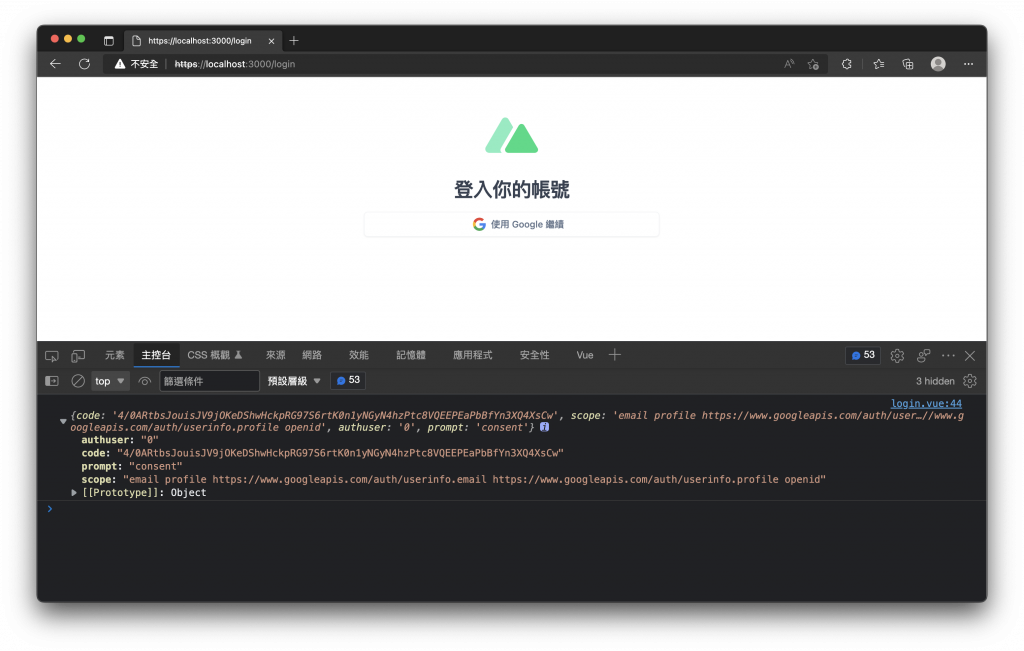
如果你想自訂登入按鈕的樣式,可以在 <GoogleLogin> 的預設插槽 (Slot) 做建立。
<template>
  <GoogleLogin :callback="callback">
    <button>使用 Google 進行登入</button>
  </GoogleLogin>
</template>
使用自訂按鈕會讓 OAuth 流程稍微有點不一樣,當你登入成功後預設會回傳 Auth Code。
如果設定屬性 popup-type="TOKEN",則回傳 Access Token。
<template>
  <GoogleLogin :callback="callback" popup-type="TOKEN">
    <button>使用 Google 進行登入</button>
  </GoogleLogin>
</template>
googleTokenLogin()在元件中我們也可以自己建立 handleGoogleLogin 點擊事件,呼叫 googleTokenLogin() 方法並傳入設定在 Runtime Config 中的 Google Client ID,這樣點擊登入按鈕就能處理 Google 登入取得 Access Token。
<script setup>
import { googleTokenLogin } from 'vue3-google-login'

const runtimeConfig = useRuntimeConfig()
const { googleClientId: GOOGLE_CLIENT_ID } = runtimeConfig.public


const handleGoogleLogin = () => {
  googleTokenLogin({
    clientId: GOOGLE_CLIENT_ID
  }).then((response) => {
    console.log(response)
  })
}
</script>
建立一個登入按鈕來呼叫 handleGoogleLogin 點擊事件。
<template>
  <div>
    <button
      type="button"
      @click="handleGoogleLogin"
    >
      使用 Google 繼續
    </button>
</template>
使用 vue3-google-login 提供的 googleTokenLogin() 方法,我們就能取得 Google 使用者的 Access Token 囉!
googleAuthCodeLogin()我們也可以使用 googleAuthCodeLogin() 來取得 Auth Code。
<script setup>
import { googleAuthCodeLogin } from 'vue3-google-login'

const runtimeConfig = useRuntimeConfig()
const { googleClientId: GOOGLE_CLIENT_ID } = runtimeConfig.public


const handleGoogleLogin = () => {
  googleAuthCodeLogin({
    clientId: GOOGLE_CLIENT_ID
  }).then((response) => {
    console.log(response)
  })
}
</script>
當使用者於前端成功登入後,通常會傳至後端進行登入或記錄使用者,再產生使用於網站的 Token、Cookie 或 Session 等,以供後續的網站驗證做使用。
我們可使用 google-auth-library 於後端進行一系列的驗證或取得使用者資訊。
使用 NPM 安裝 google-auth-library。
npm install -D google-auth-library
接下來,我們就能依照不同的登入方式取得的 Credential、Access Token 或 Auth Code 送至後端做驗證。
Access Token新增一個 Server API,只接受 POST 方法,在 Body 中夾帶 accessToken 發送至後端。
建立 ./server/api/auth/google.post.js,內容如下:
import { OAuth2Client } from 'google-auth-library'

export default defineEventHandler(async (event) => {
  const body = await readBody(event)
  const oauth2Client = new OAuth2Client()
  oauth2Client.setCredentials({ access_token: body.accessToken })

  const userInfo = await oauth2Client
    .request({
      url: 'https://www.googleapis.com/oauth2/v3/userinfo'
    })
    .then((response) => response.data)
    .catch(() => null)

  oauth2Client.revokeCredentials()

  if (!userInfo) {
    throw createError({
      statusCode: 400,
      statusMessage: 'Invalid token'
    })
  }

  return {
    id: userInfo.sub,
    name: userInfo.name,
    avatar: userInfo.picture,
    email: userInfo.email,
    emailVerified: userInfo.email_verified,
  }
})
調整元件內的登入流程。
<script setup>
import { googleTokenLogin } from 'vue3-google-login'

const runtimeConfig = useRuntimeConfig()
const { googleClientId: GOOGLE_CLIENT_ID } = runtimeConfig.public

const userInfo = ref()

const handleGoogleLogin = async () => {
  const accessToken = await googleTokenLogin({
    clientId: GOOGLE_CLIENT_ID
  }).then((response) => response?.access_token)

  if (!accessToken) {
    return '登入失敗'
  }

  const { data } = await useFetch('/api/auth/google', {
    method: 'POST',
    body: {
      accessToken
    },
    initialCache: false
  })

  userInfo.value = data.value
}
</script>
當我們使用 Google OAuth 登入成功後,會取得 Access Token,並將其傳至 Server API,/api/auth/google 接收 Access Token 並使用 Google API 取得使用者的資訊,最後回傳給前端。
Credential在元件中,我們使用的登入方式如果是 Google 渲染的預設按鈕或 One Tap prompt,回傳值就會包含 Credential,我們將就可使用下面修改後的 Server API 進行驗證。
./server/api/auth/google.post.js 內容修改為如下:
import { OAuth2Client } from 'google-auth-library'

export default defineEventHandler(async (event) => {
  const body = await readBody(event)
  const oauth2Client = new OAuth2Client()

  const ticket = await oauth2Client.verifyIdToken({
    idToken: body.credential,
  })

  const payload = ticket.getPayload()

  if (!payload) {
    throw createError({
      statusCode: 400,
      statusMessage: 'Invalid token'
    })
  }

  return {
    id: payload.sub,
    name: payload.name,
    avatar: payload.picture,
    email: payload.email,
    emailVerified: payload.email_verified
  }
})
Auth Code我們使用的登入方式如果是呼叫 vue3-google-login 的 googleAuthCodeLogin(),回傳值就會包含 Auth Code,我們就可使用下面修改後的 Server API 進行驗證。
./server/api/auth/google.post.js 內容修改為如下:
import { OAuth2Client } from 'google-auth-library'

export default defineEventHandler(async (event) => {
  const body = await readBody(event)
  const oauth2Client = new OAuth2Client({
    clientId: '你的 Google Client ID',
    clientSecret: '你的 Google Client Secret',
    redirectUri: '你的 Google Redirect Uri'
  })

  let { tokens } = await oauth2Client.getToken(body.authCode)
  oauth2Client.setCredentials({ access_token: tokens.access_token })

  const userInfo = await oauth2Client
    .request({
      url: 'https://www.googleapis.com/oauth2/v3/userinfo'
    })
    .then((response) => response.data)
    .catch(() => null)

  oauth2Client.revokeCredentials()

  if (!userInfo) {
    throw createError({
      statusCode: 400,
      statusMessage: 'Invalid token'
    })
  }

  return {
    id: userInfo.sub,
    name: userInfo.name,
    avatar: userInfo.picture,
    email: userInfo.email,
    emailVerified: userInfo.email_verified,
  }
})
這篇文章記錄了實現了串接 Google OAuth 登入,並將 Access Token 資訊發送至後端進行驗證,大家可以在依照使用情境自己挑選登入方式及驗證方式,後續也能將使用者資訊儲存到資料庫中,有了資料庫我們就能依照使用者資訊,來比對資料庫進行註冊、驗證登入及產生後續的 Session 或 Cookie 等。
感謝大家的閱讀,這是我第一次參加 iThome 鐵人賽,請鞭小力一些,也歡迎大家給予建議 :)
如果對這個 Nuxt 3 系列感興趣,可以訂閱接收通知,也歡迎分享給喜歡或正在學習 Nuxt 3 的夥伴。
在一開始
npm run dev -- --https
進 https://localhost:3000 就一直跳 500
改成 --http
Sign in with Google 按紐有出現
但是按了 彈跳後 就沒反應了...
嗨,您好
我這邊使用乾淨的 Nuxt 3 專案,目前測試是沒有問題。
依照您的描述,看起來插件是有安裝成功,所以在 HTTP 下是有按鈕渲染出來,但 HTTPS 的情況,想詢問您 500 error 或 console 是否有顯示的錯誤訊息,可以在提供多一點資訊,我看是否能幫助您解決。
也可以站內信留下聯繫方式,協助您看一下專案的配置。
500
fetch failed ()
at async $fetchRaw2 (./node_modules/ohmyfetch/dist/shared/ohmyfetch.c2a48baf.mjs:132:20)
at async ./.nuxt/dev/index.mjs:457:20
at async ./.nuxt/dev/index.mjs:526:64
at async ./.nuxt/dev/index.mjs:106:22
at async ./node_modules/h3/dist/index.mjs:592:19
at async Server.nodeHandler (./node_modules/h3/dist/index.mjs:538:7)
server side:
[nuxt] [request error] [unhandled] [500] fetch failed ()
at async $fetchRaw2 (./node_modules/ohmyfetch/dist/shared/ohmyfetch.c2a48baf.mjs:132:20)
at async ./.nuxt/dev/index.mjs:457:20
at async ./.nuxt/dev/index.mjs:526:64
at async ./.nuxt/dev/index.mjs:106:22
at async ./node_modules/h3/dist/index.mjs:592:19
at async Server.nodeHandler (./node_modules/h3/dist/index.mjs:538:7)
[nuxt] [request error] [unhandled] [500] fetch failed ()
at async $fetchRaw2 (./node_modules/ohmyfetch/dist/shared/ohmyfetch.c2a48baf.mjs:132:20)
at async ./.nuxt/dev/index.mjs:457:20
at async ./.nuxt/dev/index.mjs:526:64
at async ./.nuxt/dev/index.mjs:106:22
at async ./node_modules/h3/dist/index.mjs:592:19
at async nodeHandler (./node_modules/h3/dist/index.mjs:538:7)
at async ufetch (./node_modules/unenv/runtime/fetch/index.mjs:9:17)
at async $fetchRaw2 (./node_modules/ohmyfetch/dist/shared/ohmyfetch.c2a48baf.mjs:132:20)
at async Object.errorhandler [as onError] (./.nuxt/dev/index.mjs:354:29)
找到了
node 版本不能用 18 我切成 16 就都正常了


 iThome鐵人賽