今天預計學習 Mock Service Worker 安裝及了解 Handlers 與如何建置模擬 Server!
發現 Mock Service Worker 官方文件步驟寫的超清楚明瞭的,先透過官方文件學習怎麼引入跟使用 Handlers。
首先先來安裝該套件:
npm install msw --save-dev
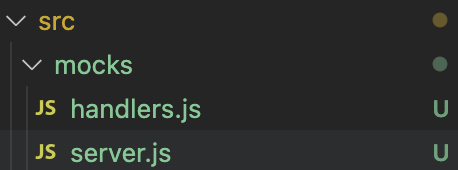
在 src 目錄底下新增 mocks 資料夾
mkdir src/mocks
mocks 資料夾內放置 handlers.js 檔案
touch src/mocks/handlers.js

handlers.js 設置攔截時的 handlers ,記得留意以下幾點:
import { rest } from 'msw' 引入 MSW 套件rest ,如: rest.get 是因為選擇了 REST API 的模式,MSW 套件有另外提供 GraphQL APIget() 、post() 、put() 、patch() 、delete()、options()
// src/mocks/handlers.js
import { rest } from 'msw'

export const handlers = [
  // Handles a POST /login request
  rest.post('/login', null),

  // Handles a GET /user request
  rest.get('/user', null),
]
// src/mocks/handlers.js
import { rest } from 'msw'

export const handlers = [
  rest.post('/login', (req, res, ctx) => {
    // Persist user's authentication in the session
    sessionStorage.setItem('is-authenticated', 'true')

    return res(
      // Respond with a 200 status code
      ctx.status(200),
    )
  }),

  rest.get('/user', (req, res, ctx) => {
    // Check if the user is authenticated in this session
    const isAuthenticated = sessionStorage.getItem('is-authenticated')

    if (!isAuthenticated) {
      // If not authenticated, respond with a 403 error
      return res(
        ctx.status(403),
        ctx.json({
          errorMessage: 'Not authorized',
        }),
      )
    }

    // If authenticated, return a mocked user details
    return res(
      ctx.status(200),
      ctx.json({
        username: 'admin',
      }),
    )
  }),
]
可以選擇要在瀏覽器或在 Node 上進行模擬,這次選擇透過 Node 進行模擬。

// src/mocks/server.js
import { setupServer } from 'msw/node'
import { handlers } from './handlers'
// This configures a request mocking server with the given request handlers.
export const server = setupServer(...handlers)
第三步驟為設置 Jest 的 setupFilesAfterEnv 參數可以在每次運行測試之前調用某些會反覆運行且重複的程式碼,因為此為全域設定,如只要在單一檔案使用 MSW 也可以不需設定,於每次要使用前皆複製貼上底下程式碼即可。
於官方文件上可看到針對 Create React App 如何設置的說明,直接透過在 src/setupTests.js ,設置以下程式碼:
// src/setupTests.js
import { server } from './mocks/server.js'
// Establish API mocking before all tests.
beforeAll(() => server.listen())

// Reset any request handlers that we may add during the tests,
// so they don't affect other tests.
afterEach(() => server.resetHandlers())

// Clean up after the tests are finished.
afterAll(() => server.close())
以上就完成模擬 server 的建置囉,明天來嘗試在專案上使用看看 ~~
