今天我們來介紹如何新建一個本地的資料庫
首先在建立之前,我們必須要先到方案總管 > 相依性 (點右鍵) > 管理NuGet套件,到這邊安裝需要的套件,這邊我們需要安裝是有關LocalDB的套件
下圖用「Microsoft.EntityFrameworkCore.SqlServer」為範例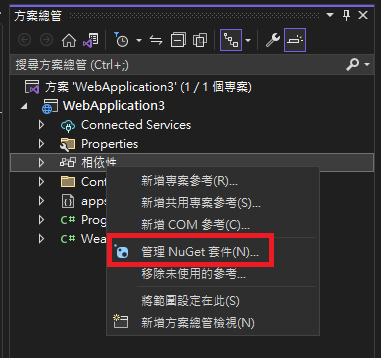

如果找不到方案總管的話,可以到上面的檢視找到方案總管
要新建一個本地的資料庫,我們用最簡單的方式,首先我們需要先到檢視 > SQL Server 物件總管 > 加入新的資料庫,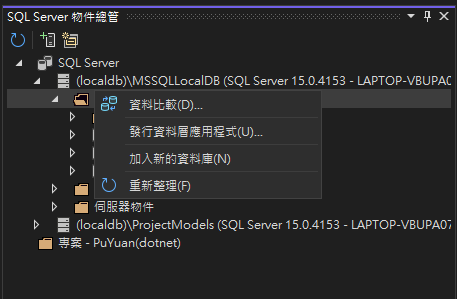
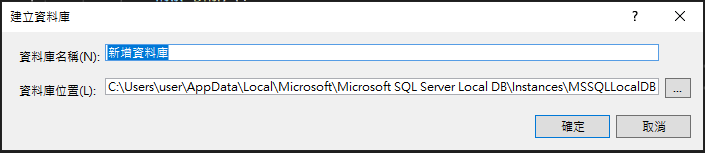
新建完之後我們可以打開來確認是否新建成功
然後我們會使用這個指令新建資料庫,<DB_Name>必須改成剛剛新建資料庫的名稱,並且使用-OutputDir這個參數指定輸出檔案的資料夾名稱Scaffold-DbContext "Server=(localdb)\mssqllocaldb;Database=<DB_Name>;Trusted_Connection=True;" Microsoft.EntityFrameworkCore.SqlServer -OutputDir Models
然後因為我們有設定輸出資料夾,所以會生成一個Models資料夾

首次建立model之後,會在model底下產生一個 Context.cs,我們可以點進來看一下裡面的內容,我們要把optionsBuilder.UseSqlServer("Server=(localdb)\\mssqllocaldb;Database=test;Trusted_Connection=True;")這行程式裡面的參數"Server=(localdb)\\mssqllocaldb;Database=test;Trusted_Connection=True;",寫到appsettings,用GetConnectionString取得連結字串做連結。。

protected override void OnConfiguring(DbContextOptionsBuilder optionsBuilder)
        {
            if (!optionsBuilder.IsConfigured)
            {
#warning To protect potentially sensitive information in your connection string, you should move it out of source code. You can avoid scaffolding the connection string by using the Name= syntax to read it from configuration - see https://go.microsoft.com/fwlink/?linkid=2131148. For more guidance on storing connection strings, see http://go.microsoft.com/fwlink/?LinkId=723263.
                optionsBuilder.UseSqlServer("Server=(localdb)\\mssqllocaldb;Database=test;Trusted_Connection=True;");
            }
        }
並在appsettings.json檔案內新增
{
  "Logging": {
    "LogLevel": {
      "Default": "Information",
      "Microsoft.AspNetCore": "Warning"
    }
  },
  "ConnectionStrings": {
    "TestDatabase": "Server=(localdb)\\mssqllocaldb;Database=test;Trusted_Connection=True;"
  }
}
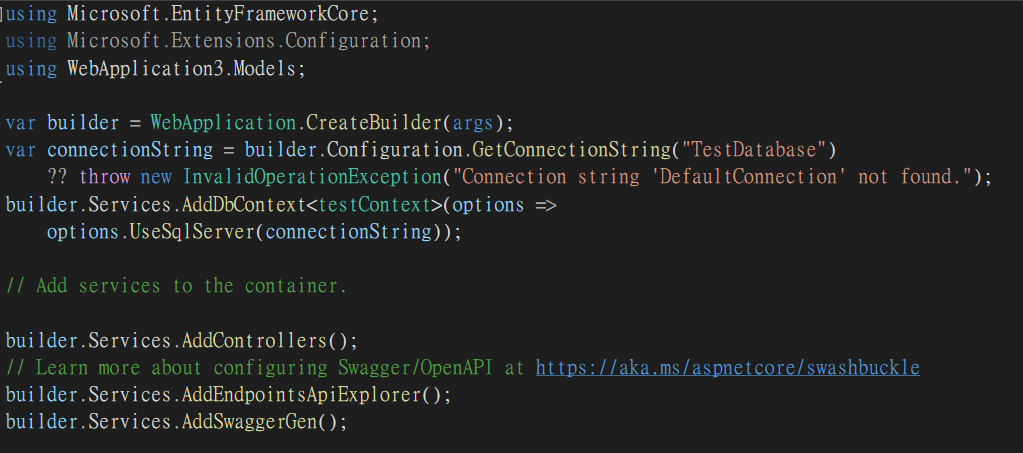
在appsettings.json新增完ConnectionStrings之後,我們要回到一開始的地方,增加MidderWare
// Program.cs
using Microsoft.EntityFrameworkCore;
using Microsoft.Extensions.Configuration;
using WebApplication3.Models;

var builder = WebApplication.CreateBuilder(args);
var connectionString = builder.Configuration.GetConnectionString("TestDatabase")
    ?? throw new InvalidOperationException("Connection string 'DefaultConnection' not found.");
builder.Services.AddDbContext<testContext>(options =>
    options.UseSqlServer(connectionString));
這邊要特別注意一下,var connectionString = builder.Configuration.GetConnectionString("<Key>"),這邊Key的內容要改成剛剛你在ConnectionStrings設定的那個Key,這裡要特別注意一下泛型的型態builder.Services.AddDbContext<DB_Name+Context>(options => options.UseSqlServer(connectionString));
接下來我們要來新建一個table,在Models底下,點選加入 > 類別,然後我們可以在裡面對該表定義schma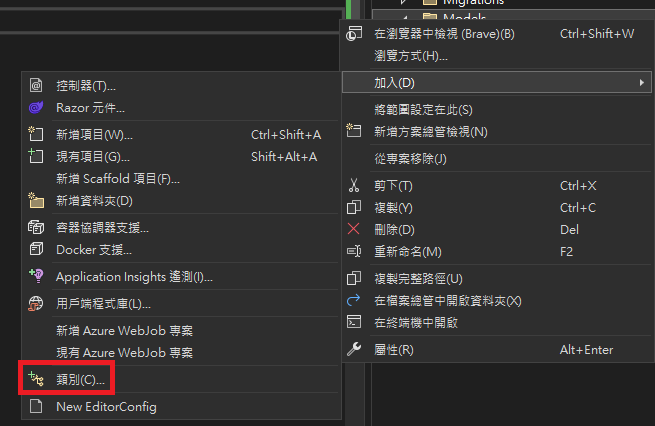


我們還要把寫好的model新增到我們"<DB_Name>Context.cs"裡
當Model變更時,可以使用Add-Migration 
我們就會看到有Migrations的資料夾,裡面有這次更動的紀錄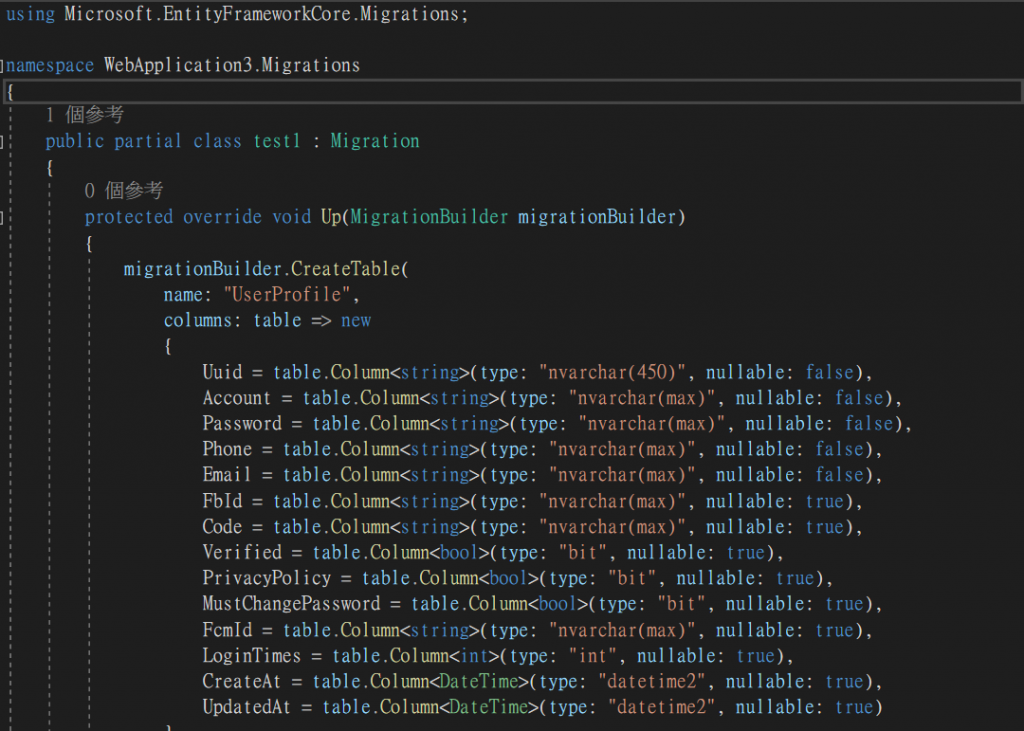
接著我們會使用Update-Database,來套用變更
然後我們可以回到檢視 > SQL Server 物件總管,選擇剛剛新建的資料庫,打開資料表,如果有新增你剛剛撰寫的表就成功囉~~
今天就先介紹到這邊吧~~ 明天可以進入開始撰寫簡易的RESTFUL API了。


 iThome鐵人賽