今天來介紹一下DataBinding的功能。
首先建立一個空的專案檔,或者你要直接應用在現有的專案上也行。
在下方的程式碼中有一個名為dataBinding的區域,在這下方有個enabled的參數,這邊將其設置為true之後並Sync,目前大部分的新開專案似乎基本上都預設為true了。
android{
    // ...

    dataBinding {
        enabled = true
    }

    // ...
}
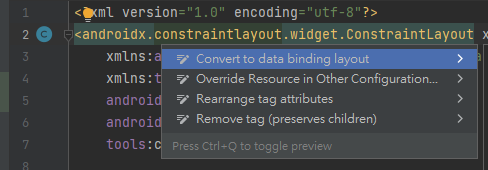
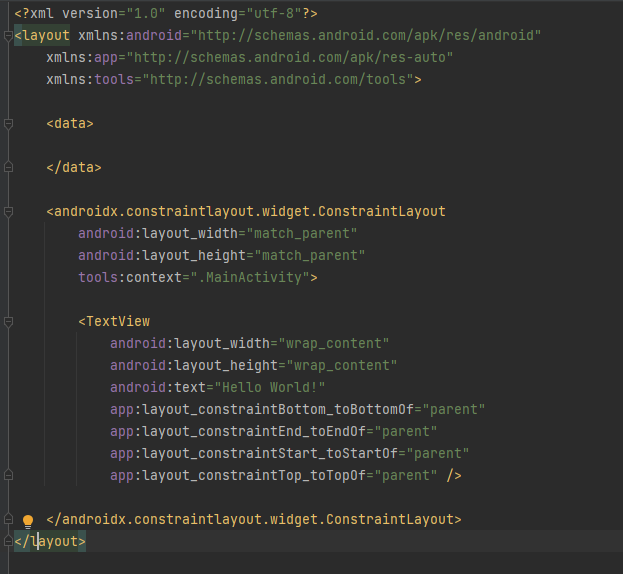
以上依賴設定完成並Sync之後,來到設置畫面文件的XML檔案,來到這邊後對著如 圖1. 的程式碼按下Alt+Enter鍵之後會跳出以下樣式,並點選Convert to data binding layout,之後就會自動變換成如圖2的樣式
    <LinearLayout
        android:layout_width="match_parent"
        android:layout_height="match_parent"
        android:orientation="vertical"
        android:gravity="center_vertical"
        tools:context=".MainActivity">

        <TextView
            android:id="@+id/name_txt"
            android:layout_width="wrap_content"
            android:layout_height="wrap_content"
            android:text="@{model.name}" />

        <TextView
            android:id="@+id/password_TV"
            android:layout_width="wrap_content"
            android:layout_height="wrap_content"
            android:text="@{model.password}" />

        <EditText
            android:id="@+id/userName"
            android:layout_width="match_parent"
            android:layout_height="wrap_content"
            android:ems="10"
            android:hint="Text UserName"
            android:inputType="textPersonName"
            android:text="@={model.name}" />

        <EditText
            android:id="@+id/password"
            android:layout_width="match_parent"
            android:layout_height="wrap_content"
            android:ems="10"
            android:hint="Text Password"
            android:inputType="text|number"
            android:text="@={model.password}" />

        <Button
            android:id="@+id/button"
            android:layout_width="match_parent"
            android:layout_height="wrap_content"
            android:onClick="@{model::Click}"
            android:text="Button" />
    </LinearLayout>
public class UserInfoModel extends BaseObservable {
    private String name;
    private String password;

    public UserInfoModel(String name,String password) {
        this.name = name;
        this.password = password;
    }

    public String getName() {
        return name;
    }

    public void setName(String name) {
        this.name = name;
    }

    public String getPassword() {
        return password;
    }

    public void setPassword(String password) {
        this.password = password;
    }

    public void Click(View view) {
        Toast.makeText(view.getContext(),"Send\n"+
                                              "Name:"+getName()+"\n"+
                                              "Password:"+getPassword(),
                                              Toast.LENGTH_LONG).show();
        Log.e("model", "Send\n"+
                                 "Name:"+getName()+"\n"+
                                 "Password:"+getPassword());
        // 提醒有變動並更新物件。
        notifyPropertyChanged(BR._all);
    }
}
public class MainActivity extends AppCompatActivity {
    private ActivityMainBinding binding;

    @Override
    protected void onCreate(Bundle savedInstanceState) {
        super.onCreate(savedInstanceState);
        setContentView(R.layout.activity_main);

        // 添加Binding程式碼
        binding = DataBindingUtil.
                setContentView(this, R.layout.activity_main);
        UserInfoModel model = new UserInfoModel("","");
        binding.setModel(model);
    } // onCreate
}
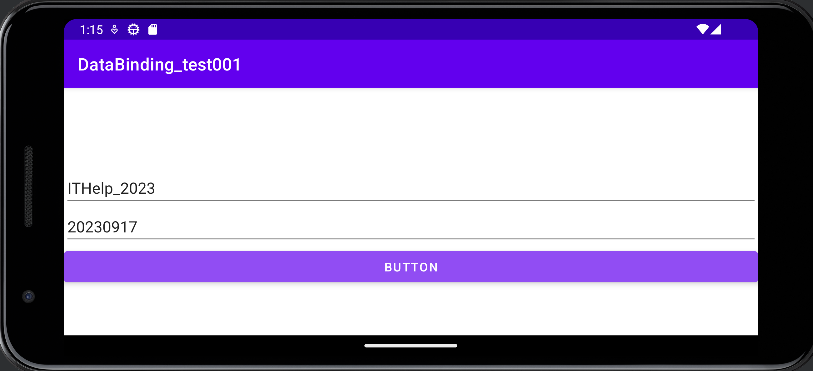
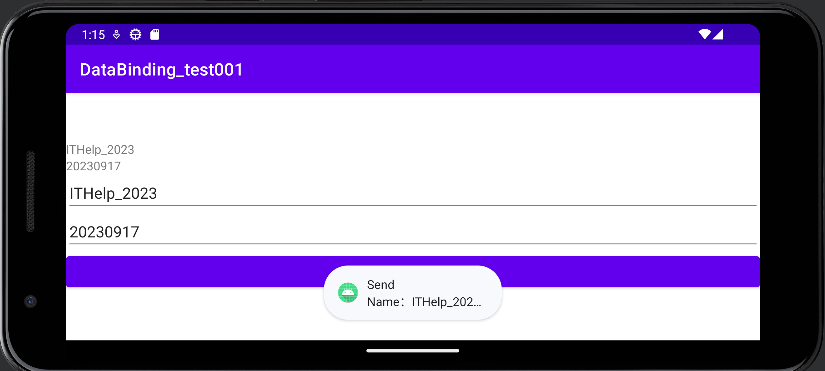
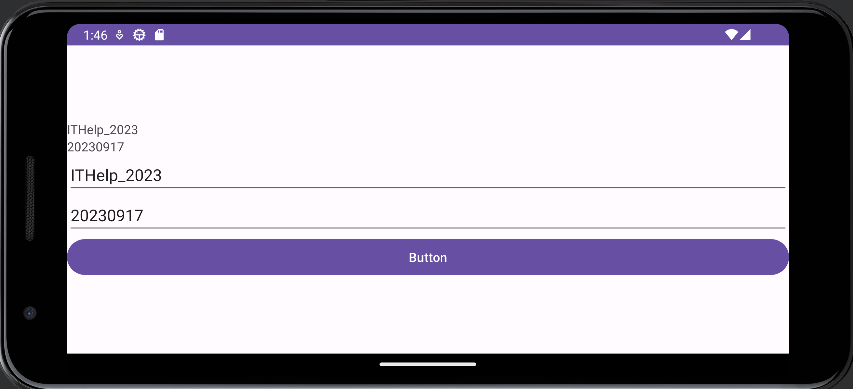
送出結果後更新畫面,上方的TextView獲取輸入框內的資料並顯示。
以往要在Acitivty類別中獲取XML layout布置檔的物件,必須使用諸如findViewById之類的才能取得,這邊添加了DataBinding之後,程式碼的行數減少了許多。
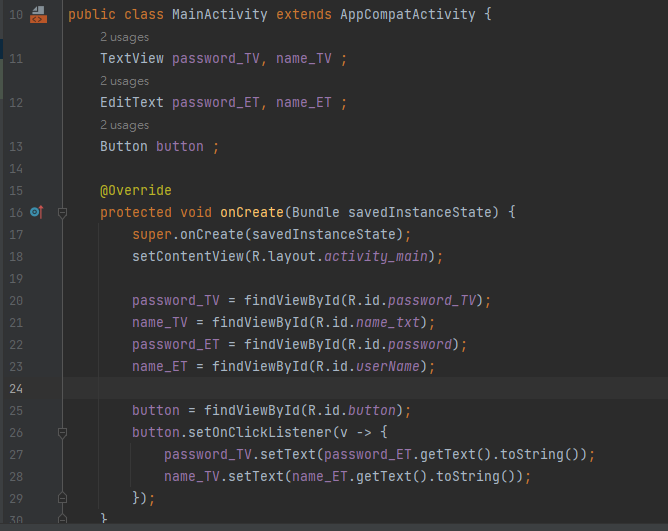
在過去尚未學習DataBinding的使用方法時可能會用以下的方式去撰寫,在寫之前必須先到外部建立TextView與EditText的變數,才可以取得EditText實例化並附寫到TextView上。
以上是今天的DataBinding,這個功能是以往沒有詳細去學習使用的功能,雖然不用DataBinding也能寫出一個App,但是使用DataBinding能夠縮短更多的程式碼行數並且達到一樣的效果,讓程式碼畫面變得更加簡潔。


 iThome鐵人賽