今天要說明如何將資料使用Json格式寫入及讀取,這邊會以List的方式依序寫入Json格式並寫入流水編號,並在Get的時候讀取所有的User List資料,以及對於ResponseEntity的功能進行說明與範例建立與結果展示
ResponseEntity 可以包含一個泛型參數,用於指定響應的主體類型。例如: ResponseEntity<String> 表示一個包含字符串主體的 HTTP 響應。ResponseEntity 允許你設定 HTTP 狀態碼、自定義標頭、訊息主體等。它通常用於控制器方法中,用於返回 HTTP 響應。ResponseEntity 方法:
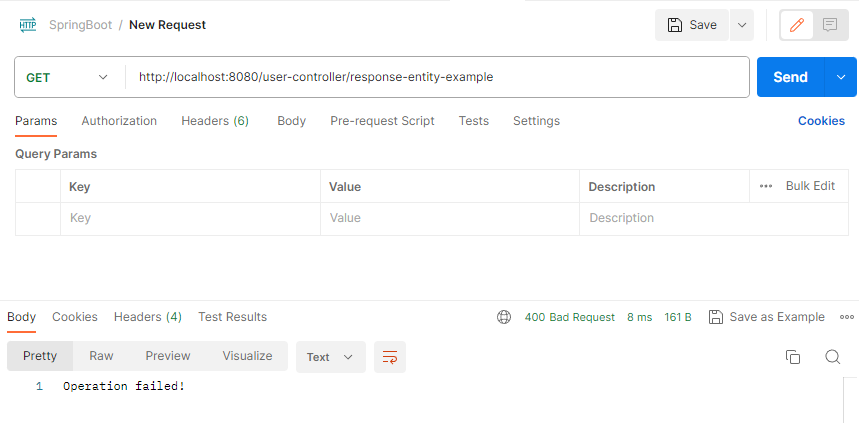
這邊撰寫兩個範例,一個回應HTTP狀態為error的結果,一個為Custom header回應OK的結果
// Error回應
@ResponseBody
@GetMapping("/response-entity-example")
public ResponseEntity<String> responseEntityExample() {
    String errorMessage = "Operation failed!";
    return ResponseEntity.status(HttpStatus.BAD_REQUEST).body(errorMessage);
}

// 自訂標頭回應OK
@ResponseBody
@GetMapping("/custom-header")
public ResponseEntity<String> customHeader() {
    String responseBody = "Custom header example!";

    HttpHeaders headers = new HttpHeaders();
    headers.add("Custom-Header", "Value");

    return ResponseEntity.ok().headers(headers).body(responseBody);
}
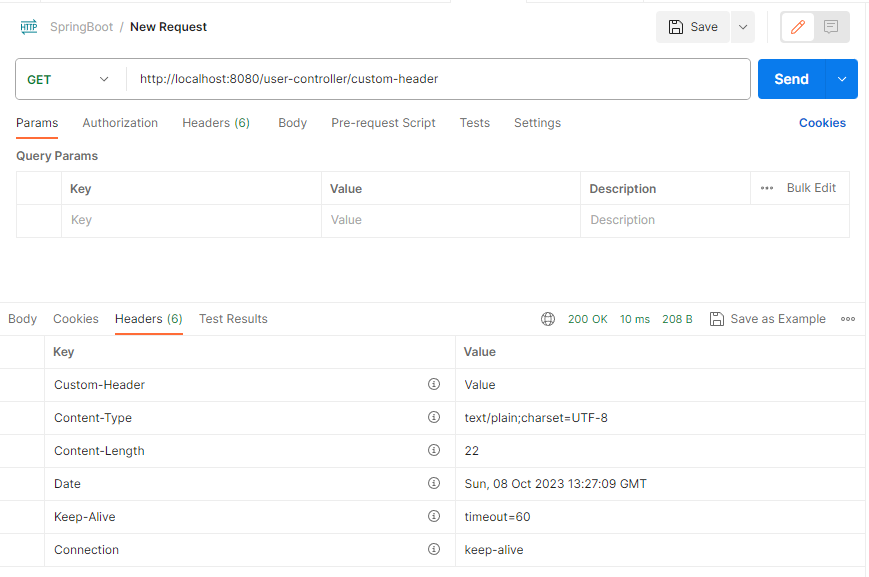
上面可以看到自訂的Header為Value並且HTTP狀態為 OK的回應結果。
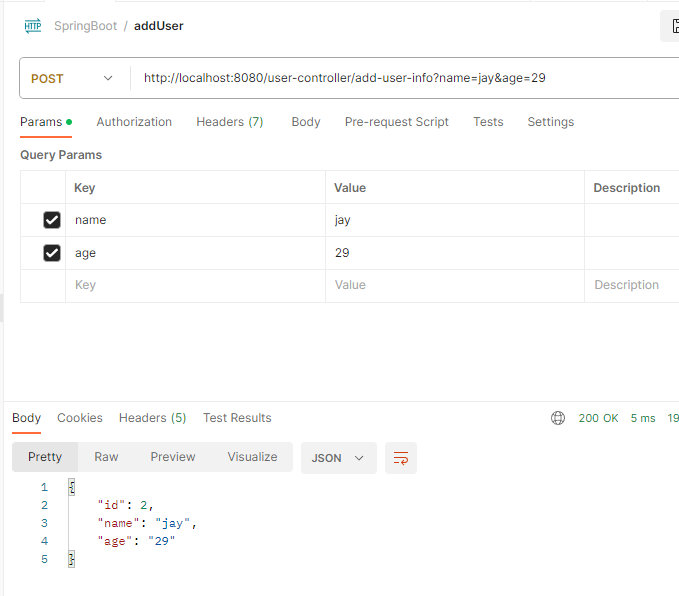
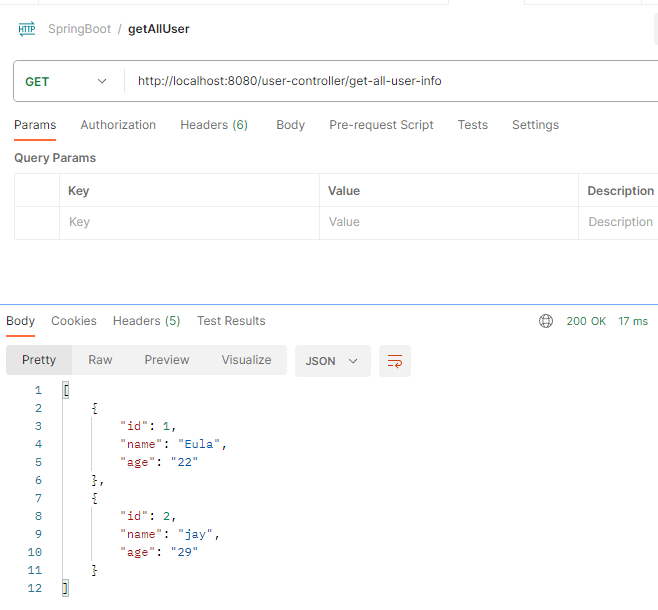
這邊以Get和Post的方式來作範例撰寫
@ResponseBody
@GetMapping("/get-all-user-info")
public ResponseEntity<List<User>> getAllUserInfo() {
    if (userList.isEmpty()) {
        throw new UserException(HttpStatus.NOT_FOUND + ", User is empty");
    }else{
        return ResponseEntity.ok(userList);
    }
}

@ResponseBody
@PostMapping("/add-user-info")
public ResponseEntity<User> addUserInfo(@RequestParam String name, @RequestParam String age) {
    User user = new User(userCounter++, name, age); // 使用流水號編號
    userList.add(user);
    return ResponseEntity.ok(user); // 返回新增的使用者物件作為JSON
}
以上是今天關於ResponseEntity如何以Json格式將User的資料進行讀寫,以及其他的功能說明與使用範例


 iThome鐵人賽