Object fit可以指定可替換元素(例如: 或 )的内容應該如何式應到其使用高度和寬度確定的框。
寫法是.object-fit-{value}(value 為 contain, cover, fill, scale, none)
關於object-fit 可以看這一篇【CSS】【Bootstrap】讓圖片滿版的object-fit
範例程式碼
<img src="https://cdn.pixabay.com/photo/2023/09/04/06/59/dog-8232158_1280.jpg" class="object-fit-contain border rounded box" alt="...">
<img src="https://cdn.pixabay.com/photo/2023/09/04/06/59/dog-8232158_1280.jpg" class="object-fit-cover border rounded box" alt="...">
<img src="https://cdn.pixabay.com/photo/2023/09/04/06/59/dog-8232158_1280.jpg" class="object-fit-fill border rounded box" alt="...">
<img src="https://cdn.pixabay.com/photo/2023/09/04/06/59/dog-8232158_1280.jpg" class="object-fit-scale border rounded box" alt="...">
<img src="https://cdn.pixabay.com/photo/2023/09/04/06/59/dog-8232158_1280.jpg" class="object-fit-none border rounded box" alt="...">
效果如圖:
此外,它也支持響應式,寫法是 .object-fit-斷點-{value}(斷點是sm, md, lg, xl, 或 xxl)
opacity可以改變物件的透明度,寫法是:.opacity-*(*為 0, 25, 50, 75, 100)
範例程式碼如下:
<div class="opacity-100">...</div>
<div class="opacity-75">...</div>
<div class="opacity-50">...</div>
<div class="opacity-25">...</div>
<div class="opacity-0">...</div>
效果如下:
overflow屬性會指定內容物在超出容器時的呈現方式,寫法是:.overflow-*(* 為auto,hidden, visible, scroll),範例程式碼如下:
<!--如果內容溢出容器才會出現卷軸-->
<div class="overflow-auto">...</div>

<!--如果內容溢出容器會被隱藏-->
<div class="overflow-hidden">...</div>

<!--內容溢出容器仍然顯現-->
<div class="overflow-visible">...</div>

<!--不管內容有沒有溢出容器都會出現卷軸-->
<div class="overflow-scroll">...</div>
效果如圖:
此外,如果要指定方向的話可以使用.overflow-x-*(左右方向)或.overflow-y-*(上下方向)。
例如:.overflow-x-hidden就是內容物水平方向超出容器時會被隱藏。
bootstrap有提供.position-*屬性(* 為static, absolute, relative, sticky, fixed)。
範例程式碼:
<div class="position-static">...</div>
<div class="position-relative">...</div>
<div class="position-absolute">...</div>
<div class="position-fixed">...</div>
<div class="position-sticky">...</div>
其中排列元素例如:top, bottom, start, end可以決定元素的位置(對position static以外的元素有效)。
寫法是.屬性-位置(位置有:0, 50, 100),例如:.top-0。
關於position屬性可以看這篇文章
以下是position-absolute的運用程式碼:
<div class="position-relative">
  <div class="position-absolute top-0 start-0"></div>
  <div class="position-absolute top-0 end-0"></div>
  <div class="position-absolute top-50 start-50"></div>
  <div class="position-absolute bottom-50 end-50"></div>
  <div class="position-absolute bottom-0 start-0"></div>
  <div class="position-absolute bottom-0 end-0"></div>
</div>
效果如下:
.translate-middle.我們可以用.translate-middle將元素置中,它使用了: translateX(-50%)(向左偏移元素寬度的50%)與translateY(-50%)(向上偏移元素高度的50%),常用在標籤(badge)或是進度條上。
如果要指定方向性的話可以使用:.translate-middle-x或.translate-middle-y。
可以玩玩此Codepen加入它.translate-middle看看效果。
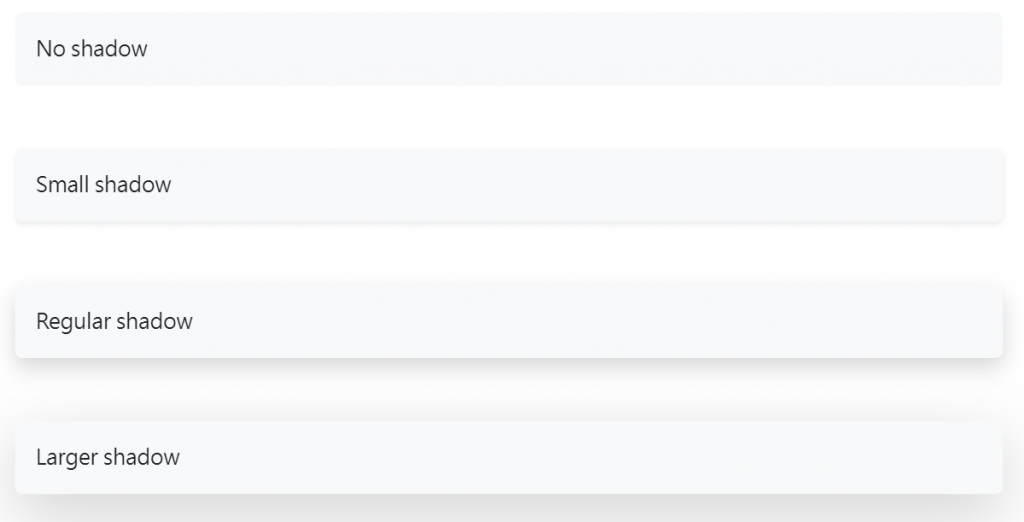
使用shadows屬性可以為物件添加陰影,寫法是:.shadow-*
例如:
<div class="shadow-none p-3 mb-5 bg-body-tertiary rounded">No shadow</div>
<div class="shadow-sm p-3 mb-5 bg-body-tertiary rounded">Small shadow</div>
<div class="shadow p-3 mb-5 bg-body-tertiary rounded">Regular shadow</div>
<div class="shadow-lg p-3 mb-5 bg-body-tertiary rounded">Larger shadow</div>

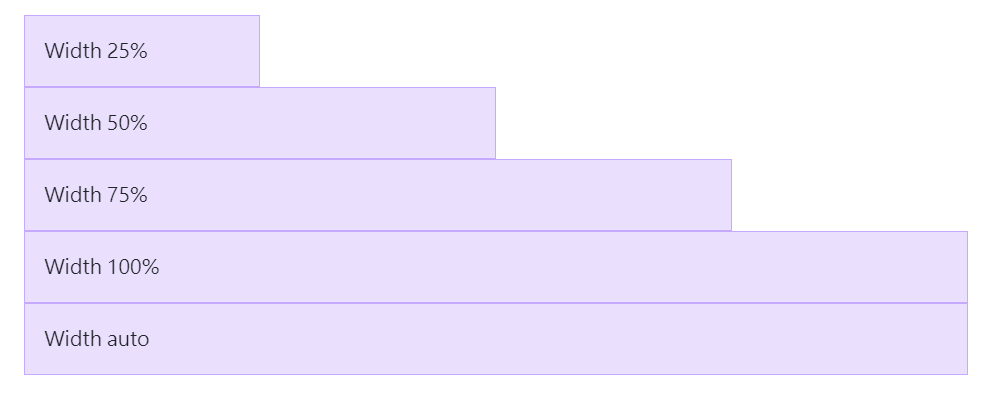
透過sizing來改變子元素相對於父元素的寬跟高,寫法是:h-數值或w-數值(數值為 25, 50, 75, 100, auto)
範例程式碼:
<div class="w-25 p-3">Width 25%</div>
<div class="w-50 p-3">Width 50%</div>
<div class="w-75 p-3">Width 75%</div>
<div class="w-100 p-3">Width 100%</div>
<div class="w-auto p-3">Width auto</div>
效果
高度也是:
<div style="height: 100px;">
  <div class="h-25 d-inline-block" style="width: 120px;">Height 25%</div>
  <div class="h-50 d-inline-block" style="width: 120px;">Height 50%</div>
  <div class="h-75 d-inline-block" style="width: 120px;">Height 75%</div>
  <div class="h-100 d-inline-block" style="width: 120px;">Height 100%</div>
  <div class="h-auto d-inline-block" style="width: 120px;">Height auto</div>
</div>
效果
你也可以依照需求使用mw-100或mh-100來達到max-width: 100%;或max-height: 100%;的效果。
如果是想讓物件有viewprot相關的寬高可以使用.min-vw-100(min-width:100vw;), .min-vh-100(min-height:100vh;), .vw-100(width:100vw;), vh-100(height:100vh;)。
關於最大寬度、最小寬度與寬度的差異可以看這篇:max-width、min-width 與 width
例如:
<div class="min-vw-100">Min-width 100vw</div>
<div class="min-vh-100">Min-height 100vh</div>
<div class="vw-100">Width 100vw</div>
<div class="vh-100">Height 100vh</div>
