今天要實作傳遞不同種類的物件,首先我們先設計好server,先在.proto檔裡面新增好一個新的request跟response,以及新的接收函式IronMan02,對應接收不同結構的資料
message IronManRequest02{
  repeated string name = 1; //getNameKist()
}

message IronManResponse02{
  string result = 1;
}
我們在.proto檔中設定新的request跟response,我們這次新定義的name是一個List的資料
service IronManService{
  rpc IronMan01(IronManRequest01) returns (IronManResponse01) {}
  rpc IronMan02(IronManRequest02) returns (IronManResponse02) {}
}
完成後重新讓protobuf生成新的method。
一樣在IronManServiceImpl裡面實作我們的method,因為我們這次要接收的是一組list,所以我們的method可以這樣寫:
@Override
public void ironMan02(IronManProto.IronManRequest02 request, StreamObserver<IronManProto.IronManResponse02> responseObserver) {
    //定義接收一組list的訊息
    ProtocolStringList nameList = request.getNameList();
    for(String string : nameList){
        System.out.println("List內容是: " + string);
    }

    System.out.println("我是server端, 我收到一組List");

    //封裝server的回應
    IronManProto.IronManResponse02.Builder builder = IronManProto.IronManResponse02.newBuilder();
    builder.setResult("server回傳,表示回應");
    IronManProto.IronManResponse02 ironManResponse02 = builder.build();

    responseObserver.onNext(ironManResponse02);
    responseObserver.onCompleted();
}
用迴圈將收到的資料印出,然後封裝好要response的訊息,準備回傳給client端,這樣我們的server端就作好了。
接下來實作Client端,在gRPCClient新增一個client02,然後寫上
public static void main(String[] args) {
    //設計好連線資訊
    String host = "localhost";
    int port = 5000;
    //通訊管道建立
    ManagedChannel managedChannel = ManagedChannelBuilder.forAddress(host,port).usePlaintext().build();

    //判斷是否有連線成功
    if (managedChannel != null && !managedChannel.isShutdown())
        System.out.println(" channel build success !! " + host + ":" + port);

        //調用連線函式
        IronManServiceGrpc.IronManServiceBlockingStub ironManServiceBlockingStub = IronManServiceGrpc.newBlockingStub(managedChannel);
        IronManProto.IronManRequest02.Builder builder = IronManProto.IronManRequest02.newBuilder();
        //設定List的資料
        builder.addName("Allen");
        builder.addName("Bob");
        builder.addName("Cindy");
        System.out.println("client端送一個List出去");
        //包裹List
        IronManProto.IronManRequest02 ironManRequest02 = builder.build();

        //傳送給server並準備接收回應
        IronManProto.IronManResponse02 ironManResponse02 = ironManServiceBlockingStub.ironMan02(ironManRequest02);
        String result = ironManResponse02.getResult();
        System.out.println(result);
        managedChannel.shutdown();
}
一樣調用newBlockingStub這個函式,並建立連線。調用IronManRequest02建立新的傳輸內容,並設定list內的資料,最後包裹好資料。接著就呼叫server的ironMan02()並將資料傳遞過去,最後我們來看看結果。
Client端這邊顯示送出一組List出去: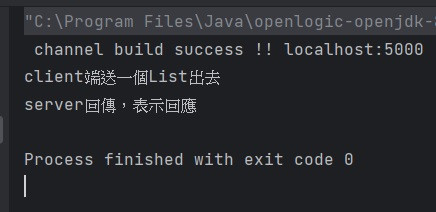
而Server端這邊也順利接收到資料了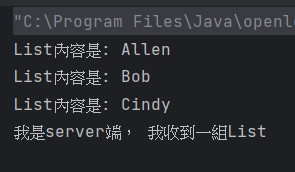
我們順利將資料傳遞過去,其實跟第一次實作的內容差不多,差別只在於我們傳遞的資料型態不同,而資料型態需要在.proto先行設定。
這樣就完成我們第二個client的實作了


 iThome鐵人賽