今天,透過兩題Leetcode來做介紹吧
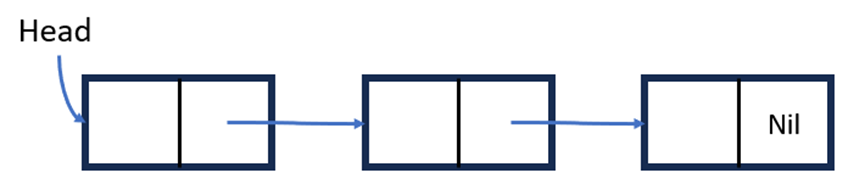
單向鏈結串列是一種資料結構,其中每個節點包含一個數據元素和一個指向下一個節點的指針。這種資料結構有其獨特的優點和缺點。
現在,我們將使用C++來實現這種資料結構,並介紹如何進行一些基本操作。
首先,我們需要定義一個節點的結構,包含一個整數值以及指向下一個節點的指針。
struct ListNode {
   int val;
     ListNode *next;
     ListNode() : val(0), next(nullptr) {}
     ListNode(int x) : val(x), next(nullptr) {}
     ListNode(int x, ListNode *next) : val(x), next(next) {}
 };
在單向鏈結串列中,新增節點是一個基本操作,我們可以將它進一步細分為兩個部分:從頭新增和從尾端新增。
首先,我們創建一個新的節點,然後將新節點的下一個指向原始的頭節點,最後將頭節點指向新節點。
void Solution::addNode_front(int val){
    ListNode *newNode = new ListNode(val);
    newNode->next = head;
    head = newNode;
}
我們創建一個新的節點,然後遍歷所有節點,直到找到尾節點,然後將尾節點的下一個指向新節點。
void Solution::addNode_back(int val){
    ListNode *newNode = new ListNode(val);
    ListNode *current = head;
    if(head == nullptr){
        head = newNode;
        return;
    }
    while(current->next != nullptr){
        current = current->next;
    }
    current->next = newNode;
}
在單向鏈結串列中,插入節點是一個常見的操作,用於在指定位置插入新節點。操作過程如下:
這樣,新節點就被成功地插入到了指定位置,並且鍊錶的連續性得到了保持。
插入節點操作允許我們在鍊錶中的任何位置插入新的數據,這在處理鍊錶時非常有用喔!
void Solution :: insertNode(int seatNumber, int val){
    ListNode *newNode = new ListNode(val);
    ListNode *current = head;
    if(head == nullptr){
        head = newNode;
        return;
    }

    if(seatNumber == 0){
        newNode->next = head;
        head = newNode;
        return;
    }
    for(int i=0; i<seatNumber-1; i++){
        current = current->next;
    }
    newNode->next = current->next;
    current->next = newNode;
}
透過leetcode來實際說明如何刪除節點吧!
難度:Easy
給定一個單向鍊錶,請反轉它並返回新的鍊錶。
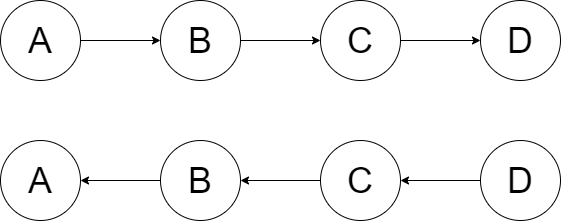
通過這三個指標的協同工作,我們可以逐個節點地改變其指向,最終實現整個鍊錶的反轉拉!

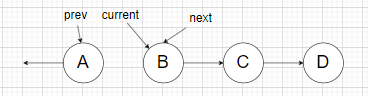
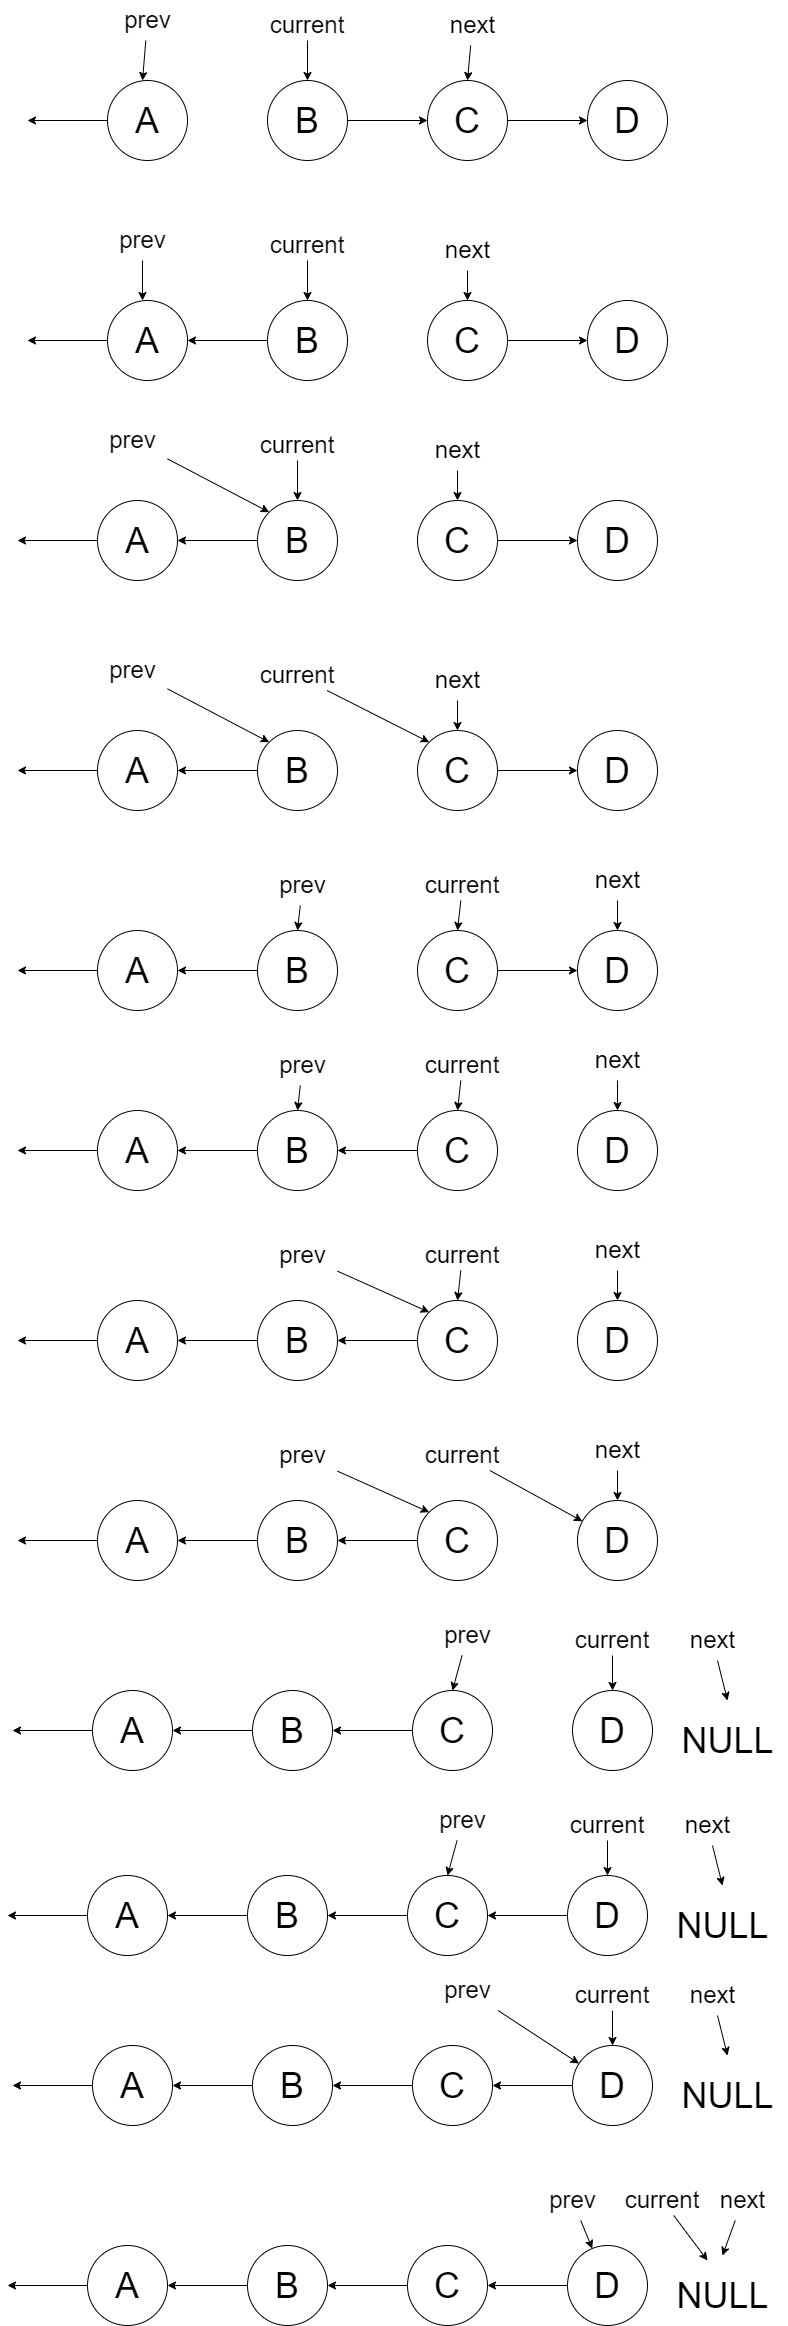
這個反轉過程確保了鍊錶中每個節點的指針方向都被正確調整。這是一個在處理鍊錶的問題時非常實用且基本的技巧,它在解決各種鍊錶相關問題時都會派上用場。簡而言之,這種操作就像是把鍊錶裡的元素倒過來,非常有用!
完整程式碼:
/**
* Definition for singly-linked list.
* struct ListNode {
* int val;
* ListNode *next;
* ListNode() : val(0), next(nullptr) {}
* ListNode(int x) : val(x), next(nullptr) {}
* ListNode(int x, ListNode *next) : val(x), next(next) {}
* };
*/
class Solution {
public:
ListNode* reverseList(ListNode* head) {
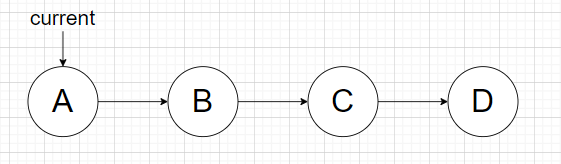
ListNode *current = head;
ListNode *prev = nullptr;
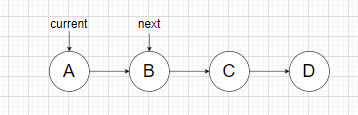
ListNode *next = nullptr;
while(current != nullptr){
next = current->next;
current->next = prev;
prev = current;
current = next;
}
return prev;
}
};
透過leetcode來實際說明如何刪除節點
難度:Easy
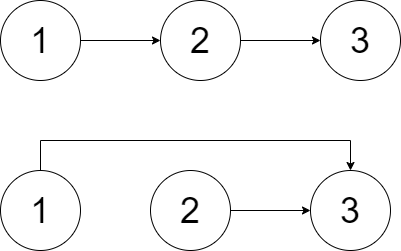
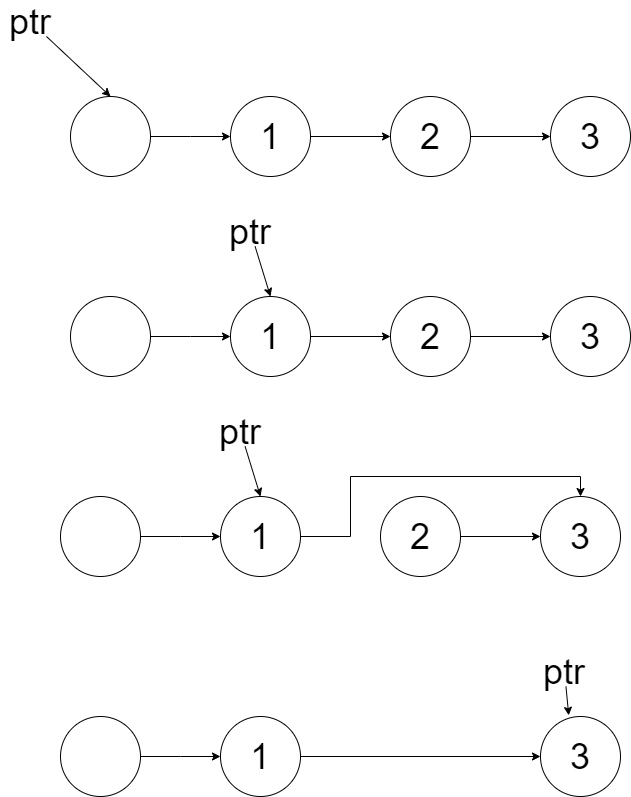
刪除鍊錶中包含val 的所有節點,並返回新的頭。

#include <iostream>
#include <string>
using namespace std;


struct ListNode {
   int val;
     ListNode *next;
     ListNode() : val(0), next(nullptr) {}
     ListNode(int x) : val(x), next(nullptr) {}
     ListNode(int x, ListNode *next) : val(x), next(next) {}
 };

class Solution {
    private :
        ListNode *head;

    public:
        Solution(){
            head = nullptr;
        }
        void addNode_front(int val);
        void addNode_back(int val);
        void insertNode(int seatNumber, int val);
        void removeNode(int val);
        void outputNode();
        void Reverse();
};

void Solution::addNode_front(int val){
    ListNode *newNode = new ListNode(val);
    newNode->next = head;
    head = newNode;
}

void Solution::addNode_back(int val){
    ListNode *newNode = new ListNode(val);
    ListNode *current = head;
    if(head == nullptr){
        head = newNode;
        return;
    }
    while(current->next != nullptr){
        current = current->next;
    }
    current->next = newNode;
}

void Solution::removeNode(int val){
    if(head == nullptr){
        cout << "list is empty" << endl;
        return;
    }
    ListNode *node = new ListNode();
    node->next = head;
    ListNode *current = node;
    while(current->next != nullptr){
        if(current->next->val == val){
            current->next = current->next->next;
            break;
        }
        current = current->next;
    }
    head = node->next;
}

void Solution::outputNode(){
    ListNode *current = head;
    while(current != nullptr){
        cout << current->val << " ";
        current = current->next;
    }
    cout << endl;
}

void Solution :: insertNode(int seatNumber, int val){
    ListNode *newNode = new ListNode(val);
    ListNode *current = head;
    if(head == nullptr){
        head = newNode;
        return;
    }

    if(seatNumber == 0){
        newNode->next = head;
        head = newNode;
        return;
    }
    for(int i=0; i<seatNumber-1; i++){
        current = current->next;
    }
    newNode->next = current->next;
    current->next = newNode;
}

void Solution :: Reverse(){
    if (head == nullptr)
        return;

    ListNode *current = head;
    ListNode *prev = nullptr;
    ListNode *next = current->next;
    while ( current != nullptr){
        current->next = prev;
        prev = current;
        current = next;
        if (next != nullptr)
            next = current->next;
    }
    head = prev;
}
int main(){
    Solution data;
    data.addNode_back(1);
    data.addNode_back(2);
    data.addNode_back(3);

    data.outputNode();

    data.removeNode(2);
    data.outputNode();

    data.addNode_front(4);
    data.outputNode();

    data.insertNode(0, 5);
    data.outputNode();

    data.Reverse();
    data.outputNode();

    return 0;

}
預期今天會很忙,所以凌晨先來發文~
相信自己的選擇,不要因為別人認為毫無意義而氣餒。或許對別人來說無用,但只要你深信,它就對你有價值。