當作品完成到一個進度,都會想部屬到雲上
之前有寫過類似的文章教學
當然還有其他GCP、AWS、Heroku、各家FREE HOST可以選擇,這裡就不個別介紹了
Render,可以用Github登入
因為這裡使用Github Repo進行部屬,所以建議就用Github
以下檔案包含路徑,如果沒有路徑就是在專案目錄下建立
/node_modules
/public/hot
/public/storage
/storage/*.key
/vendor
.env
.phpunit.result.cache
Homestead.json
Homestead.yaml
npm-debug.log
yarn-error.log
php:
  preset: laravel
  disabled:
    - unused_use
  finder:
    not-name:
      - index.php
      - server.php
js:
  finder:
    not-name:
      - webpack.mix.js
css: true
FROM richarvey/nginx-php-fpm:3.1.6

COPY . .

# Image config
ENV SKIP_COMPOSER 1
ENV WEBROOT /var/www/html/public
ENV PHP_ERRORS_STDERR 1
ENV RUN_SCRIPTS 1
ENV REAL_IP_HEADER 1

# Laravel config
ENV APP_ENV production
ENV APP_DEBUG false
ENV TELESCOPE_ENABLED false
ENV LOG_CHANNEL stderr

# Allow composer to run as root
ENV COMPOSER_ALLOW_SUPERUSER 1

CMD ["/start.sh"]
server {
  # Render provisions and terminates SSL
  listen 80;

  # Make site accessible from http://localhost/
  server_name _;

  root /var/www/html/public;
  index index.html index.htm index.php;

  # Disable sendfile as per https://docs.vagrantup.com/v2/synced-folders/virtualbox.html
  sendfile off;

  # Add stdout logging
  error_log /dev/stdout info;
  access_log /dev/stdout;

  # block access to sensitive information about git
  location /.git {
    deny all;
    return 403;
  }

  add_header X-Frame-Options "SAMEORIGIN";
  add_header X-XSS-Protection "1; mode=block";
  add_header X-Content-Type-Options "nosniff";

  charset utf-8;

  location / {
      try_files $uri $uri/ /index.php?$query_string;
  }

  location = /favicon.ico { access_log off; log_not_found off; }
  location = /robots.txt  { access_log off; log_not_found off; }

  error_page 404 /index.php;

  location ~* \.(jpg|jpeg|gif|png|css|js|ico|webp|tiff|ttf|svg)$ {
    expires 5d;
  }

  location ~ \.php$ {
    fastcgi_split_path_info ^(.+\.php)(/.+)$;
    fastcgi_pass unix:/var/run/php-fpm.sock;
    fastcgi_index index.php;
    fastcgi_param SCRIPT_FILENAME $document_root$fastcgi_script_name;
    fastcgi_param SCRIPT_NAME $fastcgi_script_name;
    include fastcgi_params;
  }

  # deny access to . files
  location ~ /\. {
    log_not_found off;
    deny all;
  }

  location ~ /\.(?!well-known).* {
    deny all;
  }
}
echo "Running composer"
composer self-update --2
composer global require hirak/prestissimo
composer install --working-dir=/var/www/html

echo "Caching config..."
php artisan config:cache

echo "Caching routes..."
php artisan route:cache

#echo "Running migrations..."
#php artisan migrate --force
登入Render後,進入Dashboard
右上角New → Web Service → Build and deploy from a Git repository
Configure account,選擇開放Github Repo給Render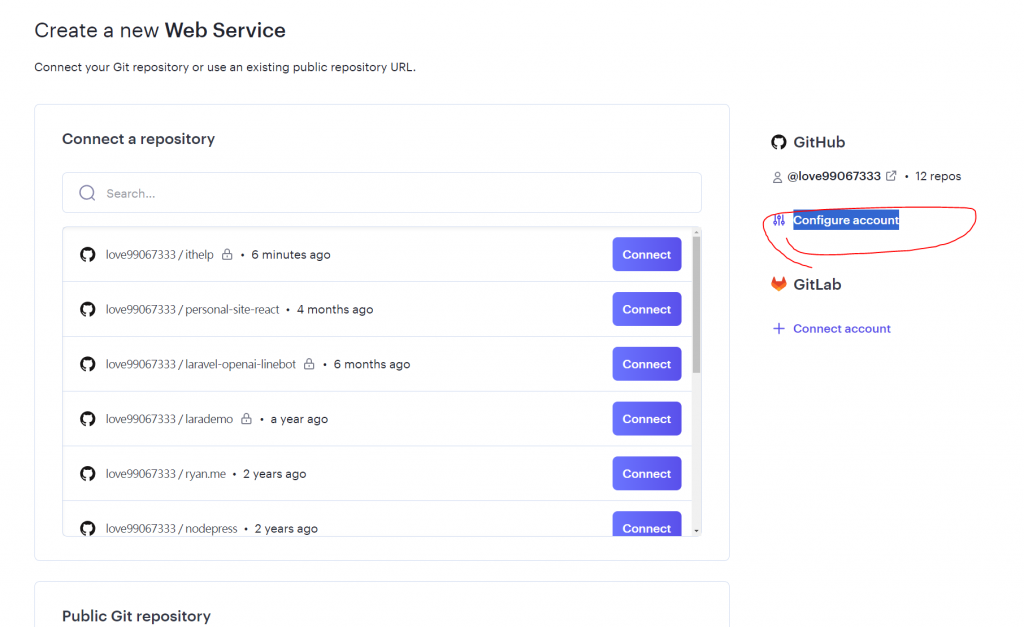

這裡環境變數,如果有使用db的這裡加入HOST等,這裡加入APP_KEY為必填
可以用php artisan key:generate --show產生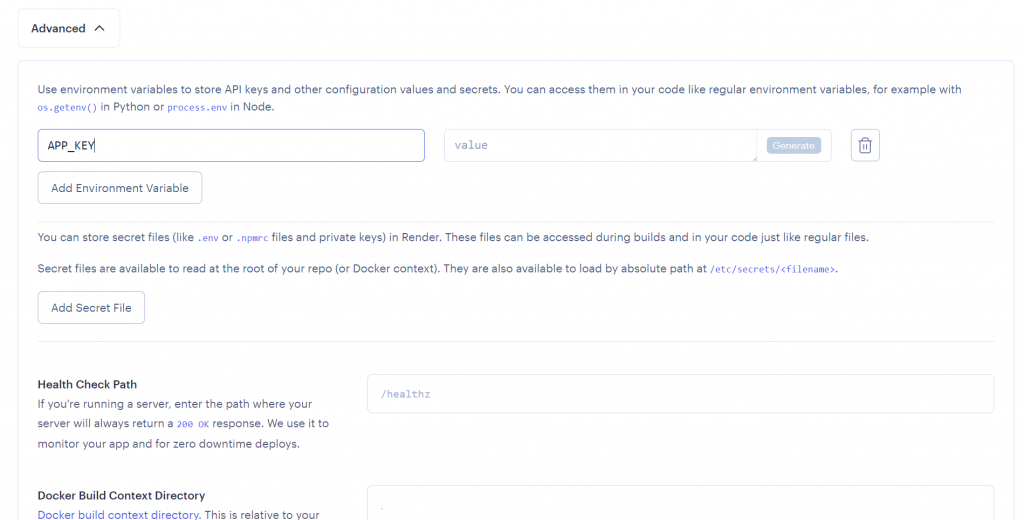
./Dockerfile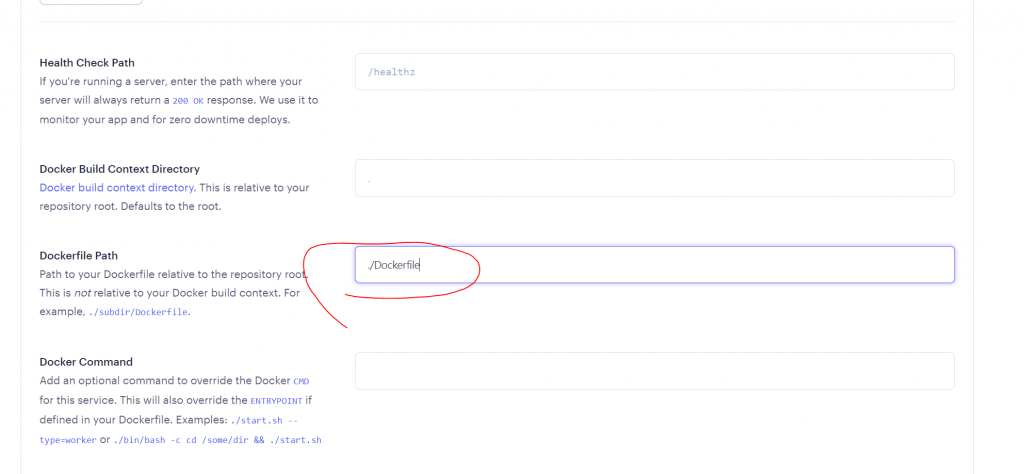
然後按下建立即可
可能在部屬不一定能一次到位,筆者用之前的教學也是
像這次就遇到php版本過低
解決方法是Dockerfile裡面的
FROM richarvey/nginx-php-fpm:3.1.6
版本要改,因為根據我目前的laravel 10需要的PHP為8.2,之前用的時候裡面是8.1
這時候要到Dashboard → 你的專案 → Log
看錯誤訊息再做更改和commit,commit後就會自動重新部屬
直到進入專案左上角網址
看到歡迎畫面,就大功告成啦
PS:免費的過一段時間會進入休眠,也就是再次進入會需要一段重啟時間
Render目前用下來滿佛心的,雖然會休眠,但有偷偷後門的方式,下次介紹
而且Render也可以不只部屬一個而且不僅Laravel
像是筆者網站就是用React+Render(前端就不會休眠
但使用到DB的部分,Render雖然有提供,但只有三十還是九十天就過期,用起來不太方便
所以就沒有強行使用
雖然相較於AWS、GCP沒有那麼自由、功能強大,但在小型、快速CI/CD上,筆者認為Render很有優勢
下次不用DB來試試Laravel+Line BOT+Render吧
Deploy a PHP Web App with Laravel and Docker
利用Render搭配Dockerfile部署Laravel專案吧!