上一篇已經部屬好專案,現在可以透過部屬好的專案接收第三方API
為甚麼? 以Line Bot為例,專案送出API很容易,但要收到Line的封包一定要是部屬好的專案
使用者端(Line) → Line → 專案webhook街口 → reply to Line → 使用者端(Line)
這是官方帳號reply流程
可以看到Line → 專案webhook街口這段是必須打到專案的,不可能打到本地端
馬上來實戰就可以了解
到Line Developer官方網站建立Message API Bot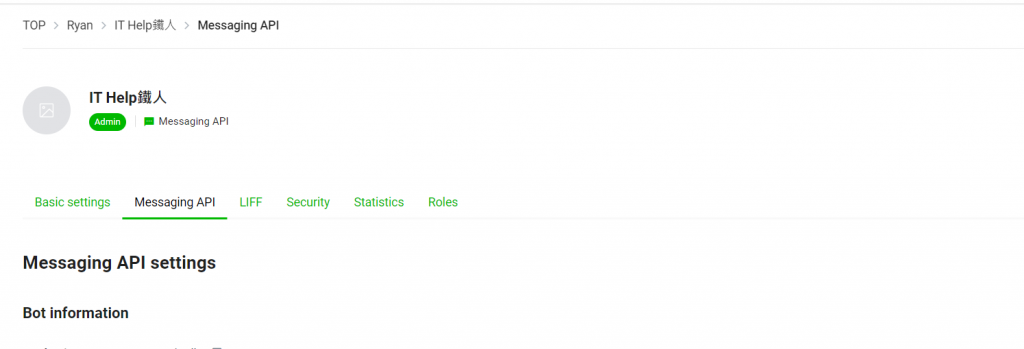
建立完後把上次部屬好的網址填入webhook
針對PHP,Line有出相關的SDK
可以不用,但要做的工就更多
筆者用Github從master切出feature/line-bot
如果完成後是master PR feature/line-bot 然後 deploy PR master
composer require linecorp/line-bot-sdk
LINE_CHANNEL_TOKEN=
LINE_CHANNEL_SECRET=
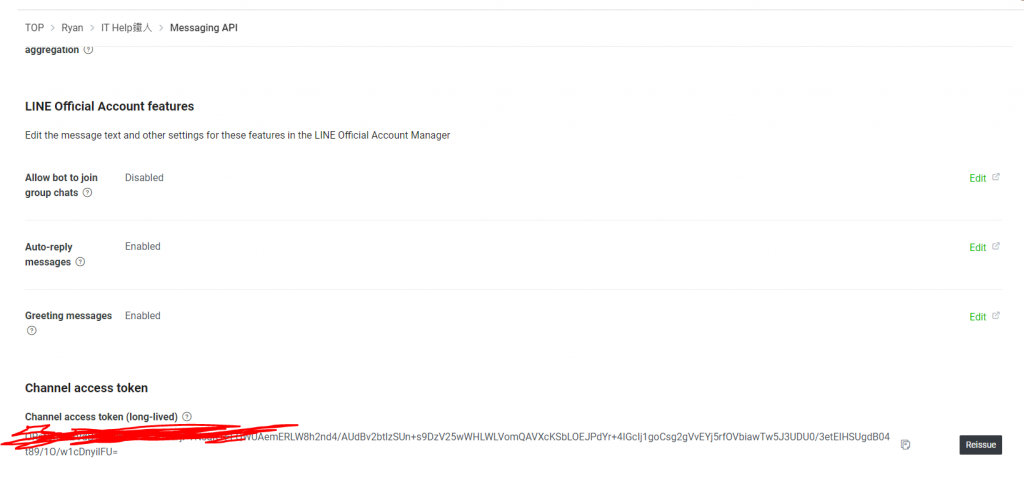
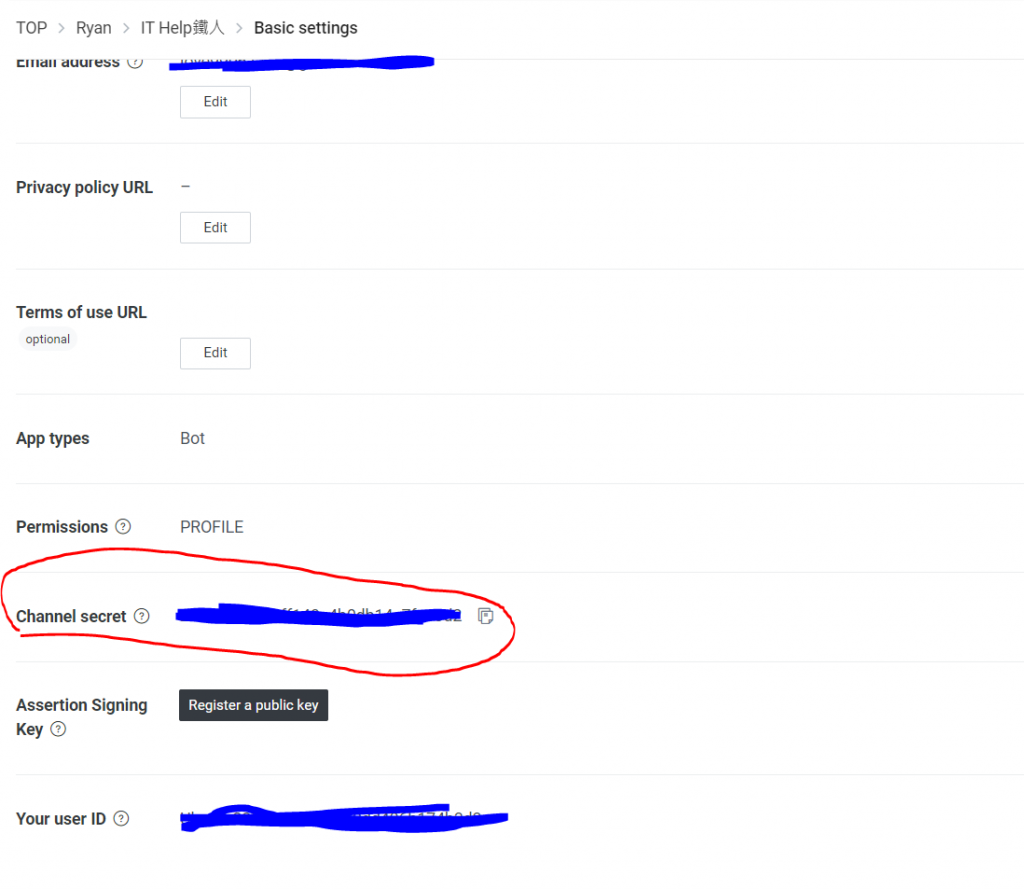
<?php
return [
    'channel_access_token' => env('LINE_BOT_CHANNEL_ACCESS_TOKEN'),
    'channel_id' => env('LINE_BOT_CHANNEL_ID'),
    'channel_secret' => env('LINE_BOT_CHANNEL_SECRET'),
    'client' => [
        'config' => [],
    ],
];
這裡這樣寫,要填入webhook的網址就會是xxx.com/webhook
use App\Http\Controllers\LineController;
Route::post('/webhook', [LineController::class, 'webhook']);
php artisan make:controller LineController
<?php

namespace App\Http\Controllers;

use App\Services\LineService;
use Illuminate\Http\Request;

class LineController extends Controller
{
    //
    public function webhook(Request $request, LineService $lineService){
        return $lineService->webhook($request);
    }
}
這裡用SDK的example稍微改下:
<?php
namespace App\Services;

<?php
namespace App\Services;

use LINE\Clients\MessagingApi\Api\MessagingApiApi;
use LINE\Clients\MessagingApi\Model\ReplyMessageRequest;
use LINE\Clients\MessagingApi\Model\TextMessage;
use LINE\Constants\HTTPHeader;
use LINE\Parser\EventRequestParser;
use LINE\Webhook\Model\MessageEvent;
use LINE\Parser\Exception\InvalidEventRequestException;
use LINE\Parser\Exception\InvalidSignatureException;
use LINE\Webhook\Model\TextMessageContent;

class LineService
{
     public function webhook($req){
        $channelToken = config('line.channel_access_token');
        $config = new Configuration();
        $config->setAccessToken($channelToken);
        $bot = new MessagingApiApi(new \GuzzleHttp\Client(), $config);
        $signature = $req->header(HTTPHeader::LINE_SIGNATURE);
        if (empty($signature)) {
            return abort(400, 'Bad Request');
        }

        // Check request with signature and parse request
        try {
            $secret = config('line.channel_secret');
            $parsedEvents = EventRequestParser::parseEventRequest($req->getContent(), $secret, $signature);
        } catch (InvalidSignatureException $e) {
            return abort(400, 'Bad signature');
        } catch (InvalidEventRequestException $e) {
            return abort(400, "Invalid event request");
        }

        foreach ($parsedEvents->getEvents() as $event) {
            if (!($event instanceof MessageEvent)) {
                // $logger->info('Non message event has come');
                continue;
            }

            $message = $event->getMessage();
            if (!($message instanceof TextMessageContent)) {
                // $logger->info('Non text message has come');
                continue;
            }

            $replyText = $message->getText();
            $bot->replyMessage(new ReplyMessageRequest([
                'replyToken' => $event->getReplyToken(),
                'messages' => [
                    (new TextMessage(['text' => $replyText]))->setType('text'),
                ],
            ]));
        }
        return response('ok');

        // $res->withStatus(200, 'OK');
        // return $res;
    }
}
Render設置LINE_BOT_CHANNEL_SECRET和LINE_BOT_CHANNEL_ACCESS_TOKEN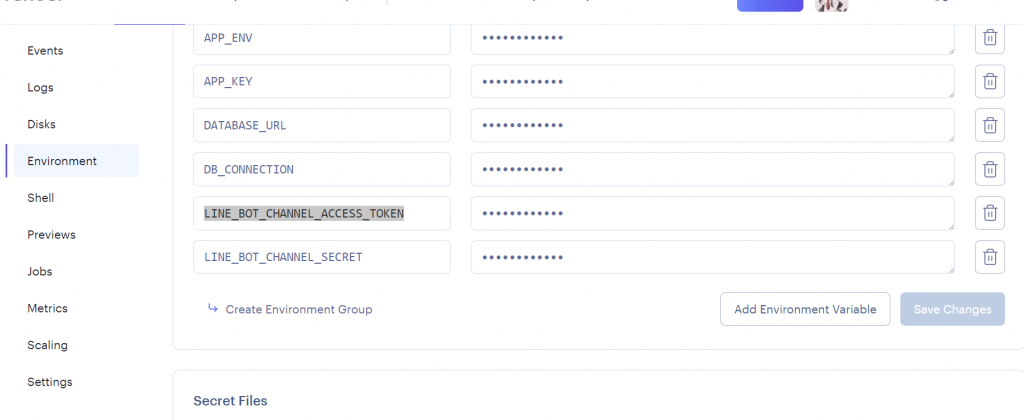
測試是否有成功第一步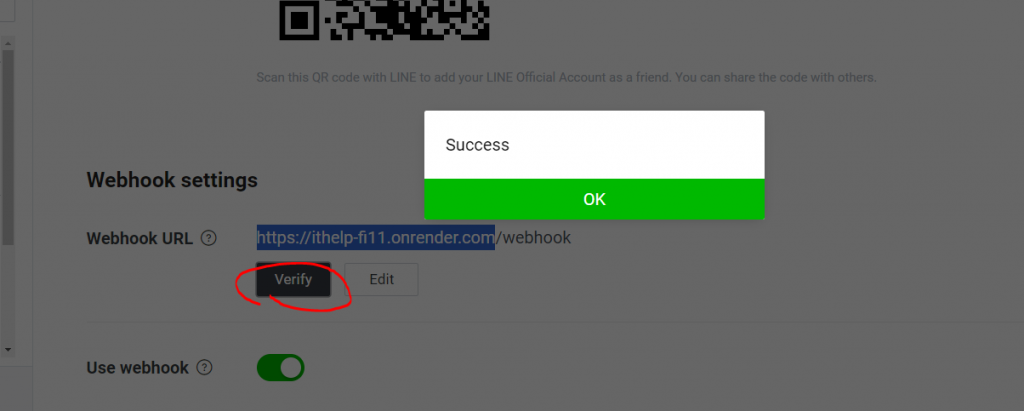
最後只要透過Line QR Code加入,測試有回應你打入的字,就代表成功啦
如果失敗可以透過Render Logs看看有沒有錯誤,再更改&commit
最後成功畫面: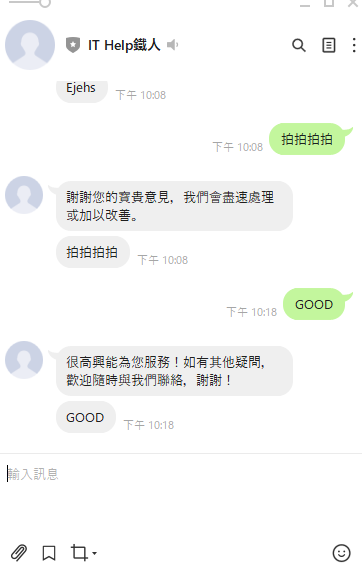
回應第一個是官方自動回復,後面是透過專案回復(目前是回復使用者輸入一模一樣)
本篇從頭起步,先建立Line機器人、利用SDK快速寫出webhook
取得使用者端輸入並回傳對應
本篇沒使用到DB,下篇也是會繼續
下篇會增加OpenAI API,來增加回應的功能性和趣味性,作為結尾
